
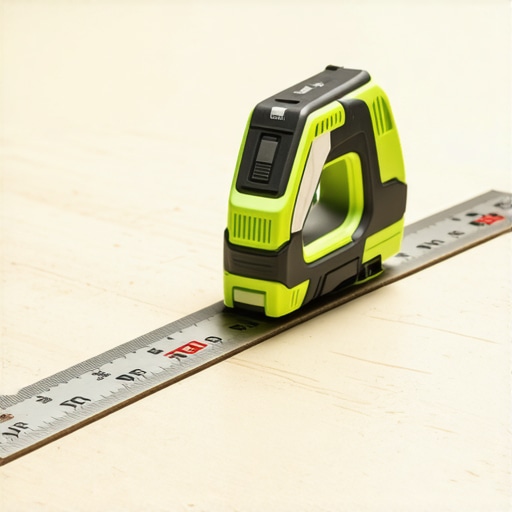
I remember the moment clearly—it was a cold Saturday morning, and I was eager to get my new tile project underway. But as I laid the tiles, I noticed something unsettling: tiny lipping and unevenness that seemed to whisper of hidden problems beneath the surface. It was my wake-up call. That stubborn dip in the subfloor almost sabotaged my entire project, and I realized I had overlooked a crucial step.
The Hidden Danger of Ignoring Floor Prep
Many DIYers and even seasoned pros overlook a simple yet vital check before installing tile or hardwood floors: testing the subfloor for dips and high spots. Skipping this step can lead to cracked tiles, uneven finishes, or squeaky floors down the line. I learned this the hard way—bad subfloor prep can turn small flaws into costly disasters. The good news? There’s a straightforward method I wish I had known earlier: the Straight-Edge Test. This simple technique can uncover those sneaky dips before they cause real trouble, saving you time, money, and frustration.
Are You Skeptical About the Straight-Edge Test?
I get it. It sounds almost too simple, right? Maybe you’ve seen various leveling tools or heard of high-tech gadgets that promise perfect results. But trust me, the classic straight-edge is a tried-and-true weapon—when used correctly. I used to think I could eyeball the flatness, but early on I made the mistake of relying solely on my vision, which led to uneven floors that I regretted every time I walked across them. Don’t make that mistake. Learn from my experience, and discover how such a basic tool can be a game-changer. For more advanced techniques, check out this guide.
Start with a Visual Inspection
Before diving into tools, walk across your space and look for obvious high or low spots. Use a long straightedge or a guided string line to identify glaring dips or humps. During my last project, I noticed a pronounced dip near the doorway—this became my starting point for detailed testing. Document these areas to plan your approach effectively.
Use the Straight-Edge Test for Accuracy
Place a 6-foot straightedge across various sections of the floor, pressing down gently to feel for gaps or wobbling. If the straightedge rocks or there’s a visible gap, that spot needs correction. This simple method is like using a giant ruler for your subfloor, catching hidden imperfections early, just as I did when I found a ¼-inch dip beneath the living room corner—saving me from future cracked tiles.
Verify with a Level for Precision
Follow up with a long spirit level or laser level across the areas identified. Place the level along the floor and look for bubbles indicating unevenness. This step helps confirm the severity of dips detected, turning subjective impressions into measurable data. During my project, this revealed a subtle high spot near the closet—a minor issue that could have led to tiles cracking.
Assess Moisture Content and Stability
Ensure your subfloor is dry and stable before proceeding. Use moisture meters or perform the calcium chloride test for concrete. A damp or shifting subfloor will cause long-term issues. In my case, measuring moisture prevented me from installing over a semi-moist slab, avoiding future tile loosening.
Plan Your Corrections Strategically
Map out the areas needing leveling, whether through sanding, grinding, filling, or reinforcement. For minor dips, self-leveling compounds work wonders; for larger flaws, consider adding plywood or reinforcing with additional subfloor layers. I once filled a ½-inch gap with a rapid-dry leveling compound, but later had to reinforce with a plywood patch for a seamless surface.
Execute with Care and Precision
Apply leveling products according to manufacturer instructions, using a gauge rake or trowel for even spread. Work in small sections for consistency, especially on larger projects. During my tile installation, meticulous application prevented lippage and ensured a flat surface, which made the subsequent tile setting process smoother and more predictable.
Double-Check Levelness Before Installation
Once your corrections are in place, re-test with your straightedge and level to verify flatness. This double-check acts as your quality control, catching any missed spots. In my experience, taking this extra moment saved me from issues with grout lines and uneven tiles later on.
Stay Informed About Best Practices
Continuous learning keeps your skills sharp. Explore additional techniques like using a laser screed or professional-grade gauges for larger or more complex areas. For detailed insights and advanced methods, review this comprehensive guide.
Even seasoned professionals can be surprised by how incomplete their understanding of floor leveling can be. A prevalent misconception is that using a laser level or high-end tools automatically guarantees perfection. While these tools are powerful, they often lead to neglecting the fundamental principles of assessing the subfloor’s true condition. Relying solely on technology without a tactile inspection can mask underlying issues like old adhesive residues or subtle irregularities that only a thorough visual and manual check can reveal. For instance, I once assumed my laser level was enough, only to discover unevenness caused by leftover debris beneath the surface—an oversight that cost me significant additional work.
Why Do We Overlook Basic Checks?Many believe that advanced gadgets eliminate the need for simple tests. However, as expert floor installers suggest, combining traditional methods like the straightedge test with technical tools provides a more comprehensive assessment. Skipping these steps is a common trap—the “Oops” factor—that can lead to multiple issues such as tile cracking or squeaky floors after installation. For example, installing over a slightly uneven surface might seem harmless initially but can cause long-term structural damage, as highlighted in industry studies on subfloor failures. Hence, understanding and performing meticulous pre-installation evaluations is critical. This guide offers detailed techniques to identify and correct subfloor imperfections before they escalate.Advanced Techniques for the Discerning Expert
Advanced Techniques for the Discerning Expert
For those seeking mastery, employing a combination of moisture testing, adhesion checks, and even subfloor reinforcement techniques ensures longevity and quality. The nuance often lies in addressing issues like slight dips that are not visually obvious but become apparent when walking across the surface with a flexion test or using a feeler gauge. Engaging in detailed testing and remediation strategies significantly reduces the risk of future failures, especially in larger projects involving hardwood refinishing or complex tile layouts. Remember, a solid foundation is the bedrock of durable, beautiful flooring. Want to learn more about precise leveling techniques? Check out this resource. Have you ever fallen into this trap? Let me know in the comments.
Invest in Precision Equipment for Long-Term Success
Maintaining flawless floors over time hinges on the right tools. I highly recommend my go-to imaging device: the Moisture Scan Pro. This non-invasive moisture meter allows me to spot hidden damp patches beneath wooden or tile surfaces without damaging the finish. Regular moisture checks prevent issues like buckling or mold growth, especially in climate-sensitive environments. For detailed moisture management, check out this guide on hardwood care.
Need Reliable Adhesion and Surface Prep Tools
When it comes to flooring installation, I rely on my GripMaster self-leveling gauge and a quality notched trowel. The GaugeMaster ensures layers of leveling compound distribute evenly, avoiding lippage or uneven surfaces. Using my preferred notched trowel—precisely 3/16-inch—I apply adhesives in controlled, consistent amounts, critical for large-format tiles or hardwood refinishing. These tools help me achieve a seamless look and prevent future repairs. The importance of proper surface prep cannot be overstated; learn more in this article.
Nurture Floors with Routine Care and Checks
Ongoing maintenance involves simple but effective routines. I use a microfiber mop and gentle pH-balanced cleaners to preserve my hardwood and tile surfaces. Additionally, every quarter, I inspect for loose tiles, creaking boards, or signs of moisture intrusion. Addressing issues early extends the life of your flooring and keeps it looking pristine. To learn how to optimize hardwood longevity, visit this resource.
Looking Ahead: The Future of Flooring Care and Installation
Emerging technologies like laser-guided leveling systems and smart moisture sensors will revolutionize how we maintain and install floors. These innovations promise faster, more accurate results, reducing repair costs and downtime. Embracing such tools now puts you ahead of the curve. For advanced leveling techniques, explore this in-depth guide.
How do I maintain hardwood and tile floors over time?
The key is consistent care paired with the right tools. Regular inspections using moisture meters and gentle cleaning extend the life of your flooring. Additionally, investing in quality leveling and adhesives during initial installation minimizes the need for future repairs. Don’t wait until damage appears; proactive maintenance keeps your floors looking stunning for years to come. I urge you to try the moisture scan regularly—it’s a game-changer for early detection and peace of mind.
Lessons That Changed My Approach to Floor Prep
One of the most profound truths I discovered is that even small oversights in floor leveling can snowball into costly problems. I used to think that a quick glance was enough, but the deep learning came from meticulous testing and real-world experience. For instance, understanding that a simple straightedge test reveals hidden dips—those subtle imperfections—has saved me countless headaches.
Another lesson was recognizing the limitations of relying solely on high-tech tools. Combining tactile assessments with technology provides a comprehensive picture, ensuring no flaw goes unnoticed. This balance between traditional methods and modern equipment elevates the quality of any flooring project.
Lastly, patience and double-checking are underrated virtues. Before setting tiles or laying hardwood, verifying with multiple methods ensures a flat, long-lasting surface. It’s these steps—though seemingly minor—that define the durability and beauty of finished floors.
Tools and Resources I Trust for Floor Perfection
My go-to resource remains the Ultimate Guide to Floor Leveling. It offers step-by-step insights that have transformed my approach, making complex corrections straightforward. For moisture detection, I rely on the Moisture Scan Pro. Its non-invasive readings help me prevent future buckling, which is invaluable.
Additionally, I swear by my precision leveling tools. They give me confidence that every inch is smooth and ready for finishing. These resources have become indispensable in my toolkit, guiding me to achieve flawless results every time.
Keep Moving Forward with Confidence
Your journey to impeccable floors is as much about mindset as it is about technique. Embrace the learning curve, and don’t shy away from the meticulous steps that guarantee durability and beauty. Every project is an opportunity to hone your skills and deepen your understanding of what’s possible with proper prep. Remember, the foundation you lay today shapes the satisfaction you’ll feel tomorrow.
What has been your biggest challenge in floor leveling? Share your story below—your experiences can inspire others to elevate their craftsmanship!