
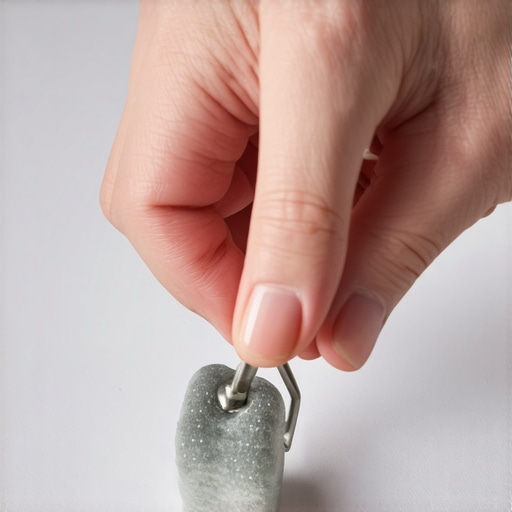
It was late in the afternoon, and I was already feeling the exhaustion from hours of kneeling over a freshly poured self-leveling compound. I watched helplessly as tiny bubbles began to emerge, creating a bumpy surface that threatened to ruin my entire flooring project. That frustrating moment wasn’t just a minor hiccup—it was a wake-up call that changed how I approach self-leveling in flooring. If you’ve ever dealt with bubbles or wondered how to achieve a perfectly smooth surface, you’re not alone. Today, I’m going to share a game-changing trick that I swear by: the Spike Roller Secret for popping those pesky bubbles before they set. This little-known technique has saved me countless hours and headaches, and I promise it can do the same for you.
Why Bubbles Are the Enemy of a Perfect Floor Surface
When pouring self-leveling compound, the appearance of air bubbles might seem like a minor issue, but they can cause serious problems down the line. Bubbles create weak spots, can lead to cracks, and compromise the overall flatness of your floor. If left unaddressed, they may force you to redo the entire pour, costing time and money. I learned this the hard way early in my career when a seemingly harmless bubble caused a part of my newly installed tile to crack months later.
Furthermore, bubbles can be tricky to spot once the compound begins to set. That’s why it’s crucial to act swiftly, and there’s no better way to do so than with a simple tool that I wish I’d known about from the start: the spike roller. It’s a straightforward device, but its impact on quality results is profound. Using a spike roller helps release trapped air, ensuring a smoother and more durable surface. If you’re curious about mastering this technique, check out [precise floor leveling techniques to achieve flawless surfaces](https://tiletrendshop.com/precise-floor-leveling-techniques-to-achieve-flawless-surfaces), which offers valuable insights into professional-level results.
Have you faced issues with bubbles ruining your projects? If so, keep reading, because I’ll walk you through the exact steps to get it right—the first time. This little secret could be the turning point in your flooring journey.
Is the Spike Roller Secret Really Worth the Hype?
Initially, I was skeptical about whether a simple tool like a spike roller could make a real difference. My first mistake was dismissing its importance and relying solely on my trowel or manual levelling. I quickly found out that air bubbles are more stubborn than they appear, and ignoring them leads to subpar results. It’s like trying to smooth out waves on a lake with your hands—ineffective and frustrating. Once I started using a spike roller, I noticed a dramatic improvement in surface flatness and durability.
Remember, achieving a flawless finish isn’t just about what you pour down; it’s about how you handle it immediately afterward. Small mistakes early on, such as neglecting bubble pop, can have lasting consequences. For a comprehensive guide on avoiding common flooring pitfalls, visit [the ultimate guide to floor leveling for a perfect finish](https://tiletrendshop.com/the-ultimate-guide-to-floor-leveling-for-a-perfect-finish).
So, are you ready to say goodbye to bubbles and hello to a perfectly smooth floor? Before we dive into the step-by-step process, let’s briefly explore how you can incorporate this method into your project and the tools you’ll need—trust me, it’s simpler than you think.
Prepare Your Tools and Surface Properly
Before jumping into bubble popping, gather your essential tools: a high-quality spike roller, gloves, and a clean, dry roller tray. Ensure your subfloor or foundation is clean, free of debris, and slightly damp to help the compound settle evenly. I remember one time failing to clean the surface thoroughly, which led to uneven compound adhesion and stubborn bubbles; now, I always prep meticulously to avoid such setbacks.
Apply the Self-Leveling Compound Correctly
Pour the mixture steadily into the center of the area, letting gravity do its work. Use a gauge rake to spread the compound, aiming for a thin, even layer, akin to spreading peanut butter smoothly. Think of this step as laying the foundation of a cake: the smoother the base, the better the final result. When I first started, rushing this step caused air pockets to form prematurely—slowing down and ensuring uniform pouring has saved me headaches.
Use the Spike Roller Immediately After Pouring
Within the first few minutes, once the compound begins to settle but isn’t yet firm, roll the spike roller vigorously across the surface. Think of it as releasing trapped bubbles from a soda bottle by shaking it gently—this technique helps bring air to the surface and pops tiny bubbles before they set. A mistake I made early on was waiting too long; the bubbles became embedded, leading to surface imperfections. Acting promptly with the spike roller is crucial.
Technique for Effective Bubble Removal
Start from one side and work your way across in overlapping paths. Apply moderate pressure to embed the spikes into the compound, then quickly lift and repeat—don’t roll back and forth; use a consistent motion. I once tried to do it lazily, and the bubbles persisted; adopting a systematic approach made all the difference, resulting in a smooth finish that cured perfectly.
Address Persistent Bubbles with Fine-Tuning
If you notice stubborn bubbles that didn’t pop initially, wait for the compound to tighten slightly—usually a few minutes—and re-roll, focusing on the problematic areas. Think of it as smoothing out wrinkles in fabric: patience and precision pay off. Remember, over-rolling can cause uneven leveling, so strike a balance. Once I learned to judge the right time, my surfaces became notably flatter.
Finish and Cure Carefully
After bubble removal, avoid walking on or disturbing the surface during curing to prevent new air pockets from forming. Protect the area from drafts, as sudden temperature changes can affect drying. Proper curing ensures the bubbles don’t reappear, and your floor remains flat and durable. For more advanced tips on achieving perfect surfaces, visit precise floor leveling techniques.
Even seasoned professionals sometimes fall prey to common myths that hinder optimal flooring results. One widespread misconception is that leveling compounds alone guarantee a perfectly flat surface; however, without proper subfloor prep, these compounds can hide high spots and dips, leading to uneven tiles or hardwood gaps. Experts emphasize that meticulous subfloor assessment and correction are crucial before applying any leveling products, something I learned through years of trial and error. An overlooked nuance is the drying time of adhesives and compounds—rushing this step can trap moisture or air, causing future cracks or de-lamination, as highlighted in recent industry studies. Must-know experts suggest conducting adhesion and moisture tests to prevent these issues, which are often neglected by DIYers eager to complete projects quickly. Have you ever fallen into this trap? Let me know in the comments.
A significant trap—commonly believed to be false—is that larger tiles necessarily crack on uneven floors. In reality, careful subfloor leveling and adequate subfloor preparation can allow for the installation of large-format tiles on seemingly imperfect substrates. This contradicts the myth that larger tiles require perfectly smooth surfaces, which often leads to unnecessary demolition or re-leveling. Conversely, attempting to install on uneven surfaces without proper prep increases the risk of tile cracking due to stress concentration. Advanced installers frequently utilize screed beds and self-leveling underlayments, which absorb minor imperfections, ensuring longevity. For insights into such techniques, reviewing [the ultimate guide to floor leveling](https://tiletrendshop.com/the-ultimate-guide-to-floor-leveling-for-a-perfect-finish) can be invaluable.
Another misconception revolves around hardwoods: that all finishes or stains are equally durable. Many believe that a glossy finish provides both beauty and long-term protection, but experts in hardwood refinishing clarify that satin or matte finishes can sometimes offer better wear resistance depending on usage. Moreover, the myth that refinishing hardwood floors is a lengthy, messy process discourages many from maintaining their floors properly. However, with modern refinishing techniques, such as dustless sanders and quick-drying sealants, homeowners can avoid prolonged disruptions and achieve impeccable results. Dive deeper into refinishing secrets by visiting [mastering hardwood refinishing](https://tiletrendshop.com/mastering-hardwood-floor-refinishing-expert-tips-for-2025).
Beware of the trap that straight lines are always better for tile layouts. While symmetry is aesthetically pleasing, strategic offsets can enhance a floor’s visual interest and minimize material waste. Advanced installers consider pattern design and structural stability over mere symmetry, especially in large spaces. For example, running bonds with staggered joints distribute stress more evenly, reducing cracking potential, an insight supported by recent engineering analyses. Remember, the key is to plan layouts that combine visual harmony with structural integrity—something that experience hones. Curious about perfecting your layout? Check out [tile installation pointers that save time and money](https://tiletrendshop.com/tile-installation-pointers-that-save-time-and-money).Maintaining your flooring investments requires more than just initial installation skills; it demands the right tools and a consistent maintenance routine. One of my top recommendations is investing in a high-quality moisture meter. This device allows me to regularly check subfloor moisture levels, preventing issues like buckling or warping, especially crucial for hardwood floors. For comprehensive testing, I prefer the Protimeter Surveymaster, which provides quick, accurate readings and helps catch problems early—saving time and costly repairs down the line. Beyond testing tools, proper cleaning equipment is vital. A microfiber mop paired with gentle, pH-balanced cleaners maintains the surface without causing scratches or dullness. I avoid harsh chemicals that can degrade finishes or underlying materials, opting instead for products recommended by flooring manufacturers, like those found through [hardwood floor care secrets](https://tiletrendshop.com/hardwood-floor-care-secrets-to-longevity-and-shine). Regular sweeping and prompt spill cleanup are simple practices that extend your floor’s life. In terms of long-term results, applying protective pads on furniture legs reduces scratches and dents—an often overlooked step—while area rugs in high-traffic zones help distribute wear evenly. Looking ahead, the trend in flooring maintenance leans toward automated systems—such as robotic vacuums equipped with HEPA filters—to keep surfaces spotless with minimal effort. These innovations promise to simplify upkeep and preserve aesthetics over many years.
How do I keep my flooring in top shape over time?
Regular inspections are essential. Check for signs of wear, loose boards, or gaps, and address issues promptly. Conditioning and refinishing hardwood surfaces periodically restore their luster and provide a protective barrier against stains and scratches; consult expert guides like [refinishing hardwood floors](https://tiletrendshop.com/mastering-hardwood-floor-refinishing-expert-tips-for-2025) for detailed procedures. Using tools such as a drum sander or buffer, when done correctly, helps maintain a fresh appearance without complete refinishing. Don’t forget that environmental control—maintaining stable humidity and temperature—plays a significant role in preventing expansion or contraction of wooden boards. I personally use a dehumidifier during humid seasons and a humidifier in dry periods, inspired by industry best practices.
If you’re ready to take your maintenance game up a notch, try incorporating a moisture meter check before and after refinishing projects. This small step guarantees the foundation is stable and your efforts will last. For a seamless process, consider scheduling annual professional inspections, especially if your space endures drastic climate shifts. Implementing these maintenance habits ensures your floors remain stunning and durable for decades. Curious about more advanced care techniques? Visit [hardwood floor care secrets](https://tiletrendshop.com/hardwood-floor-care-secrets-to-longevity-and-shine) and explore professional strategies to maximize your flooring investment.
What I Wish I Knew When I Started Tiling and Leveling
One of the most profound lessons I learned is that technology alone can’t guarantee flawless results; it’s proper technique and understanding the materials that truly matter. For example, neglecting the importance of subfloor prep or waiting too long to use the spike roller can ruin an entire project, no matter how skilled you are. I also discovered that smooth, even pours rely heavily on the tools I choose, like a high-quality spike roller, which can make or break the final surface.
Another insight was realizing that patience is key. Rushing your self-leveling pour or skipping crucial steps like moisture testing can lead to cracks or imperfections down the line. Small mistakes early on often snowball into costly repairs later, so taking the time to verify every stage saved me time and money. Understanding these subtleties helped me transform my approach from amateur to confident professional.
Finally, I learned that ongoing education enhances your craftsmanship. Resources like the comprehensive guide on floor leveling techniques have been invaluable in refining my skills. Investing in the right knowledge and tools empowers you to create floors that aren’t just level but are true works of art—ending your frustration and elevating your entire space.
Tools and Resources That Elevate My Work
For anyone serious about achieving perfection in flooring installation and leveling, my essentials include a reliable moisture meter like the Protimeter Surveymaster, which ensures your subfloor conditions are optimal before pouring. I also swear by high-quality spike rollers; brands with durable spikes provide the best air release and bubble popping capabilities. To stay ahead of best practices, I often consult industry-leading guides such as tile design and installation tips, which offer innovative ideas and proven techniques.
Additionally, professional-grade leveling compounds and tools like gauge rakes facilitate smoother pours, reducing the time spent reworking uneven surfaces. When I need quick touch-ups, specialized patching and filler kits keep my projects seamless. Finally, maintaining a good communication line with suppliers and industry experts through trusted contacts has proven crucial for troubleshooting tricky situations swiftly.
Seize the Moment to Make Your Floors Wow
Every step you take towards mastering floor leveling and installation not only creates a beautiful space but also boosts your confidence in tackling more ambitious projects. It’s about transforming a simple floor into a foundation of durability and elegance. Remember, perfection isn’t achieved overnight, but with the right mindset and tools, you’re capable of creating stunning results.
Don’t let doubts hold you back—embrace the learning process, experiment with techniques like the spike roller trick, and keep pushing your skills forward. Your future self will thank you for the hard work and persistence you invest today. Now’s the time to elevate your craft and turn your flooring dreams into reality.