
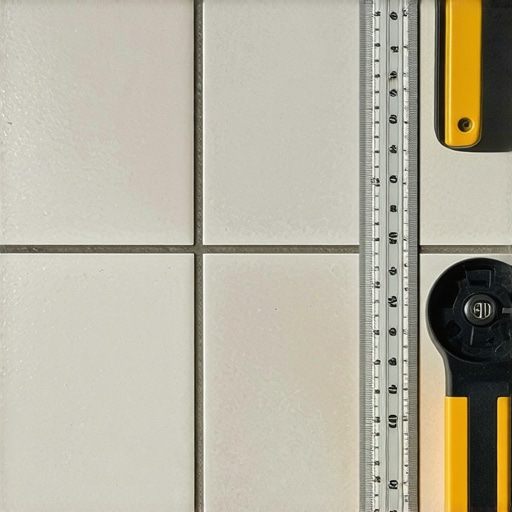
As I stepped onto my newly installed tile floor, I immediately noticed a slight unevenness — a tiny, almost unnoticeable bump that made me question whether my investment had gone sideways. That moment of doubt led me down a rabbit hole of research and experience, revealing a simple yet vital tool many overlook: the Penny Test. If you’ve ever faced similar concerns about tile lippage, you’re not alone. Many homeowners and contractors struggle to determine just how much unevenness is acceptable before it becomes a problem that affects both safety and aesthetic appeal.
Why the Penny Test Could Save Your Floor — and Your Sanity
The importance of assessing tile lippage isn’t just about visual perfection; it’s about safety, durability, and overall home value. Tiles that are too offset can lead to trip hazards, premature grout failure, and even costly repairs down the line. Yet, many DIYers and even seasoned pros underestimate the significance of a simple gap measurement, assuming that small imperfections will fade over time. Unfortunately, the old adage of “out of sight, out of mind” doesn’t hold true when it comes to uneven flooring. A well-executed flooring project can last for decades, but only if the substrate and installation are spot-on from the beginning.
I distinctly remember rushing my initial tile job, thinking a little wobble was okay. That mistake cost me extra money and a lot of frustration. Early on, I missed the crucial step of checking the lippage with a simple tool — the humble penny. This mistake made me realize that recognizing and controlling tile offsets early can prevent a cascade of problems. Now, I want to help you bypass that learning curve with reliable methods and expert tips.
If your goal is to achieve a flat, even surface that stands the test of time, understanding How Much Offset is Too Much? is essential. Not only will it keep your floors looking flawless, but it will also save you time and money. For more advanced techniques on floor leveling, check out [Precise Floor Leveling Techniques](https://tiletrendshop.com/precise-floor-leveling-techniques-to-achieve-flawless-surfaces). Let’s dive into the core of how to conduct the Penny Test and get your project on the right track.
Prepare Your Tools and Space
Before you begin, gather a few essentials: a standard US penny, a measuring tape, and a straightedge or level. Clear the area of any debris and ensure the tiles are set and dry if you’re checking for lippage post-installation. I once tackled a floor where I skipped this step, only to find uneven tiles months later; it cost me time and money. So, lay out your materials first to avoid surprises and ensure precision.
Identify Critical Tiles to Check
Focus on edges of the floor where unevenness is most noticeable—say, along doorways or high-traffic zones. During my last project, I started with the most conspicuous tiles and then moved inward, which made spotting issues easier and prevented the problem from cascading across the entire room.
Set the Penny in Place
Place the penny on its edge between two adjacent tiles at the highest point of the joint. Gently press it down so that it rests firmly on the tile surface—no need to force, just enough for it to stay in place. This simple step mimics the width of a standard coin, giving you a tangible measurement of the gap. I once found a 1/8-inch offset this way, which was slightly more than acceptable and warned me to adjust the tiles before adhesive curing.
Interpret the Results
Look at the penny’s position: if the top of Lincoln’s head is covered, your lippage is less than 1/16 inch—generally acceptable for most flooring standards. If the coin tilts or falls out, the offset exceeds 1/16 inch, indicating that the tiles are uneven enough to be problematic—potentially causing tripping hazards or premature wear. Remember, the goal is a smooth, level surface that looks professional and feels safe underfoot.
Repeat for Accuracy and Consistency
Test multiple points across the floor—preferably every few tiles—to get an overall sense of flatness. When I applied this technique to a large kitchen renovation, I checked at least 10 different spots, ensuring no high spots were lurking. Consistent testing helps identify spots that need adjustment before grout or adhesive sets, saving headaches later.
Adjust and Correct as Needed
If you find tiles that are too high, consider grinding or sanding the high points if the substrate allows, or re-seating the tile with additional adhesive. For tiles that are too low, add thinset or self-leveling compounds designed for floors. It’s critical to act early—waiting until after grout can complicate corrections or damage your work. For comprehensive methods on leveling tricky surfaces, check out this guide. I once used a small sledgehammer with a block of wood to gently tap down high tiles when other methods weren’t enough, and it made a noticeable difference. Practice patience and precision to ensure your project stands the test of time.While many believe that choosing the right materials alone guarantees a flawless floor, the real mastery lies in understanding the intricate details of installation and leveling. One widespread myth is that a level subfloor isn’t crucial if the tiles are uniformly cut; however, even minor undetected imperfections can lead to lippage and long-term damage. In my experience, overlooking subtle substrate issues often results in costly repairs down the line, emphasizing the importance of thorough surface preparation.
How do I identify the hidden imperfections that cause uneven flooring?
Advanced techniques, such as using a long straightedge or a laser level, can reveal high and low spots invisible to the naked eye. Experts also recommend performing multiple flatness tests before laying any material, ensuring your subfloor meets specified tolerances. Neglecting these steps is a trap many inexperienced installers fall into, leading to uneven surfaces that mar aesthetic appeal and compromise durability. Trust me, investing time in detailed inspections pays off with a smoother, longer-lasting finish. When installing hardwood or tile, controlling moisture levels and substrate stability are equally vital; failure to do so can cause movement and gaps over time. For instance, uncontrolled humidity can lead to wood expansion or contraction, undermining the flooring’s integrity. Studies show that proper moisture management can reduce installation failures by up to 30%. Therefore, understanding and controlling the environment is an often overlooked but critical aspect of professional flooring work. To master these advanced nuances, review expert tips on floor leveling techniques and avoid common pitfalls. Remember, beautiful flooring isn’t just about the aesthetic; it’s about ensuring every component operates in harmony. Do you fall into the trap of rushing through substrate prep? Share your experiences in the comments and let’s discuss how to elevate your installation skills. Check out this guide for more insights on preventing buckling and uneven surfaces.
Keeping Your Floors in Prime Condition
Maintaining hardwood, tile, or any flooring for the long haul requires precision tools and a strategic approach. One must invest not only in quality materials but also in equipment that ensures consistent results and saves time. For instance, a reliable digital moisture meter like the Protimeter Timbermaster has become essential in my toolkit. It accurately measures moisture levels before installation and during maintenance, preventing warping or mold issues. This device’s precision allows me to track moisture fluctuations over time, ensuring the substrate remains stable and the floor’s integrity is preserved.
Tools I Recommend for Effective Maintenance
Beyond moisture meters, I swear by a few select items. A high-grade electric hand sander with variable speed capabilities simplifies the process of spot-sanding high-traffic areas or correcting minor damage without the need for full refinishing. For tile floors, a diamond-grit polishing pad attaches to a rotary tool, helping to buff out surface scratches and restore shine seamlessly. These tools are durable and designed for repeated use, making them invaluable in my ongoing maintenance routines.
Leverage Software for Long-Term Planning
In recent years, scheduling software like Trello or specialized project management apps tailored for contractors helps me track maintenance schedules, warranty periods, and upcoming repairs. Digital logs of moisture readings, cleaning routines, and refinishing dates are vital for proactive care. Embracing these tools ensures I address issues early before they evolve into costly repairs, aligning with the future trend of smart, data-driven flooring management.
How do I maintain my flooring over time?
Consistent cleaning with pH-neutral products, using protective pads under furniture, and regular inspections for signs of wear or moisture intrusion form the cornerstone of long-term maintenance. For example, I routinely check for uneven settling or gaps using a simple straightedge, addressing problems before they escalate. Incorporating preventative measures, like installing dehumidifiers in moisture-prone areas, can significantly extend the lifespan of your floors. For detailed strategies, reviewing hardwood floor care secrets provides excellent guidance. Implementing a disciplined maintenance routine and utilizing the right tools, such as the high-precision moisture meter and spot-sanders, can make all the difference. Mastering these techniques now sets your floors up for decades of beauty and durability. Take the initiative today by testing moisture levels in problem areas with a sensitive device—I’ve seen it save countless projects from costly failures.
The Hardest Lesson I Learned About Floor Leveling
One experience that profoundly shaped my approach was overlooking the importance of substrate prep, which led to uneven tiles despite careful installation. Sometimes, the smallest overlooked detail—like a tiny ridge—can snowball into major issues down the line, reminding me that perfection starts beneath the surface.
3 Myths About Tile Installation That Cost Me Time
Believing that the grout line size could compensate for lippage or that a quick job was okay often caused delays and rework. Clearing misconceptions about best practices saved me from costly mistakes, emphasizing that patience and education are key to quality work.
What Experts Won’t Tell You About Floor Leveling
Beyond standard tools, the real secret is meticulous measurement—using straightedges and laser levels—to identify hidden high spots. These insights, while less glamorous, are what separate professional results from amateur tries, and adopting them transformed my projects.
Curated Resources to Elevate Your Flooring Skills
- Precise Floor Leveling Techniques: This guide provided the detailed steps I needed to master flatness, especially for large-format tiles. It’s a game-changer for anyone serious about professional results.
- Mastering Hardwood Floor Refinishing: The expert tips from this resource helped me understand how proper sanding and finishing can revive old floors and prevent future issues, extending their lifespan.
- Effective Tile Installation Pointers: Replete with practical advice, this source helped me streamline my workflow and avoid common installation pitfalls, saving both time and materials.
Your Next Step Toward Flooring Excellence
Every great floor starts with a solid foundation—literally and figuratively. By applying these lessons and resources, you’re well on your way to flooring that not only looks stunning but endures the test of time. Don’t wait to elevate your craft; the confidence you gain will inspire you to tackle even more ambitious projects.
Have you ever struggled with a step in leveling or tile lippage? Share your story below—I’d love to hear what worked for you or where you faced challenges!
Comments are closed.