
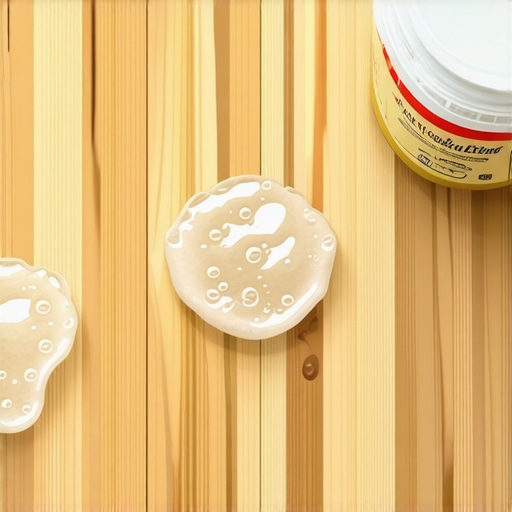
It was a typical Saturday morning when I finally dared to walk across my newly refinished hardwood floor. Expecting smooth, glossy perfection, I was met with a unexpected surprise — bubbling patches that looked like a bad skin rash. I couldn’t believe it. My heart sank, and suddenly all those hours of prep and careful application felt wasted. That moment was my lightbulb moment: I had broken the vital stirring rule, and it was costing me dearly.
The Hidden Culprit Behind Those Bubbles
Polyurethane bubbling is a frustrating problem that many DIYers and even pros face. It’s like watching your beautiful work bubble up and peel away — and trust me, it’s discouraging. The main cause? Improper mixing, especially breaking the stirring rule, which I learned the hard way. When you don’t stir your polyurethane thoroughly, especially if you’re using a higher-viscosity type, you end up with uneven components. This inconsistency gets trapped during application, forming stubborn bubbles as the finish cures.
Early on, I thought mixing was just about combining the ingredients briefly. Big mistake. I learned that thorough stirring is essential — it’s what ensures the resins and solvents are evenly distributed, preventing those pesky bubbles from forming. According to expert advice from [Mastering Hardwood Floor Refinishing](https://tiletrendshop.com/mastering-hardwood-floor-refinishing-expert-tips-for-2025), failing to stir polyurethane adequately can lead to bubbles, uneven gloss, and poor adhesion. That’s a fact you can’t ignore.
Are you facing the same issue on your project? Do you find yourself battling bubbles no matter how careful you are? If so, stay tuned. We’re about to dig into the stirring rule you probably broke and how to fix it so your finish looks smooth and professional every time.
Thorough Mixing is Your Best Friend
When applying polyurethane, picture it like baking a cake—you need all ingredients evenly combined for a perfect result. During my DIY project, I once hurried through mixing, assuming a quick stir was enough. The outcome? Bubbles and an uneven sheen. To avoid this, grab your stirring stick and mix slowly and thoroughly for at least 2-3 minutes, scraping the sides and bottom of the container to ensure complete blending. This meticulous step distributes resins and solvents evenly, preventing trapped air and bubbles, much like ensuring no lumps in your batter.
Use the Right Tools for the Job
Invest in a high-quality stir stick—preferably a stainless steel or durable plastic one—because flimsy tools can’t handle the viscosity of polyurethane. During my latest refinishing, I used a sturdy stir stick and experienced fewer air pockets. Avoid metal mixers attached to drills—they can introduce excessive air and cause over-agitation. A simple, long-handled stir stick allows you to control the mixing process with precision, reducing the risk of introducing bubbles.
Mix in the Correct Order
If your polyurethane comes with separate components, always add the activator or hardener to the resin first, then stir. Think of it like mixing paint—you want the components to blend smoothly before applying. During my first attempt, I added both simultaneously and ended up with streaks. Reading the product instructions carefully beforehand helps you follow the proper sequence, ensuring the components bond correctly and curing smoothly without bubbles.
Avoid Overmixing and Incorporate Air Carefully
While thorough mixing is essential, overmixing can introduce unwanted air bubbles into the finish. Use a gentle, figure-eight stirring motion and stop once the mixture appears uniform. When I first applied polyurethane, I kept stirring vigorously, which led to foaming. To minimize air entrapment, stir gently and consider resting the mixed polyurethane for a few minutes before application, allowing any bubbles to escape naturally. This step is crucial—think of it as letting whipped cream settle for a smoother topping.
Practice Makes Perfect
My experience taught me that mastering the stirring technique saves time and materials in the long run. Spend a few minutes practicing mixing small batches to gauge the right motion and duration. Remember, consistent, proper stirring ensures a thin, even layer free from bubbles, resulting in a professional-quality finish that enhances your hardwood floors.
If you want a deeper dive into surface preparation and application techniques, check out this expert guide.
When it comes to laying tiles, leveling floors, or installing hardwood, many professionals and DIY enthusiasts alike often miss subtle but critical aspects that can make or break the project. Contrary to popular belief, the most prevalent mistakes aren’t always related to the tools or materials but often stem from misunderstandings about the process itself.
One widespread myth is that simply following manufacturer instructions guarantees a perfect finish. In reality, the nuances of subfloor preparation, environmental conditions, and curing times require a more sophisticated approach. For instance, inadequate moisture testing or ignoring temperature fluctuations during installation can lead to tile cracking or hardwood gapping, issues professionals meticulously avoid. According to experts in [floor leveling techniques](https://tiletrendshop.com/precise-floor-leveling-techniques-to-achieve-flawless-surfaces), small oversights in how you prepare and adapt to the space’s conditions greatly impact longevity and appearance.
Beware! A common trap is assuming that floor leveling compounds are foolproof. Many installers rush through mixing or apply thick layers without proper substrate assessment, leading to uneven surfaces. To prevent this, understanding the importance of proper substrate evaluation and following advanced leveling methods is key. For example, applying self-leveling compounds correctly involves more than pouring and screeding; it requires precise mixing ratios, adequate priming, and controlled curing conditions. Skipping these steps can cause cracks or unevenness that compromise entire flooring sections.
What’s the overlooked mistake even seasoned installers make with floor prep?
Many overlook the subtle effects of subfloor movement and how it influences the final outcome. For example, slight flexing or high spots can be invisible to the naked eye but cause issues like tile lippage or hardwood buckling over time. Using tools like the straight edge test allows you to detect these high and low spots before laying materials. Studies, such as those summarized in [this comprehensive guide](https://tiletrendshop.com/the-ultimate-guide-to-floor-leveling-for-a-perfect-finish), confirm that meticulous subfloor assessment and correction are essential for a durable, professional finish.
Another advanced consideration involves understanding the specific needs of different flooring types regarding underlayment and adhesives. For hardwood floors, improper underlayment choice can lead to squeaks or gaps. With tiles, inadequate substrate preparation can cause cracks or uneven surfaces. Investing in detailed prep work, including moisture mitigation and substrate reinforcement, is a small step that delivers significant long-term benefits.
Finally, the importance of environmental control during the entire process cannot be overstated. Fluctuations in humidity and temperature can cause materials to expand or contract post-installation. Thus, managing these factors through climate control or temporary enclosures during curing can prevent costly mistakes and callbacks.
Consider these deeper insights next time you plan a flooring project. Remember, perfection lies in the details. Want to master these advanced techniques? Dive into [expert-level floor leveling strategies](https://tiletrendshop.com/precise-floor-leveling-techniques-to-achieve-flawless-surfaces) or explore [guides on installing different flooring types](https://tiletrendshop.com/installing-tiles-like-a-pro-step-by-step-strategies-for-2025). Keep learning, and your floors will thank you.
Have you ever fallen into this trap? Let me know in the comments.Achieving durable and beautiful floors requires more than just skill; it hinges on using the right tools and maintaining them properly. My personal toolkit has evolved over years of hands-on experience, and I can confidently say that investing in quality equipment saves time, money, and frustration in the long run. For floor leveling and installation, I rely on a few key instruments that ensure precision and longevity.
Invest in a Quality Laser Level
A laser level, such as the LEICA Lino or Bosch GLL series, is indispensable for checking subfloor flatness and ensuring tiles or hardwoods are installed evenly. Unlike traditional bubble levels, lasers provide a continuous reference line over larger areas, making it easier to spot high or low spots. Regular calibration and careful handling are essential—dirt or bumps can skew readings. I make it a habit to check my laser’s calibration before every major project, which dramatically reduces lippage or uneven floors.
Use a Vibrating Power Floater
When applying self-leveling compounds, a vibrating power floater helps batched material settle uniformly, eliminating trapped air that causes bubbles or cracks. I prefer models with adjustable vibration intensity, as over-vibrating can separate the mix or introduce unwanted air. Practice is key—I’ve found that gentle, consistent vibrations produce the best, bubble-free results, especially on larger slabs. This tool is crucial for projects demanding a flawless, seamless surface, and with proper use, it extends the lifespan of the leveling layer.
Maintain Your Trowels and Smoothing Tools
High-quality notched trowels, like those from Marshalltown, are essential for spreading adhesives and thinsets evenly. Dull or improperly cleaned trowels can result in inconsistent bedding thickness, leading to lippage or gaps. I always keep my tools razor-sharp and wash them immediately after use with warm water and a stiff brush. For smoothing surfaces or joints, I rely on nylon scarifiers or rubber floaters, which prevent surface damage while ensuring smooth finishes. Regular maintenance of these tools doubles their lifespan and maintains application quality.
Forget the cheap, flimsy equipment that shortchanges your work. Invest in precise instruments, like a high-quality laser level or a vibrating floater, and learn their proper techniques. These tools are more than accessories—they’re your secret weapons for long-term success. For example, mastering proper substrate assessment with a laser level and ensuring even compound application with a vibrating floater significantly reduces problems like tile cracking or hardwood cupping in the future. Learn from experts by exploring detailed guides, like this comprehensive article on leveling techniques, and incorporate these tools into your workflow. Try practicing with a vibrating floater on your next project—once you see the difference, there’s no going back.
Over the years, I’ve realized that achieving flawless flooring isn’t just about following instructions—it’s about embracing the subtle nuances that make a difference. One of the most profound lessons I’ve learned is that patience and attention to detail often trump expensive tools or premium materials. For instance, taking the time to properly assess our subfloor conditions can save countless headaches later, from cracked tiles to buckling hardwood. It’s easy to overlook these foundational checks, but trusting your instincts and going the extra mile can dramatically elevate your finished project. Additionally, understanding the materials’ behavior—like how hardwood reacts to moisture or how self-leveling compounds cure—is key to avoiding pitfalls. Remember, the devil’s in the details, and embracing this mindset transforms a good project into a great one. Dive deeper into these insights by exploring our expert guide on hardwood refinishing, or continue elevating your flooring skills with advanced leveling techniques in our comprehensive floor leveling resource.
Comments are closed.