Ever spent hours—or even days—smoothing out a floor, only to find the primer peeling just months after your hard work? I remember the frustration vividly. One moment, my new tile installation looked flawless, and the next, unsightly peeling spots appeared like unwanted scars, ruining the entire look and forcing a costly redo. It was a lightbulb moment that I couldn’t ignore: the secret to a lasting floor isn’t just in the materials used but in the prep process, especially the primer. Since then, I’ve dived deep into the world of floor leveling, discovering hacks that have saved me—and countless others—time, money, and headaches.
Stop Wasting Time and Money on Failing Floor Leveling
If you’re facing a persistent problem with wall and floor surfaces peeling or cracking, rest assured, you are not alone. The good news? Some simple yet effective primer hacks can make all the difference. In my journey, I learned that proper primer preparation and application are critical, especially with the 2026 updates in flooring standards and materials. These hacks are based on tested techniques and personal trial and error, helping you achieve a durable, flawless finish that lasts for years. Ready to transform your flooring projects and say goodbye to peeling primers? Let’s get started!
Is Primer Peeling Just Bad Luck or Can I Fix It?
At first, I blamed bad products, rushed jobs, and even bad luck. But I soon realized early mistakes often set the stage for failure. One common mistake I made was underestimating the importance of proper surface cleaning and adhesion. This overlooked detail led to peeling within just a few months. Learning to prep the subfloor or slab correctly and choosing the right primer can make or break your project. Don’t let flawed prep work sabotage your efforts. For expert advice on avoiding these pitfalls, check our detailed guide on 5 Slab Primer Hacks to Stop 2026 Floor Leveler Peeling.
Now, let’s explore the top five hacks to ensure your floor leveler stays put and your project stands the test of time!
,
Prep the Surface Like a Pro
Start by thoroughly cleaning the subfloor with a vacuum and a damp cloth to remove dust, grease, or debris. For concrete, etch the surface slightly with a grinder or acid wash if necessary, ensuring a rough texture that promotes primer adhesion. Picture trying to stick a sticker on a smooth, oily surface—it won’t hold. Preparing your surface is akin to giving the primer a rough handshake—it guarantees better bonding and long-lasting results. During my first attempt, skipping this step resulted in primer peeling within months, but after properly cleaning, adhesion significantly improved.
Choose the Right Primer for the Job
Select a high-quality, appropriate primer based on your substrate—epoxy primers for concrete, bonding agents for plywood, or specific primers for moisture-prone areas. Don’t just grab the cheapest; think of primer as the foundation of your flooring—skimping here spells disaster. For example, I once used a generic primer on my plywood subfloor, and it failed prematurely. After switching to a latex-big polymer-based primer designed for wood, I saw a marked improvement in adhesion. For detailed guidance on selecting the best primer, check precise leveling techniques.
Apply Primer Evenly and Properly
Use a high-quality roller or brush to apply an even coat, avoiding puddles or thin spots. Think of primer like painting a wall—consistent coverage is key. I once rushed a job with a cheap roller, leading to uneven layers that peeled or bubbled. To prevent this, work in manageable sections, maintaining a wet edge to keep the coat seamless. If you’re dealing with large areas, consider using a sprayer for a uniform application. After application, follow the manufacturer’s drying time—skipping this can trap moisture and cause future failures. For optimal results, refer to our comprehensive leveling guide.
Let the Primer Cure Fully
Patience is crucial. Allow the primer to cure completely, as per the manufacturer’s instructions—rushing this step invites primer failure. During my early projects, I was tempted to start leveling or laying tiles too soon, resulting in peeling and cracking. I learned that waiting 24-48 hours, depending on the product, solidifies the bond and prevents issues later. Use this time to verify surface dryness and surface flatness before moving on. Remember, a well-cured primer is the backbone of durable flooring. For detailed curing and application techniques, explore 5 slab primer hacks.
Seal and Protect the Primer Layer
In high-traffic or moisture-prone areas, consider sealing the primer with a clear, breathable sealer—a step often overlooked. Imagine wearing a raincoat—it protects your clothes from getting soaked. Similarly, sealing prevents moisture ingress that can weaken the primer bond, especially with concrete slabs or in basements. During a renovation, I sealed my primer to prevent moisture from seeping through the concrete, which kept my tiles firmly in place for years. This extra barrier extends the lifespan of your flooring and maintains a flawless finish over time.
Many homeowners and even some professionals often fall prey to misconceptions that can compromise the longevity and quality of flooring projects. Let’s clear up some hidden nuances that are frequently misunderstood, starting with the idea that using the thickest or most expensive primer guarantees a durable bond. In my experience, the key isn’t just about product selection but about understanding the nuanced surface preparation and application techniques—small details that most overlook but are critical for success. For instance, applying primer without proper surface cleaning or neglecting to test moisture levels can lead to peeling or cracking down the line. These are traps I once stumbled into, thinking premium materials alone would suffice, but the real game-changer was mastering surface prep and understanding the properties of each material involved.
One prevalent myth is that floor leveling compounds are foolproof, and once applied, you’ll have a perfectly flat surface. However, if subfloor issues like sagging or moisture aren’t addressed beforehand, you might see cracks or uneven tiles later. Correctly diagnosing and fixing structural problems before leveling pays off immensely, a lesson I learned after a failed tile job that cracked within months because of unaddressed subfloor movement. Refining your approach to surface assessment and preparation is vital—don’t just follow the standard procedures blindly.
Another common mistake is related to the belief that hardwood floors can be installed directly over uneven concrete slabs. While this might seem convenient, in reality, small deviations in slab flatness or moisture content can cause significant issues like cupping, gaps, or buckling. Advanced installers know that using proper moisture barriers, subfloor reinforcement, and precise leveling techniques dramatically extends the lifespan of your hardwood. For those looking to elevate their projects, I recommend reviewing our guide on precise leveling techniques.
What are some myths about tile or hardwood that you’ve encountered? Perhaps you believe that larger tiles are always better, but in my experience, large-format tiles demand a near-perfect subfloor surface to prevent lippage. Misjudging this can ruin the aesthetic and cause the tiles to pop or crack. A real differentiator is understanding the nuances of substrate preparation and using the proper thinset and leveling systems—they’re your best allies in achieving a flawless finish.
For advanced homeowners or contractors, mastering these subtle details makes a significant difference. Do you know how subtle subfloor dampness or surface irregularities can impact your project? Testing with specialized tools and consulting expert resources can help you avoid costly mistakes. Read more about how to level floors perfectly and ensure your installation stands the test of time.
Have you ever fallen into this trap? Let me know in the comments! Remember, understanding the hidden nuances in flooring projects isn’t just for perfectionists—it’s the secret to lasting results.
Essential Tools for Long-Term Flooring Success
Maintaining beautiful, durable flooring requires the right equipment to ensure longevity and quality over time. I recommend investing in a high-quality moisture meter, such as the Protimeter Surveymaster, to regularly assess subfloor conditions before installation or maintenance. This device provides precise readings, helping you catch potential issues like moisture lurks that can cause hardwood or tile failure, as discussed in our guide on precise leveling techniques. Additionally, having a good cordless oscillating tool with various blades allows for quick repairs or refinishing without the hassle of corded equipment, saving time during project touch-ups.
Software and Digital Resources for Better Planning
Utilizing software can make a significant difference in planning and scheduling maintenance tasks. I personally rely on flooring installation apps like Floori, which help track the lifespan of different flooring materials, schedule routine inspections, and plan upgrades efficiently. Such tools ensure your investment in a flooring system remains protected and optimally maintained. As flooring technologies evolve, keeping up-to-date with the latest trends through industry blogs and digital dashboards prepares you to adapt proactive maintenance routines that extend the lifespan of your floors.
How do I keep my floors looking great over the years?
Routine cleaning with pH-neutral cleaners, regular inspections for signs of wear or moisture issues, and timely refinishing or sealing are crucial. For hardwood, applying a protective coat of finish every few years prevents scratches and maintains shine, as highlighted in our hardwood care secrets. For tile and resilient flooring, sealing grout lines and inspecting for cracks keeps moisture out and prevents deterioration. Be proactive—early detection saves you from costly repairs down the line.
Tools That Make Scaling Easier
Scaling flooring projects requires durable, reliable tools. When expanding or replacing large areas, a laser level with a self-leveling feature is invaluable for achieving flat surfaces quickly. I rely on the Bosch GSL2 Professional Laser Level; it ensures consistent height across expansive spaces, aligning with the advanced techniques found in our primer hacks for 2026 standards. For handling multiple rooms simultaneously, a cordless pneumatic staple gun speeds up fastening, making large-scale projects manageable and precise.
Looking ahead, the trend points toward integrating smart sensors and IoT technology into flooring systems. Future innovations could allow floors to self-monitor and alert homeowners about issues like moisture or structural shifts before they become visible, paralleling developments in home automation. Embracing these tools now gives you a head start in maintaining impeccable flooring that stands the test of time. Why not try an advanced moisture testing device today, and see how much easier maintaining your floors becomes? For expert advice on advanced testing techniques, consider contacting our team here.
The Hardest Lesson I Learned About Floor Leveling and Flooring Installation
One of my most profound realizations is that surface prep and patience are twin pillars of lasting flooring. Rushing through cleaning or applying primer too quickly can set the stage for failure. I remember thinking that the choice of product mattered more than preparation—turns out, I was partially right, but neglected the crucial proper surface cleaning and trial applications. Every successful project has taught me that embracing a meticulous, step-by-step process yields durable, beautiful floors that stand the test of time.
Why Ignoring Surface Conditions Cost Me Big
I once installed hardwood over a slightly damp slab without testing or sealing properly, leading to cupping within a year. That mistake underscored how moisture testing tools, like the moisture meter I now swear by, can save thousands of dollars. Recognizing subtle subfloor issues before they escalate has become my go-to strategy, emphasizing that precision and proactive checks are essential for flawless flooring projects.
DIY Floor Leveling & Tile Tips That Actually Work
Over the years, I’ve learned that understanding substrate properties allows you to select compatible primers and leveling compounds. For example, epoxy primers are a game-changer for concrete, while bonding agents are better for plywood. Applying even coats with appropriate tools, like high-quality rollers or sprayers, accelerates workflow and improves adhesion. Waiting for proper curing before moving on ensures a strong, lasting bond, steering clear of common pitfalls lamented in industry circles. Dive deeper into these proven techniques at this detailed guide.
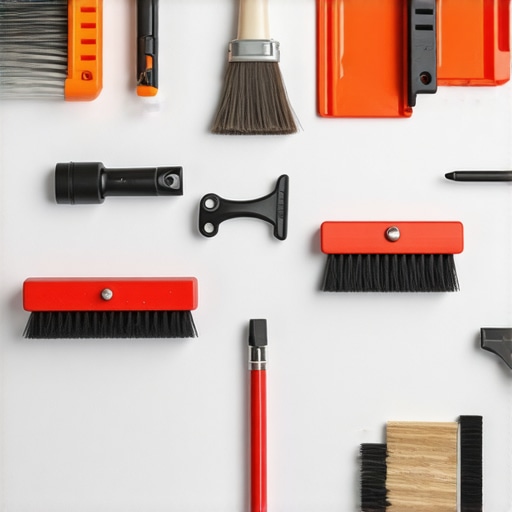
My Toolbox for Long-Lasting Floors
The right tools make all the difference. I trust a reliable moisture meter to monitor dampness, a laser level for perfect flatness, and a quality oscillating tool for repairs. These investments have consistently paid off by preventing issues before they start. Modern digital resources like flooring apps help me plan routine inspections and track material lifespan, keeping my floors beautiful for years. For instance, I use our leveling techniques resource to stay ahead of challenges and ensure optimal results.
What I Wish I Knew About Floor Finishing and Maintenance
Applying the right sealing products and regular maintenance routines have extended my floors’ lifespan significantly. Sealing grout lines or reinforcing underlayments has been a game-changer in moisture-prone areas. Constant learning about new sealants and finishing techniques from trusted sources like hardwood care guides empowers me to preserve floors effortlessly. Remember, proactive upkeep preserves the investment and keeps your floors looking as stunning as day one.
Don’t Let Small Mistakes Sabotage Your Projects
Sometimes, the tiniest oversight—like skipping surface cleaning or ignoring drying times—leads to costly repairs. My lightbulb moment was realizing that patience and attention to detail are the backbone of successful flooring installation. Every project is an opportunity to learn and refine your craft. Sharing these lessons through forums or comments not only helps me grow but also builds a supportive community. Have you ever faced a flooring challenge that taught you a crucial lesson? Share below, and let’s learn together from our experiences.