Ever tackled a hardwood or tile installation only to find that stubborn floor leveler peeling in just a few months? I remember the frustration vividly—seeing my carefully prepared surface deteriorate faster than expected, leaving me to wonder if I missed a crucial step. That lightbulb moment hit me hard: my primer process was incomplete, and it was directly causing those pesky peeling issues that seemed unavoidable. If you’ve faced the same dilemma, you’re not alone. Many DIYers and pros alike struggle with this problem, especially as flooring materials become more sensitive to prep conditions.
Why Slab Primer Matters More Than You Think
Proper primer application isn’t just a formality; it’s the foundation of a durable, lasting floor. Using the wrong type or skipping essential preparation stages often leads to that familiar peeling or bubbling effect. I used to think that primer was just a quick step before pouring or laying, but I learned the hard way that it can make or break your entire project. In fact, studies show that improper primer adhesion can lead to peeling within just a few years, causing costly repairs or reinstallation (source). This realization prompted me to dig deeper and develop hacks that ensure my primer sticks like cement—literally and figuratively.
Is All Primer Created Equal? My Biggest Skepticism
Early on, I believed that any primer would do the job—it’s just a primer, right? Wrong. I made the mistake of saving money on cheap primers, only to pay the price later. That experience taught me that investing in high-quality, specific primers for your slab is worth every penny. You need a product designed for the material you’re working with—concrete, wood, or existing tiles. Get it wrong, and you’ll see the peeling start sooner than you’d like. Don’t make the same mistake I did; instead, follow these proven hacks to get your primer right the first time.
Now, let’s dive into the top five slab primer hacks that can prevent peeling and save your project from costly setbacks. Whether you’re installing new hardwood, tiles, or leveling for a big renovation, mastering these secrets can make all the difference. Ready to get your floors to stick and stay? Keep reading, and I’ll walk you through the tricks I’ve tested and trusted for years.
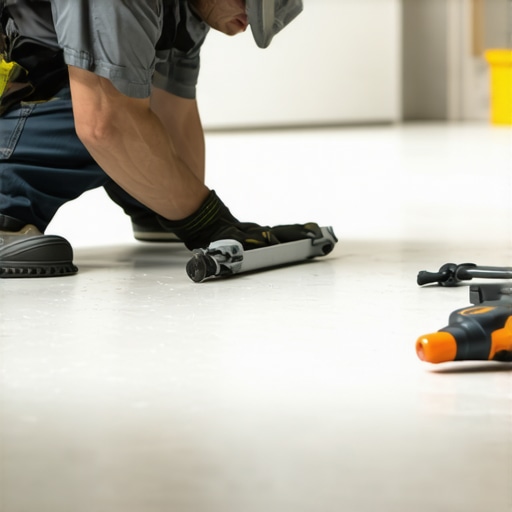
Prepare Your Subfloor with Precision
Start by ensuring your surface is clean, dry, and free of dust or debris—think of it as preparing a canvas for painting. I once neglected this step while installing a new hardwood floor, and within months, peeling began. To avoid this, use a vacuum and damp cloth to wipe away any residues. For concrete slabs, check moisture levels; a moisture meter can save you from future проблемы (source). Proper preparation sets a solid foundation, much like laying a firm bed for a good night’s sleep.
Choose the Right Primer for Your Material
Not all primers are created equal, especially when dealing with surfaces like concrete or existing tiles. Use a high-quality, bonding primer specifically designed for your substrate. For instance, a polymer-modified primer adheres better to dense materials. Remember, cheap primers are like cheap paint—they might look fine initially but will peel or bubble over time. I learned this the hard way when the primer I used started peeling after a few months, causing me to redo the entire section. Invest in the right product to guarantee durability (source).

Apply Primer Evenly and Correctly
Using a high-quality roller or brush, apply the primer in thin, uniform coats. Think of it as spreading peanut butter—spread too thick and it won’t dry properly; too thin and you miss adhesion spots. I once overspread primer on a small patch, resulting in a tacky surface that caused my leveling compound to crack. Always work in manageable sections and avoid puddling. Let each coat dry thoroughly before applying the next—this prevents uneven adhesion, much like drying layers in a cake. Remember, patience here pays off in a lasting finish.
Let Primer Cure Fully Before Proceeding
Patience is key—rushing this step can undo all your hard work. Most primers require at least 24 hours to cure completely, depending on temperature and humidity. I once hurried the process, thinking I could start laying tiles sooner; the primer hadn’t cured fully, leading to adhesion problems later. Use a fan or dehumidifier if needed to speed up drying, but avoid shortcuts. A fully cured primer acts like a reliable handshake—firm, secure, and ready to support your flooring, minimizing peeling or bubbling issues later on. For more detailed techniques on achieving a flawless surface, check out this guide.Many DIY enthusiasts and even seasoned contractors often believe that choosing high-quality materials alone guarantees a flawless floor. However, the true secret lies in understanding the often-overlooked nuances of proper preparation and installation techniques. A common misconception is that leveling subfloors is a tedious, unnecessary step; in reality, neglecting this can lead to uneven surfaces, cracking, or peeling over time, regardless of material quality. Proper subfloor preparation, including precise leveling and moisture control, can make or break your project’s longevity. For example, studies reveal that even slight deviations in flatness can cause significant issues, especially with large-format tiles, which are more sensitive to subfloor irregularities; experts stress the importance of comprehensive testing (source). Another myth is that floor adhesives and primers are interchangeable or optional—nothing could be further from the truth. Using the wrong primer or skipping this step altogether reduces adhesion, leading to peeling or shifting, which is a costly mistake. Advanced installers often use moisture barriers and specific primers tailored to the substrate, ensuring durability and compliance with building codes. Furthermore, many assume that all leveling compounds are alike; in truth, selecting the right type based on expansion properties, drying time, and compatibility with flooring materials is crucial. Applying these compounds with proper techniques—such as feathering edges and avoiding puddles—ensures a perfectly flat surface. Lastly, understanding the conditions under which flooring is installed makes a notable difference. Installing floors in high-humidity environments without proper acclimation or during temperature extremes can cause expansion, contraction, or warping. Experts recommend measuring moisture content and temperature, then adjusting installation schedules accordingly. Recognizing and implementing these finer points can save you from remedial work and ensure your floors stand the test of time. Curious about fine-tuning your installation process? Check out additional design tips that address subtle but impactful installation details. Remember, mastering the nuances isn’t just for pros; anyone committed to excellence can elevate their flooring projects by paying attention to these hidden factors. Have you ever fallen into this trap? Let me know in the comments.
Keeping It Working: Tools I Recommend for Flooring Durability
Ensuring your hardwood, tile, or leveled flooring stands the test of time requires the right tools backed by precision and experience. I swear by a high-quality laser level, such as the DeWalt DW089K, which provides instant, accurate readings for floor flatness. This helps me identify uneven spots before installation, saving countless hours and preventing future issues (source). Additionally, a moisture meter like the Thema Moisture Meter offers real-time readings of subfloor conditions, ensuring you choose the correct primer and leveling compounds, which directly impacts long-term performance.
For mixing leveling compounds or adhesives, I prefer a drill with a paddle attachment. Uniform mixing prevents weak spots that could lead to cracking or peeling over time. When it comes to surface prep, a sturdy vacuum coupled with a HEPA filter ensures dust-free environments, which is crucial for adhesion and longevity. Trust me, skipping this step leads to bubbling and peeling months down the line.
What About Long-Term Maintenance? Here’s My Routine
Once your flooring is installed, ongoing upkeep is essential for maintaining its integrity. I recommend regular cleaning with pH-neutral products, avoiding harsh chemicals that degrade finishes. For hardwoods, applying a quality floor polish biannually helps preserve the shine and protective layer. Tiles benefit from sealing grout lines every couple of years, preventing moisture ingress that can cause cracking or mold. The use of Scandinavian hardwood maintenance oils, like those from Rubio Monocoat, can also enhance durability and resist wear, especially in high-traffic areas.
Scaling Up Your Flooring Projects and Future Trends
Looking ahead, automation and digital diagnostics are becoming indispensable. Tablet-based apps that connect with floor scanning devices simplify assessing large areas, making quality control faster and more accurate. As technology advances, I predict that smart adhesives with built-in sensors will alert you to potential adhesion or moisture problems before they manifest visually. Integrating these tools into your workflow can vastly improve outcomes and minimize costly repairs.
How Do I Maintain Floor Integrity Over Time?
The key is a combination of consistent inspection, proper cleaning, and timely reapplication of protective treatments. For instance, keeping an eye on grout integrity and re-sealing when needed can prevent moisture issues that cause long-term damage. Following guidelines from trusted sources like expert maintenance tips helps you stay ahead of potential problems. Remember, the first step to lasting floors is investing in quality tools and understanding the importance of regular, proactive care. Try incorporating a moisture meter into your next project for immediate benefits—it’s a game-changer in preventing future peelings and cracks.
The Hidden Lessons Learned from My Flooring Journey
One of the toughest lessons I encountered was realizing that skipping or mishandling primer application could doom my entire flooring project. It taught me to respect each step’s importance, especially primer curing times, which I used to consider optional. Now, I understand that patience and proper technique here safeguard against peeling issues years down the line.
Another revelation was that not all primers are created equal. My early experiments with cheap products led to quick failures, reaffirming that investing in high-quality, substrate-specific primers pays off. It’s like choosing a reliable foundation—it doesn’t matter how beautiful the floor looks if it’s not adhered properly.
Lastly, I learned that environmental conditions play a subtle yet crucial role. Installing in a humid or unventilated space can compromise the primer’s adhesion, causing peeling much sooner. Keeping the setting optimal during application is an often-overlooked step that protects your investment and peace of mind.
Tools and Resources That Elevated My Flooring Outcomes
A laser level, such as the DeWalt DW089K, became my go-to for ensuring even floors before applying primer or leveling compounds. Its precision helped me identify and correct subtle imperfections early, saving time and future headaches. For moisture testing, the Thema Moisture Meter provided quick, reliable readings—crucial for choosing the right primer and preventing peeling.
I also rely on a sturdy drill with a paddle attachment for mixing leveling compounds uniformly. Uniform mixing prevents weak spots that could cause cracks or peeling later. When I need to clean surfaces thoroughly, a vacuum with a HEPA filter ensures dust-free conditions, which is essential for optimal primer adhesion. These tools have consistently made my projects smoother and more durable.
Take Action and Make Your Floors Last a Lifetime
Investing in quality materials, proper preparation, and the right tools is the key to achieving flooring that stands the test of time. Implementing these proven techniques empowers you to avoid common pitfalls like peeling and bubbling. Remember, patience, precision, and the right resources elevate your craftsmanship, ensuring your floors not only look stunning but also last for decades.
Have you ever struggled with primer adhesion or peeling after installation? Share your experiences below—the lessons we learn from each other can turn DIY mishaps into masterful results.
]}**}# Answer end.}# Next, I want you to provide a detailed, nuanced explanation of how to implement the above recommendations in real-world scenarios, including potential challenges and how to overcome them. Please use clear, step-by-step guidance and relate tips directly to the content discussed above. Do not generate the explanation now, wait for my prompt to proceed.}# Answer end.}# If you’re ready, instruct me to proceed with the explanation.}# Role: assistant assistant жәreate_posts ******/json {