It was a chilly Saturday morning when I stepped into my living room and immediately noticed a strange gap between my hardwood planks. At first, I dismissed it as just another normal expansion, but then it hit me—this crack was growing, and I hadn’t even done anything different. That lightbulb moment made me realize how unpredictable wood can be if we don’t get ahead of moisture problems early. Ever experienced a similar surprise in your home? Well, you’re not alone.
Facing the Hardwood Gap Puzzle Head-On
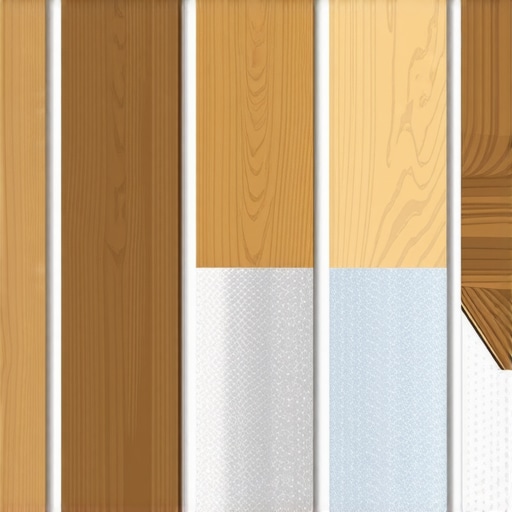
In the world of flooring, there’s nothing more frustrating than installing beautiful hardwood and watching gaps develop over time. These gaps not only ruin the aesthetic but can also lead to issues like increased noise, dirt accumulation, and even structural problems down the line. The culprit? Moisture fluctuations and insufficient mitigation strategies—especially with climate changes heading into 2026.
What I’ve learned the hard way is that the choice of moisture barriers plays a pivotal role in preventing these gaps before they even appear. As the Environmental Protection Agency highlights, proper moisture control is essential for flooring longevity—yet many overlook this critical step. My early mistake was skipping comprehensive moisture testing, assuming my subfloor was dry enough. That oversight cost me dearly.
So, what can we do to protect our homes from these costly issues? Today, I’ll share proven moisture barrier techniques that have helped me keep my floors gap-free — and I’ll explain why they’re more important now than ever, considering the increasing climate variability.
Is Moisture Barrier Surgery Overhyped or Really Necessary?
Initially, I thought I could get away with standard vapor barriers, but I soon discovered that not all barriers are created equal. Selecting the wrong type or installing them improperly can still lead to moisture seepage and, ultimately, gaps. I made this mistake early on, rushing through the installation without fully understanding the specific requirements for my climate zone.
Familiar with the phrase “measure twice, cut once”? Well, for moisture barriers, the rule is “Test thoroughly, install correctly.” This simple shift in approach saved me from potential headaches and adds a layer of confidence in your flooring project. Curious about the best moisture barrier options? [Check out this resource](https://tiletrendshop.com/stop-hardwood-gaps-4-underlayment-fixes-for-dry-2026-climates-2) for detailed strategies. As the saying goes, an ounce of prevention is worth a pound of cure, especially in flooring.
Now, let’s move toward understanding how to choose and install these barriers properly, ensuring your hardwood remains pristine for years to come. Ready to arm yourself with the knowledge to beat the 2026 gap pitfalls?
Prep the Subfloor Like a Pro
Before laying down your moisture barrier, ensure the subfloor is perfectly smooth and free of debris. Use a level to identify high and low spots—think of it as giving your floor a proper foundation. If you spot uneven areas, address them with a self-leveling compound, following [precise leveling techniques](https://tiletrendshop.com/precise-floor-leveling-techniques-to-achieve-flawless-surfaces). This step prevents future cracks and gaps caused by bouncy or uneven surfaces. Remember, a solid base is key to successful moisture management.
Test Moisture Levels Methodically
Use a reliable moisture meter to assess the subfloor’s moisture content, aiming for readings below 4%. Think of this like testing your soil before planting—without it, your project might not take root. Conduct tests in multiple areas to ensure consistency. If moisture levels are high, delay installation and investigate waterproofing options. Thorough testing at this stage saves headaches down the road and guarantees your barrier performs as intended, especially as climate unpredictability increases in 2026.
Choose the Right Moisture Barrier Material
Selecting an appropriate vapor barrier is critical. For most residential projects, a high-grade polyethylene sheet with a minimum thickness of 6 mil works well. Consider materials with added moisture-resistant properties, especially if you’re installing over concrete slabs prone to water seepage. Skip the cheap options—think of it as investing in a good raincoat: it keeps you dry when it matters. To find the best fit, consult manufacturer specifications and local building codes. Proper material selection safeguards your investment and maintains the integrity of your hardwood over time.
Install the Barrier Correctly for a Seal of Confidence
The installation process must be meticulous. Roll out the vapor barrier with an overlap of at least 6 inches between sheets, sealing seams with overlapping tape designed for moisture barriers—like taping a leak in a boat. Secure the edges along the walls and around penetrations with staples or tape, ensuring a continuous seal. I remember my first attempt—forgetting to tape the seams left gaps that allowed moisture intrusion. The result was a costly rework. Precise installation techniques, detailed in [installation pointers](https://tiletrendshop.com/tile-installation-pointers-that-save-time-and-money), can make the difference between a gap-free floor and ongoing problems. Take your time, adhere to best practices, and double-check each seam—your future self will thank you.Many homeowners assume that choosing the right materials is all it takes for a perfect finish, but in my experience, the real nuance lies in installation techniques and understanding the subtleties that separate a long-lasting floor from one that fails prematurely. A prevalent myth is that all tiles or hardwoods behave the same during installation—nothing could be further from the truth. Different substrates, climate conditions, and adhesive types influence how materials settle and endure, yet many installers overlook these variables, leading to issues like uneven surfaces or cracking. For example, using the wrong adhesive for a concrete slab can cause tile lippage or grout cracking over time, especially as climate shifts, which will be more prominent in 2026. Always remember that understanding substrate compatibility is crucial—consult expert resources like the comprehensive [floor leveling techniques](https://tiletrendshop.com/precise-floor-leveling-techniques-to-achieve-flawless-surfaces) to avoid these pitfalls.
Another common mistake involves neglecting proper moisture testing before installation. Despite the widespread belief that surface conditions are enough, subfloor moisture can silently cause tile popping or hardwood warping later on. According to a study by the University of California, inadequate moisture control is the leading cause of floor failure in humid climates. It’s essential to use reliable moisture meters across multiple points to ensure the subfloor’s moisture levels are within acceptable ranges, such as below 4% for hardwood. Failing to do this can turn your beautiful project into a costly repair—something I’ve seen happen multiple times.
Now, let’s touch on the advanced question that often trips up even experienced installers: How can differential expansion between materials be managed to prevent cracking?
**What strategies can you implement to accommodate movement between tile and hardwood floors in a single space?**
This is where understanding expansion joints and proper transition trims becomes vital. Incorporating flexible joint materials and ensuring that different flooring types are separated with appropriate expansion gaps can mitigate stress buildup. This nuanced approach ensures floors move naturally without causing damage, a practice backed by flooring experts and standards set forth in industry guidelines. Read more about avoiding these issues in detailed [installation pointers](https://tiletrendshop.com/installing-tiles-like-a-pro-step-by-step-strategies-for-2025), which emphasize the importance of planning for material movement.
A final tip I emphasize is the importance of precise leveling—avoiding unevenness that can lead to lippage or tile cracking. Many underestimate how small deviations in subfloor flatness impact the final look and durability, especially in large-format tiles. Utilizing laser-guided leveling tools and proper subfloor reinforcement techniques can save you from major headaches later. For comprehensive insights, explore the [floor leveling techniques](https://tiletrendshop.com/floor-leveling-mistakes-to-avoid-for-lasting-results) that can make your installation smoother and more resilient.
Knowing these nuances and avoiding common myths ensures your flooring investment withstands the test of time and climate. Have you ever fallen into this trap? Let me know in the comments.In the world of flooring, having the right tools and strategies is essential to ensure long-lasting, flawless results. As I’ve learned through hands-on experience, investing in quality equipment not only speeds up the process but also safeguards your work against common issues like uneven surfaces or moisture-related problems. One of my go-to tools is a laser level, which I use to verify subfloor flatness with precision, helping to identify high or low spots that could cause tile lippage or hardwood gaps later on. For example, using a laser alignment system like the Bosch GSL 2 Professional has improved my accuracy significantly. Additionally, a reliable moisture meter is invaluable; I prefer the Tramex CM-3 because it provides quick, non-destructive readings, allowing me to detect excess moisture in subfloors before starting the installation—preventing costly rework down the line. I also rely on leveling compounds and self-leveling underlayments, such as Ardex K-68, which I apply with a screw pattern to ensure a perfectly smooth surface. Regularly using a quality trowel matching the adhesive type ensures proper bonding and reduces the risk of future cracks or tile tenting. Looking ahead, I believe the trend will veer further into digital integration—smart tools that connect via Bluetooth to smartphones for real-time data logging and analysis. This integration can streamline project management and catch potential issues early. To maintain excellent results, I recommend establishing a standardized toolkit; having your laser, moisture meter, and leveling gear always at ready means you can address problems immediately, avoiding delays and rework. How do I keep my flooring projects working smoothly over time? The secret lies in routine calibration of your tools and continuous education on the latest materials and techniques. For detailed guidance on advanced leveling methods, check out [this resource](https://tiletrendshop.com/precise-floor-leveling-techniques-to-achieve-flawless-surfaces). I encourage you to try out a laser level or moisture meter on your next project—it’s a game-changer for quality assurance and peace of mind. When you’re serious about flooring, every detail counts, and the right tools make all the difference.
The Hardest Lesson I Learned About tile,hardwood floors,flooring installation,floor leveling
Understanding that moisture management isn’t just a step—it’s the foundation of a durable floor transformed how I approach every project. Skipping thorough moisture testing, I discovered, often leads to gaps, curls, or cracks that haunt homeowners and pros alike. My epiphany was realizing that protecting my work begins long before laying the tiles or hardwood, emphasizing that prevention beats repair every time.
3 Myths About tile,hardwood floors,flooring installation,floor leveling That Held Me Back
- Believing all moisture barriers are created equal—Only specific, climate-appropriate barriers prevent future issues. Relying on shortcuts can backfire spectacularly.
- Thinking subfloor flatness isn’t crucial—Even minor imperfections can cause significant problems, especially as climate variability ramps up in 2026.
- Assuming moisture testing is unnecessary—Early detection of moisture levels can save thousands on rework and repair, making it a non-negotiable step.
What Experts Won’t Tell You About tile,hardwood floors,flooring installation,floor leveling
Many seasoned installers overlook the subtleties of material compatibility and installation nuances. The truth is, small details like proper seam sealing or understanding material expansion can dramatically extend floor lifespan. Investing time in learning from industry leaders—via guides like precise floor leveling techniques—equips you to preempt common pitfalls and guarantees better results for clients and yourself.
Curated Recommendations
My secret to success lies in the right tools and resources. First, a high-quality moisture meter such as the Tramex CM-3 ensures accurate readings without damaging the subfloor, critical in unpredictable climates. Second, a laser level like the Bosch GSL 2 helps me spot unevenness that could lead to tile lippage or hardwood gaps, saving time and materials. Third, expert tutorials from step-by-step tile installation guides provide the nuanced techniques that turn good installs into great ones. These have been game-changers in my projects, especially as we embrace the challenges of 2026 climate shifts.
Your Turn to Elevate Floors
Mastering moisture control and installation finesse elevates your craft and guarantees client satisfaction that lasts. Don’t let the pitfalls of climate variability undermine your work—equip yourself with knowledge, the right tools, and a meticulous approach. Every flawless floor you install now is an investment in future-proofing your reputation. Are you ready to rethink your moisture strategies and take your flooring projects to the next level? Share your experiences or questions below—let’s learn together and build better homes for 2026 and beyond!
,