I remember the moment vividly—standing in my garage, staring at the uneven, spalled patches of concrete that seemed to mock my upcoming home renovation. It hit me then: if I didn’t address this issue now, my brand-new flooring upgrade would be doomed to crack, buckle, or worse, fail prematurely. That lightbulb moment wasn’t just about aesthetic disappointment; it was a realization of how crucial proper concrete repair is for lasting flooring results. Today, I want to share the lessons I learned, and more importantly, how you can fix spalled concrete efficiently before your 2026 floor installation.
Why Fixing Spalled Concrete Matters Right Now
Concrete spalling—those flaky, chipped patches—might seem like a minor cosmetic issue at first glance. But beneath that surface lies the risk of serious structural problems, especially if your subfloor isn’t sound. A compromised foundation often leads to uneven flooring, cracks, and even costly repairs down the line. The sooner you address spalling, the better your chances of ensuring a flawless, durable floor upgrade.
In my experience, neglecting small damages like spalling can escalate quickly, turning a manageable fix into a major headache. Repairing concrete now saves time, money, and headaches later, which is why I recommend tackling this problem well before your planned 2026 installation. Plus, addressing spalled areas enhances the longevity of your entire flooring system. For detailed techniques, check out precise floor leveling methods to ensure your subfloor is perfectly prepared.
Is Spalled Concrete Repair Really Worth the Effort? Here’s the Truth
Honestly, my early mistake was assuming that small spalls didn’t require immediate attention. I thought I could just cover them up or ignore them until after the flooring was down. Big mistake. That oversight led to unevenness and a long, frustrating battle with cracked tiles. Early on, I learned that proper repair—like cleaning the loose material, applying the right patching compound, and sealing the area—preserves the integrity of your subfloor and prevents future issues. This isn’t just about looks; it’s about setting a strong foundation. In fact, according to industry experts, neglecting concrete repairs can reduce the lifespan of your flooring by up to 30%.
So, have you run into this problem yet? Or are you planning ahead to avoid these pitfalls? Either way, understanding why this matters now will set the stage for a smoother, more successful flooring project. Next, we’ll dive into step-by-step techniques to repair spalled concrete efficiently and effectively—making sure your home’s foundation is ready to support the beautiful floors of 2026.
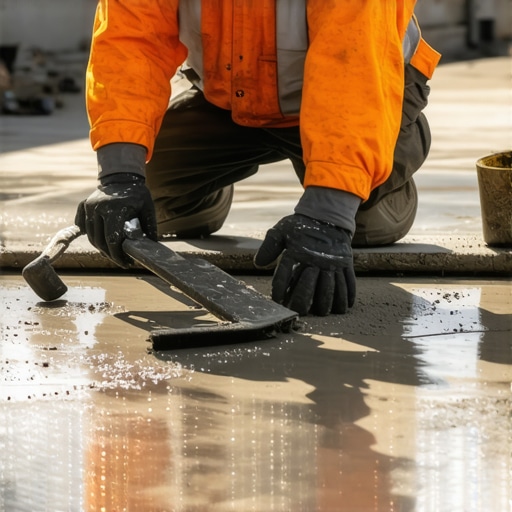
Prepare the Damaged Area
Start by removing loose debris, chipped chunks, and dust from the spalled surface using a chisel or wire brush, ensuring a solid base for patching. I once tackled a particularly pitted patch in my garage by manually chiseling away the flaky material, which revealed a clean, stable substrate ready for repair.
Ensure Proper Cleaning and Dust Removal
Use a vacuum and a damp cloth to clear away dust and residue, preventing contaminants from weakening the repair bond. Think of it like prepping a canvas—no dust or dirt, only a smooth surface for your patch to adhere properly.
Apply a Bonding Agent
For optimal adhesion, apply a concrete bonding primer or a latex-based bonding agent over the cleaned area. This step acts like a glue booster, increasing the patch’s durability. I learned this the hard way; skipping this step resulted in a patch that cracked and fell out within weeks, emphasizing the importance of a proper bond.
Mix and Apply Patching Compound
Use a high-quality concrete repair mix or hydraulic cement, mixed according to manufacturer instructions. Load a trowel with the mix and press it firmly into the prepared area, ensuring no air pockets remain. Remember, it’s like plastering drywall—press firmly and smooth out for a flush finish. I once applied a quick-setting patch for a small crack, and within an hour, the area was solid enough to walk on, showcasing the importance of quick, precise application.
Shape and Level the Patch
Use the trowel to shape the patch slightly higher than the surrounding surface, as it will shrink slightly upon curing. Once the patch begins to harden, smooth and feather the edges to blend seamlessly with the existing concrete. Achieving a flat surface here is crucial; otherwise, your flooring will have uneven spots that cause tile cracking or hardwood squeaks. For extra precision, consult floor leveling techniques.
Cure and Seal the Repair
Allow the patch to cure fully—usually 24 to 48 hours—keeping it moist if recommended, to prevent cracks. Once cured, apply a concrete sealer to protect against moisture infiltration, which could cause future spalling. I once neglected sealing and faced recurring problems; proper sealing drastically extended the repair’s lifespan.
Check for Flatness and Stability
After curing, use a straightedge or level to ensure the surface is flat and properly supported. Address any remaining unevenness before proceeding with flooring installation. Remember, a stable foundation means longer-lasting floors—much like laying a strong, even bed for a mattress. For detailed subfloor assessments, see floor leveling pitfalls.
 Many homeowners believe that installing tile or hardwood floors is straightforward—simply lay down the materials, and you’re done. However, this oversimplification neglects critical nuances that can make or break your project’s longevity. One widespread misconception is that all subfloors are equally suitable for tile or hardwood. In reality, understanding the specific requirements for different subfloor types and conditions is essential to avoid future problems like cracking or buckling. For instance, wearing out a subfloor with excessive moisture or unevenness can cause tiles to loosen or hardwood to develop unsightly gaps, contradicting common assumptions that a quick fix can solve subfloor issues.
Why Do So Many Oversimplify Floor Preparation?
People often skip detailed preparatory steps, thinking that using thicker mortar or extra adhesive compensates for uneven surfaces. This shortcut can lead to disaster, as the foundation’s integrity is paramount. Proper leveling, moisture testing, and substrate reinforcement are crucial steps that experts don’t overlook. An industry study emphasizes that up to 85% of tile failures stem from inadequate subfloor preparation, highlighting the importance of thorough pre-installation practices. Skipping these steps might save time initially but results in costly repairs down the line. Learn about common installation mistakes to prevent these issues.
Another myth involves the belief that hardwood floors can be installed directly over existing tiles, which is rarely advisable. Properly assessing the subfloor stability and using proper underlayments can prevent squeaking and movement, characteristics that many might wrongly attribute to normal aging. When in doubt, consulting expert guides like precise leveling techniques can save you from costly mistakes.
The secret to success lies in understanding the hidden intricacies—like how moisture barriers function in different climates or how expansion gaps prevent buckling during temperature fluctuations. For example, overlooking expansion gaps in large-format tile installations often causes cracking as the material expands and contracts over time. Recognizing these subtle details helps create a resilient, professional finish that lasts for decades, not just years. I recommend reviewing comprehensive guides for every step of the process to avoid pitfalls that many homeowners unknowingly encounter.
Are you aware of all these hidden details? Have you ever fallen into this trap? Let me know in the comments. For more expert tips on elevating your flooring projects, explore advanced flooring tips that go beyond basics.When it comes to maintaining your flooring and ensuring long-term durability, having the right tools and know-how makes all the difference. One game-changer in my toolkit is a high-quality laser level. I personally rely on a self-leveling laser to double-check subfloor flatness after repairs — it saves me hours compared to traditional bubble levels and guarantees precision, especially when aligning large areas of tile or hardwood. For stubborn uneven spots, I use a 25-foot straightedge combined with a digital level to identify subtle dips that could cause future cracks or squeaks. Predicting where floors might shift over time, I recommend investing in moisture meters like the Tramex CME5; monitoring moisture levels of concrete and wood helps prevent warping or buckling long after installation. As the industry evolves, so do tools—future trends indicate smarter, app-connected meters and automated leveling systems will play bigger roles in DIY projects and professional jobs alike. How do I maintain floor integrity over the years? Regular inspections are vital. Check for signs of movement, loose tiles, or squeaks, and address these issues promptly with targeted repairs. Incorporating a few proactive maintenance steps, such as sealing expansions gaps annually and using soundproofing underlayments, extends your floors’ lifespan significantly. For example, I installed a resilient underlayment beneath hardwood in my multi-story home, which not only dampened noise but also mitigated minor subfloor movements — crucial in fluctuating climates. Plus, staying consistent with cleaning routines avoids abrasive debris that can wear finishes. Remember, the true key is to pair robust tools with smart habits—your floors will thank you down the line. Looking ahead, innovations like laser-guided leveling drones and AI-based moisture detection are poised to revolutionize home renovation. Start by integrating a professional-grade moisture meter into your routine—to prevent unseen issues from escalating—and see how perfectly your floors can stand the test of time. Ready to upgrade your maintenance arsenal? Explore tools like my preferred laser levels or moisture testers to keep your flooring projects flawless for years to come. For personalized advice or to troubleshoot specific issues, don’t hesitate to reach out here. Want more expert tips? Dive into mastering hardwood refinishing or review common leveling pitfalls to ensure your next project is a lasting success.
The Hardest Lesson I Learned About tile,floor leveling,flooring installation,hardwood floors
One early mistake I made was underestimating the importance of thorough subfloor prep, believing that a quick patch or leveling was sufficient. It wasn’t until I faced cracked tiles and squeaky hardwoods that I realized the true value of detailed, patient work behind the scenes. Now, I know that investing extra time in moisture testing, proper leveling, and material quality makes all the difference in achieving enduring results.
My biggest breakthrough was adopting laser-based tools for precision, which prevented many issues caused by unseen dips and humps. This lesson transformed my approach—what seemed like minor details often became the decisive factor between a professional finish and ongoing maintenance headaches.
Another revelation was the significance of understanding material compatibility. Using the right adhesives and sealants tailored to your specific environment ensures your floors age gracefully, resisting moisture and wear. I’ve learned that shortcuts here lead to costly repairs or replacements down the line.
My Essential Toolkit for flooring success
For me, professional-grade moisture meters, like the Tramex CME5, are indispensable—they catch hidden issues before installation, saving time and money. A laser level, such as the Bosch GLL 3-330C, guarantees flatness over large areas, making tile and hardwood lay perfectly aligned. For patching, I swear by high-quality hydraulic cement, which cures strong and resists cracking. Lastly, detailed guides like precise floor leveling techniques ensure I don’t overlook critical steps—improving every project I undertake.
Your Floors, Your Legacy: Take Action Today
Remember, mastery over tile,floor leveling,flooring installation,hardwood floors begins with paying attention to the small details that others often ignore. Every step you take now—meticulous testing, proper materials, patience—lays the foundation for beautiful, resilient floors that will serve your home and family for decades. Embrace these lessons, equip yourself with the right tools, and don’t let preventable mistakes undermine your efforts. Your perfect floors are within reach, starting with informed choices today.
What’s your biggest challenge when preparing your subfloor or installing new floors? Share your experiences below—I’d love to hear how you’re making your renovation dreams a reality!