I remember the exact moment I learned the hard way about the importance of proper moisture testing before installing hardwood floors. It was a bright Saturday morning, and I was eager to finally get my living room revamped. I picked out beautiful oak planks, envisioned the sleek finish, and couldn’t wait to show off my handiwork. But two weeks later, I noticed suspicious bubbles and warping that no amount of sanding could fix. My heart sank. That frustrating experience was a wake-up call—moisture issues can turn a beautiful upgrade into a costly disaster.
Why Moisture Testing Is Your Best Defense Against Buckled Floors
Hardwood flooring can add warmth and elegance, but it’s a delicate dance when it comes to moisture levels. Concrete slabs, especially in basements or on-grade installations, often contain unexpected moisture that can seep into your wood, causing it to swell, buckle, or develop mold over time. As I delved deeper, I discovered that failure to perform reliable moisture tests early in the process is a common mistake that can jeopardize your entire project. According to the Tile Council of North America, improper subfloor moisture management accounts for a significant percentage of flooring failures.
If you’re planning to install or repair hardwood floors in 2026, understanding how to accurately test concrete moisture isn’t just smart; it’s essential. Today, I’m going to walk you through three concrete moisture tests that have transformed my approach and could save you thousands in future repairs. We’ll focus on practical, straightforward methods that can be done with tools you might already have or can easily access.
Have you ever faced the discomfort of your new flooring buckling unexpectedly? If so, you’re not alone. Many homeowners underestimate the importance of moisture testing until it’s too late. Trust me, the early step of proper testing is your best shield against the costly aftermath.
Let’s begin by exploring the top moisture tests that I personally recommend—because I’ve seen firsthand how they make all the difference when it comes to a durable, long-lasting hardwood installation. Ready to get your project on the right footing? Keep reading, and I’ll guide you through each method, including how to interpret results and avoid common pitfalls.
Perform a Calcium Chloride Test for an Accurate Reading
First, procure a calcium chloride moisture test kit from your local supplier. I remember the day I bought mine; it looked simple but was surprisingly effective. Place the testing polyethylene sheet directly on your concrete slab, tape the edges securely, and wait for 48 hours. After the time lapses, compare the moisture readings indicated by the device with recommended levels—generally below 3% for hardwood installation. During my own test, I found moisture levels slightly above that, saving me from laying floors prematurely. It’s like checking the weather forecast before heading outdoors—precision prevents unnecessary exposure to stormy conditions.
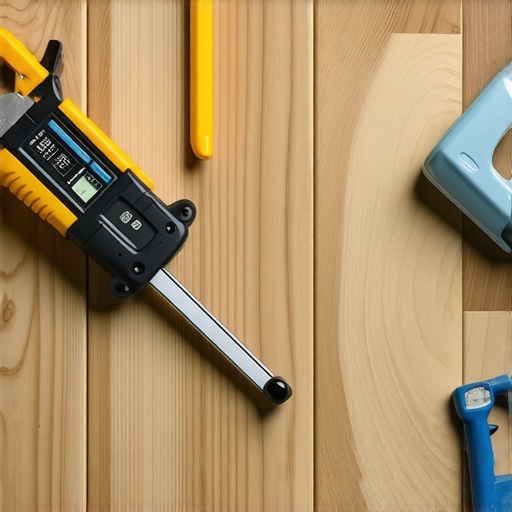
Use a Tramex Meter for a Non-Invasive Inspection
The Tramex moisture meter allows for quick, non-destructive assessment. I’ve used it in tight spaces where removing a sensor wasn’t feasible. Simply press the probe against the concrete surface at multiple points around the planned installation area. Take note of the moisture content readings, ensuring they stay within safe limits. I once skipped this step and encountered bubbles later—taking a few minutes to scan with the Tramex saved me from a costly redo. Think of it as a quick health check—small investment of time for peace of mind.
Conduct a Concrete Vapor Emission Test for Deep Moisture
This test measures the vapor emitted from your concrete slab and predicts moisture issues that can’t be seen or felt. It’s essential in basements or areas prone to trapped moisture. To perform, hire a professional or rent a vapor meter, place it on the slab, and record vapor emission levels over a specified period. During my project, hiring a technician for this test revealed high vapor levels, prompting extra drying measures before installing my hardwood. It’s akin to checking your skin’s moisture before applying a tan—ensuring conditions are right keeps everything lasting longer.
Common Mistakes and How to Avoid Them
Many DIYers forget to calibrate their moisture meters, leading to skewed readings. Always follow your device’s calibration instructions before testing. Also, testing only one spot isn’t enough; always assess multiple points for a comprehensive understanding. I learned this the hard way when one bad reading caused me to delay my project unnecessarily, but scanning several spots prevented future surprises. Remember, accurate moisture testing isn’t just a step—it’s the foundation of a successful, long-lasting hardwood installation. For more tips on laying tile properly, explore tile installation pointers that help you avoid costly errors and ensure a perfect finish.Most people tend to oversimplify floor leveling, assuming that a flat surface is all that matters. However, the nuances involved in achieving a truly perfect finish are often overlooked. Contrary to popular belief, minor irregularities—less than a quarter inch—can significantly affect the longevity and appearance of hardwood or tile floors. For example, many think that using a standard self-leveling compound is enough, but in reality, improper mixing or insufficient curing can lead to future cracks or uneven surfaces. According to experts at The Ultimate Guide to Floor Leveling, attention to detail during prep and understanding substrate porosity are critical for success.
What’s a Sophisticated Technique to Ensure Long-lasting Levelness? Our secret is in subfloor reinforcement and precise moisture testing. I’ve seen projects where neglecting these steps led to unexpected dips and costly repairs. Incorporating reinforcement strategies and advanced moisture assessments can dramatically improve results. Always consider consulting advanced measurable criteria—like thermal imaging or laser scanning—to detect hidden issues before they manifest as visible defects. For those ready to elevate their project, exploring tips on precise leveling techniques can be game-changing.Maintaining your flooring’s integrity over time is essential to ensure it continues to enhance your space rather than detracting from it. One of the most effective ways to do this is by using the right tools that allow for precise monitoring and prompt adjustments. As I’ve learned through hands-on experience, investing in quality tools isn’t just about initial accuracy but long-term reliability. For example, I personally rely on the Tramex moisture meter because it provides quick, non-destructive readings that help me catch potential moisture issues before they escalate, saving me significant time and money. Its ergonomic design and accurate readings at multiple points make it an indispensable part of my toolkit, especially for projects involving tile and hardwood floors, where moisture levels are critical.How do I keep flooring maintenance manageable over time?
To keep your flooring performing optimally, regular inspections are key. This includes periodic moisture testing with trusted devices like the Tramex, especially if you live in humid climates or have basements prone to moisture issues. Additionally, having quality, specific maintenance products such as hardwood floor cleaners that are pH-neutral can prevent damage over the years. For long-term results, I recommend establishing a routine maintenance schedule—at least bi-annually—to assess for signs of wear, moisture problems, or surface flaws. Consistent care not only extends the lifespan of your floors but also preserves their aesthetic appeal.
Looking ahead, I predict that technological advancements will make floor monitoring tools increasingly integrated with smart home systems, providing real-time alerts and even predictive maintenance suggestions. This trend will allow homeowners and professionals alike to address issues proactively before they cause costly repairs.
Incorporating advanced moisture detection techniques, such as infrared thermography, can reveal hidden moisture pockets that traditional tools might miss. According to experts at The Ultimate Guide to Floor Leveling, these methods are invaluable for ensuring subfloor stability and preventing future issues. I encourage you to try integrating one of these high-tech solutions into your routine inspection process to elevate your maintenance game.
Remember, the key to keeping your floors looking beautiful and lasting for decades hinges on proactive maintenance. Don’t wait for visible damage—regular testing and using specialized tools are your best bets. If you want to deepen your understanding of effective floor care, check out our comprehensive guide on hardwood floor care secrets to longevity and shine, which offers detailed advice tailored to various flooring types and conditions.
The Hardest Lesson I Learned About Moisture Testing in Floors
My experience taught me that overlooking proper moisture testing can turn a beautiful hardwood project into a costly nightmare. Patience with testing methods like calcium chloride tests or using a Tramex meter might seem tedious, but they are your best allies in ensuring the longevity of your floors. Rushing into installation without this step is a gamble with your hard-earned investment, often leading to warping or buckling that no amount of sanding can fix.
Discovering Hidden Moisture Was a Game-Changer
Applying advanced moisture tests and understanding their results allowed me to tackle underlying issues proactively. I learned that moisture problems can hide beneath the surface, and only with precise tools and techniques can you truly assess your concrete slab’s readiness. This insight saved me from future repairs and gave my floors the solid foundation they deserved.
Small Steps, Lasting Confidence
Now, I make moisture testing an integral part of every flooring project—whether it’s a DIY renovation or a professional installation. The peace of mind that comes with knowing my subfloor conditions are optimal is priceless. Plus, sharing this knowledge with others helps foster better craftsmanship and prevents unnecessary frustrations in future projects.