I’ll never forget the day I installed what I thought was a “waterproof” hardwood floor, only to find unsightly warping and swelling just months later. The frustration was real, and it made me question everything I knew about hardwood flooring in our ever-changing climate. That lightbulb moment led me down a rabbit hole of myths and truths, especially about waterproof hardwoods—a topic that’s become increasingly vital as homeowners seek durable, stylish solutions for their spaces.
Why Understanding Waterproof Hardwood Myths Is Crucial
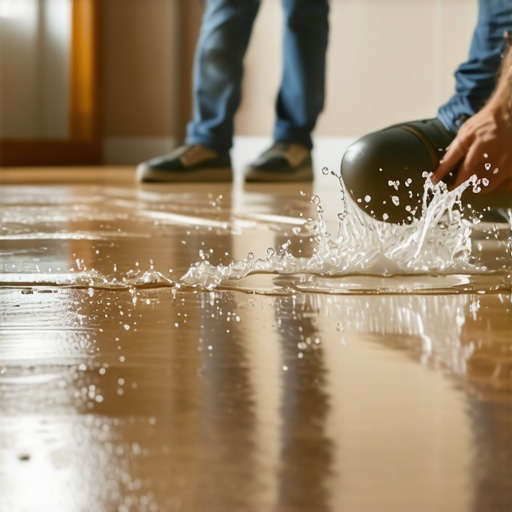
As renovation seasons gear up for 2026, I’ve come to realize that many myths surrounding waterproof hardwood flooring can cause costly mistakes. Not all waterproof claims are equal, and some products don’t live up to their hype, especially in high-moisture areas like kitchens and basements. Knowing what’s true can save you time, money, and a whole lot of frustration. For instance, did you know that some so-called waterproof hardwoods can still warp or swell if installed improperly or if used in unsuitable environments? According to industry experts, understanding the actual moisture resistance of your flooring is essential to longevity. I learned the hard way—early in my career, I made the mistake of choosing a waterproof product based only on marketing. That led me to scrape and replace prematurely, a mistake I hope you won’t repeat.
Skeptical About Waterproof Hardwood? You’re Not Alone
Many folks, myself included at first, get skeptical when brands promise waterproof hardwoods that can withstand any moisture. My biggest fear was investing in a product that wouldn’t perform as advertised—sound familiar? To build trust, I’ll share the common misconceptions, reveal what actually works, and point you toward proven solutions. Are you tired of hearing conflicting advice about waterproof flooring, or worried about your upcoming renovation? If so, you’re in the right place. This article aims to bust those myths wide open and arm you with real, actionable information. Curious about the facts? Let’s dive deeper into what waterproof hardwood truly means—and what it doesn’t.
Prepare the Subfloor with Precision
Before laying any flooring, ensure the subfloor is perfectly level. Use a long spirit level or laser level to identify high and low spots. For minor imperfections, a self-leveling compound can be applied. For larger deviations, remove or sand down uneven sections. This step is crucial because a flat surface prevents tiles from cracking and hardwood from squeaking. I once skipped this step on a remodel, leading to uneven grout lines and squeaky hardwood; remedying it involved extensive adjustments later. Always refer to precise leveling techniques to set the stage for a successful install.
Choose the Right Materials
Select appropriate subfloor underlayment and adhesives compatible with your flooring type. For hardwood over concrete, a moisture barrier and a vapor-retardant membrane are essential to prevent warping. When installing tiles, a high-quality thinset with rapid-dry properties ensures good adhesion and reduces movement. My experience with a DIY tile project taught me that investing in quality materials saves time and money in the long run—cheap adhesives often lead to costly failures. Always double-check and follow manufacturer specifications for materials, which can be found in guides like rapid-dry thinsets for 2026.
Follow a Strategic Installation Process
Mark Out Your Layout
Accurately measure and sketch your flooring pattern. Use spacers and chalk lines to ensure tiles or hardwood planks align correctly. An accurate layout reduces waste and ensures aesthetic balance. For example, I once misaligned my tile layout, which became obvious after the grout dried—leading to redoing a large section. Planning and precise measurement are keys to efficiency and visual appeal. For complex patterns, referencing professional tile installation strategies can help.
Install in Manageable Sections
Lay flooring in sections, working from the center outward. This approach helps maintain alignment and reduces the risk of shifting. For hardwood, start with the anchored rows near the longest wall and work towards the exit. For tiles, apply the adhesive and set tiles in small groups, pressing firmly and using spacers for uniform grout lines. A mistake I made involved rushing through the last section, which caused uneven grout joints. Take your time, and regularly check levelness using a straightedge, consulting floor leveling guides for assurance.
Control Moisture Throughout
Monitor moisture levels in the subfloor and environment. Use a moisture meter before installation; ideal moisture content for hardwood is typically below 12%. In humid areas, run a dehumidifier to prevent expansion or contraction after installation. During my last project, I sealed the subfloor with a moisture barrier that drastically reduced future warping, emphasizing the importance of moisture control. Incorporate vapor barriers and breathable underlayments when necessary, especially with concrete slabs, to improve longevity, as detailed in waterproofing tips.
Finalize with Proper Finishing
After the primary installation, allow the floor to settle for at least 24-48 hours. Then, proceed with sanding, sealing, or grouting as needed. For hardwood, a professional sanding and finishing process enhances durability and appearance; avoid rushed jobs by setting aside adequate curing time. For tiles, ensure joints are clean and sealed properly to prevent moisture ingress. I once finished a hardwood floor without proper sanding, which resulted in a streaky finish that required recoat. Consult experts and reputable guides like hardwood finishing tips to perfect your craft.When it comes to flooring projects, many homeowners and even professionals share misconceptions that can lead to costly mistakes. One prevalent myth is that *simply pouring a self-leveling compound guarantees a perfectly flat surface*. In reality, without proper substrate preparation and moisture testing, uneven floors are almost inevitable. Expert tip: always check the subfloor’s porosity and moisture content before applying leveling products—see how incorrect shortcuts can cause failure. Additionally, many believe that hardwood must be installed immediately after delivery; however, acclimation is often overlooked. Proper acclimation helps prevent future warping or cupping, especially in fluctuating climates. For the most detailed process, consult expert leveling techniques.
Another common misbelief is that *you can skip expansion gaps in large tile or wood installations.* Not true. Expansion joints accommodate temperature and humidity changes, preventing buckling and cracks over time. Failing to plan these gaps often results in expensive repairs—a scenario I’ve seen more than once, emphasizing the importance of proper planning from the start. For high-traffic or expansive areas, consider strategic placement of joints; for guidance, review tile tenting fixes.
Why Do Many Overlook Installation Nuances?
Understanding the subtle aspects of flooring installation can make the difference between a stunning finish and ongoing issues. For example, many installers focus solely on surface aesthetics, neglecting subfloor reinforcement. An inadequately reinforced subfloor will cause squeaks, movement, and uneven wear—issues that appear months after the project is complete. Advanced builders often use a combination of reinforcement techniques for bouncy or uneven subfloors. Moreover, the choice of adhesives matters; some ‘all-in-one’ products are marketed as versatile, but for specialized materials like luxury vinyl, using the correct adhesive ensures longevity. Check out leveling plywood floors for expert insights.
What’s the biggest trap that trips up even experienced installers? It’s rushing the moisture testing process. Skipping proper moisture evaluation of both subfloor and materials often leads to buckling or delamination—disasters that are frequently hidden until it’s too late. The importance of thorough testing is backed by industry research, which shows that moisture-related failures account for a significant percentage of flooring failures in high-humidity areas (see this study). Always prioritize accurate moisture measurement to avoid these pitfalls.
Have you ever fallen into this trap? Let me know in the comments! Remember, mastering the nuances of floor leveling and installation isn’t just about aesthetics; it’s about ensuring durability, safety, and value for years to come. For more expert tips, visit our contact page or explore [related articles](https://tiletrendshop.com/elevate-your-space-choosing-the-right-hardwood-floors-for-your-home) that delve into elevating your living space with the right flooring choices.
Maintaining the quality and durability of your flooring requires more than just proper installation; it hinges on the right tools and consistent care. Over years of hands-on experience, I’ve found that investing in specific equipment can significantly extend the life of hardwood, tile, or engineered floors. One essential tool is a high-quality moisture meter, such as the Tramex CME5, which I personally use to regularly monitor subfloor moisture levels. This device offers precise readings that help prevent warping or buckling caused by unseen moisture issues. Regular moisture checks using this tool, especially in humid seasons, can save you from costly repairs down the line.
Another indispensable item is a dustless hardwood sander, like the Clarke American Sanders Scrubber, which makes refinishing surfaces straightforward and less disruptive. I rely on this sander for routine touch-ups and restorations, as it ensures a smooth, even finish without excessive dust. Complementing this, I recommend a high-quality vacuum with HEPA filtration, such as the Dyson V11, to keep the floor surface free of debris that could scratch or dull the finish over time. This combination helps maintain cleanliness without risking damage to your floors.
For tile installations, a calibrated laser level like the Bosch GSL 2 Professional provides unmatched accuracy when checking for flatness during repairs or upgrades. Precise leveling is crucial for ensuring long-term durability, and as documented in this guide, consistent use of such tools reduces the risk of cracks or uneven grout lines—a common challenge in tile work. Using the right adhesives, like rapid-dry thinset, also plays a vital role, especially for large-format tiles, ensuring long-lasting adhesion.
Looking ahead, I believe smart monitoring systems that integrate moisture sensors with your home automation could revolutionize maintenance routines, providing real-time feedback and alerts to prevent issues before they escalate. Embracing these technological advances can help you keep your floors in top shape with minimal effort.
How do I keep my flooring performing over the years?
Establish a routine maintenance schedule that includes regular cleaning with gentle, floor-appropriate products and periodic inspections for damage or wear. Using specialized tools like a microfiber mop or an automated floor scrubber can preserve your surface finish and prevent grime buildup. Address minor issues promptly—such as loose tiles or small gouges—before they develop into costly repairs. For hardwood floors, applying recommended cleaning and recoating protocols, as outlined in this expert resource, will help sustain their appearance and structural integrity over decades.
Remember, the key to long-term success lies in combining the right tools with proactive care. Experiment with one of the advanced techniques mentioned today, like using a moisture meter regularly, and you’ll be surprised at how much easier it becomes to keep your floors looking pristine for years to come. If you need tailored advice or equipment recommendations, don’t hesitate to reach out through our contact page.
What I Wish I Knew Before My First Floor Overhaul
The most valuable lesson I learned was that meticulous preparation can save you countless headaches later. Rushing the subfloor inspection or neglecting moisture testing almost always leads to issues like buckling or cracking down the line. Own every stage of the project, and don’t hesitate to revisit foundational steps—your future self will thank you.
Tools That Turn DIY Dreams into Reality
Investing in quality tools isn’t just about making the job easier; it’s about ensuring lasting results. A reliable moisture meter, such as the Tramex CME5, helps detect hidden problems early, preventing costly disasters. Also, a laser level like the Bosch GSL 2 provides unmatched accuracy for alignment. Trust me, these tools are worth every penny—they transform uncertainty into confidence.
Bringing Heart to the Craft: A Personal Reflection
Every successful project has taught me that patience and attention to detail are your best friends. I used to believe speed was the best route, but I’ve found that taking the time to do things right yields more beauty and durability. When you put care into your flooring installation, it becomes more than a job—it’s a legacy you create in your home and future spaces.
Where to Go from Here
If you’re serious about elevating your flooring skills, dive into comprehensive guides like this in-depth resource that covers every nuance of levelness and surface prep. Equip yourself with the right tools, stay patient, and don’t shy away from seeking expert advice. Remember, mastery is a journey—start today to ensure beautiful, lasting floors tomorrow.
Elevate Your Space with Confidence
Taking on flooring projects can feel daunting, but with the right mindset and knowledge, you can achieve professional results. Embrace the learning process, celebrate small victories, and don’t be discouraged by setbacks—each one is an opportunity to grow. Your perfect floor is within reach, so roll up your sleeves and make it happen. Think about your next project—are you ready to turn your space into a masterpiece?
What’s the biggest flooring challenge you’ve faced so far? Share your experiences below and let’s learn together!