Have you ever stepped onto a floor and felt that unnerving wobble or unevenness? I remember the sinking feeling in my stomach when I first laid hardwood over a subfloor that seemed perfectly flat during prep—but once the floor was down, it revealed unexpected twists and dips. That lightbulb moment hit me hard: what seemed like a simple install turned into a battle against undetected unevenness. And worst of all, I had used shims—more out of hope than certainty—hoping they’d fix the problem temporarily, not understanding that there are better, more reliable ways.
Discovering a New Approach to Floor Leveling
Since then, I’ve dived deep into the world of subfloor preparation and learned that shims are often a band-aid, not a solution. If you’ve struggled with uneven floors, you’re probably aware that achieving a perfectly flat surface is crucial—not just for aesthetics, but for the longevity of your flooring. The good news? There are four innovative methods to level your 2026 subfloor without relying on shims, ensuring a foolproof foundation for your beautiful new floors.
Is It Really Worth Dropping Shims for Better Results?
I’ll admit, I used shims early on because they seemed like the easiest fix. But I soon realized that many of my mistakes stemmed from underestimating the importance of proper subfloor prep. According to flooring experts, neglecting a thorough assessment can lead to costly repairs down the line. In fact, poor levelness is one of the most common causes of tile cracking and hardwood buckling. Making the switch from shims to more effective leveling techniques can save you headaches and money in the long run. Ready to explore these better methods? Let’s dive in and transform your floor installation process.
Assess the Floor Thoroughly Before Starting
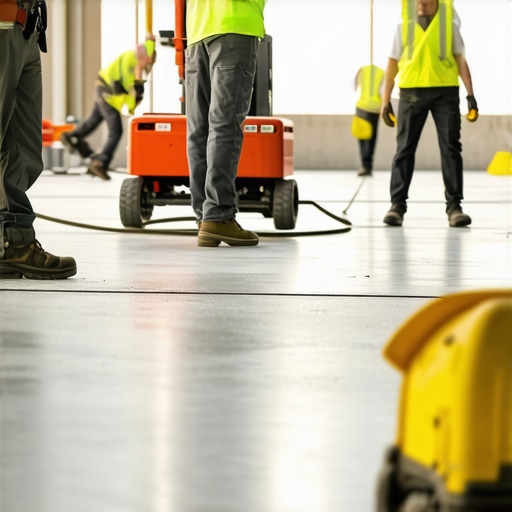
Begin by testing your subfloor’s flatness with a long straightedge or a level. Place it across different sections of the floor, checking for gaps or high spots. I once used a 4-foot level in my living room, and to my surprise, I discovered a hump spanning across a third of the space—something I couldn’t see with just my eyes. This initial step saves you from surprises later in the project.
Identify and Measure Problem Areas
Use a laser level or a straightedge to pinpoint uneven regions. Mark the high spots with chalk, and record their measurements. For deeper dips, consider a detailed assessment with a multi-point leveling kit. This step ensures you know exactly where and how much correction is needed before applying any leveling compound or reinforcement methods.
Choose Your Leveling Strategy
Depending on severity, select a suitable method. Minor irregularities (less than 1/4 inch difference) can often be smoothed with self-leveling compound. For larger dips or bouncy floors, reinforcement or grinding is necessary. Think of it like fixing a warped piece of wood: small bends can be steamed out, but large warps need more structural work.
Applying Self-Leveling Compounds
Clean the floor meticulously, removing dust and debris. Mix the compound per manufacturer instructions, ensuring consistency. Pour the mixture starting from the highest point, working towards the lowest, allowing it to flow into low spots. I once poured a batch in my family room, and watching the compound settle displayed the importance of quick, deliberate action. This method creates a ready surface for flooring installation and is a go-to for minor issues.
Reinforcing Bouncy or Uneven Subfloors
For floors exhibiting bounce or excessive flex, add blocking between joists or reinforce weak spots with additional plywood layers. Secure with long screws, not staples, to tighten the subfloor—much like tightening a loose door hinge. I learned this the hard way when laying tile; a bouncy subfloor caused cracks, but afterward, a few reinforcement hacks made all the difference.
Use Proper Tools and Regular Tests
Invest in quality tools like a laser level, digital measuring tape, and a subfloor tester. Conduct multiple tests during the process to catch issues early. Regularly check your progress to avoid ending up with an uneven surface that will compromise your finish. Remember, consistent testing during leveling often mitigates costly mistakes later.
Verify Flatness Before Moving Forward
Before installing flooring, perform the four secret tests for subfloor flatness. These tests help you confirm that your work meets industry standards, especially for tile or hardwood installations. If you’re unsure, use these techniques as your quality control, much like a chef tasting a dish before serving. A small investment in testing now prevents big headaches down the line.
Address Persistent Issues Early
If you notice persistent wavy or uneven patches after initial leveling, consider feathering or reapplying the compound. Sometimes, problem areas need multiple rounds of treatment. For severe cases, consult a professional or consider replacing the subfloor altogether. Better to fix issues now than to risk future damage that could cost hundreds in repairs or replacements.
By integrating precise assessment, strategic reinforcement, and proper application techniques, you can create a perfectly flat foundation for your flooring project. For detailed guidance on repairing specific problems, visit the comprehensive guide on precise floor leveling techniques and learn how to elevate your space efficiently.
Many DIYers and even professionals often fall prey to myths about floor leveling and installation, which can lead to costly mistakes. One widespread misconception is that shims are a reliable long-term solution for uneven floors. In reality, shims only mask underlying issues and can worsen over time, especially if the subfloor has significant dips or humps. Instead, investing in proper assessment and correction techniques ensures a durable, flat surface, crucial for hardwood or tile installations.
Another trap involves underestimating the importance of comprehensive testing for flatness. Relying solely on visual inspection or small measurements can hide subtle irregularities that become glaring once flooring is laid. Advanced methods, like using laser levels and multi-point testing, reveal these nuances—leading to better results and fewer callbacks. For example, a misdiagnosed high spot might seem trivial but can cause tiles to crack or hardwood planks to warp over time.
Many assume that minor unevenness, say less than 1/4 inch, doesn’t matter. However, even small imperfections can cause significant frustration—such as squeaking hardwood or cracking tiles—if not addressed properly. Experts recommend ensuring your subfloor meets industry standards, such as those outlined in the [precise floor leveling techniques](https://tiletrendshop.com/precise-floor-leveling-techniques-to-achieve-flawless-surfaces), which emphasize thorough testing and correction.
Now, let’s tackle a common myth about self-leveling compounds: that they are a catch-all fix for any unevenness. While excellent for minor dips, they have limitations and may fail if the subfloor has structural issues or excessive bounciness. Reinforcement methods, like adding blocking or new plywood layers, often provide a more reliable base – especially in high-traffic or heavy-load areas. Ignoring these nuances can result in dual problems—unstable floors and damaged finishes.
**How can you sharpen your skills and avoid these traps?** Regularly reviewing comprehensive guides, such as [floor leveling for a flawless finish](https://tiletrendshop.com/the-ultimate-guide-to-floor-leveling-for-a-perfect-finish), and staying informed about new techniques will elevate your craftsmanship. Also, participate in forums or consult experts—learning from real-world experiences minimizes mistakes and builds confidence.
In sum, the hidden nuance often overlooked is that flooring success hinges on meticulous evaluation and correction of the subfloor, rather than relying on quick fixes like shims or superficial solutions. Cutting corners might seem tempting, but in the long run, thorough prep and understanding these advanced points ensure a smooth, lasting installation. Have you ever fallen into this trap? Let me know in the comments.
Keeping It Working: Tools and Maintenance for Durable Floors
Once you’ve achieved a perfectly level subfloor and installed your hardwood or tile, the journey doesn’t end. Proper ongoing maintenance and having the right tools are vital to ensure your floors remain beautiful and functional over the years. Investing in quality equipment and adopting regular upkeep routines can save you time and money, while extending the lifespan of your flooring.
One of my go-to tools for maintaining hardwood floors is a high-quality floor sander paired with dustless sanding systems. I prefer the Bona Dust-Free Sanding System because it dramatically reduces airborne dust, making cleanup quicker and healthier for my home environment. For routine cleaning, I recommend using a microfiber mop combined with a gentle, pH-balanced cleaner—like the ones recommended by hardwood floor care experts. Regularly sweeping and avoiding excessive moisture are simple but critical practices that protect the finish.
When it comes to preventing damage and addressing wear, I advocate for applying a protective finish every few years. Modern water-based polyurethane finishes offer durability while maintaining clarity. For a deeper refresh, especially on older hardwoods, consider a professional refinishing process detailed in expert tips for 2025. This not only restores the look but also creates a new barrier against scratches and stains.
Tools designed for tile installation, such as tile cutters with precision scoring and leveling systems, are essential for maintaining a uniform, crack-free surface. A good example is the Rubi ZX-562 Compact Tile Cutter, which I use for its reliability on large projects. Regularly calibrating your tools ensures consistent results, which is especially important for large-format tiles where even small inaccuracies can be noticeable.
How do I maintain floors over time?
Keeping floors in prime condition involves more than just tools. Establishing a regular maintenance routine tailored to your flooring type can prolong its life. For hardwood, avoid dragging heavy furniture and regularly reapply protective finishes as needed. For tile, seal grout lines annually to prevent stains and water damage. I recommend setting a quarterly schedule to inspect your floors for issues and address them early—like fixing minor grout cracks or sanding down high spots that develop over time.
Advancements in floor maintenance technology continue to evolve. Automated cleaning robots equipped with sensors, like the iRobot Braava Jet M6, now offer a hands-free approach to keeping floors spotless. These devices can be programmed to clean regularly, maintaining the surface’s aesthetic appeal and reducing the buildup of debris that can scratch finishes.
In the future, I foresee even smarter maintenance solutions that integrate real-time sensors to monitor moisture, wear, and structural integrity. Such innovations might alert homeowners immediately if a problem arises, allowing for prompt intervention. Staying informed about these trends through resources like the industry research helps you stay ahead in maintaining your flooring investments.
Don’t forget: the key to long-lasting floors is proactive care. Start by investing in a reliable buffer or polisher, and schedule regular inspections and cleaning routines. Taking these steps now will pay off by preserving your floors’ beauty and functionality for decades. Want to make your next maintenance routine more effective? Try incorporating a scheduled deep clean with tools like the Bona Dust-Free system—your floors will thank you!
The Costly Truth About Relying on Shims Alone
My early attempts at leveling floors were quick fixes—shims seemed like the easiest solution when tiny dips appeared. But I soon learned that shims only mask underlying issues, often leading to long-term problems like squeaky, uneven floors or cracked tiles. The real lesson? Invest in proper assessment and correction methods to ensure enduring flatness—your future self will thank you.
What a Deep Dive into Subfloor Secrets Revealed
Using high-tech tools like laser levels and moisture meters transformed my understanding of my floors. These gadgets exposed hidden imperfections and moisture pockets that standard inspections missed. Discovering these issues early allowed me to take targeted action—saving time, money, and disappointment. It’s incredible how much a little scientific precision can improve your flooring results.
Gear Up with Tools That Make a Difference
Choosing the right equipment, such as a reliable self-leveling compound and quality reinforcement materials, can elevate your project from amateur to professional quality. My favorite is the [superior leveling products](https://tiletrendshop.com/precise-floor-leveling-techniques-to-achieve-flawless-surfaces), which provide dependable results and ease of application. Trusting proven tools and techniques turned my uneven floor nightmare into a flat, durable foundation.
Embrace Quality, Not Speed, for Lasting Results
Delayed gratification by taking the time to properly assess, prep, and correct your subfloor pays dividends in the form of flawless finishes and fewer repairs later. Don’t rush through small steps—think of your project as an investment in your home’s durability. Patience and precision today prevent costly fixes tomorrow, making your investment worthwhile.
Fuel Your Passion for Perfect Floors
Your journey to a perfectly level floor is a blend of science, patience, and the right tools. When you commit to thorough preparation and expert-approved techniques, the results are truly satisfying and long-lasting. Keep learning, keep experimenting—your dream floor is within reach!