Ever found yourself mid-project, staring at a wobbly, bouncy tile surface and wondering how it got so out of hand? I remember the lightbulb moment when I stepped onto a freshly tiled floor only to feel that unsettling give under my feet. It was a stark reminder that even the smallest subfloor issues can turn a beautiful tile job into a nightmare. That frustrating experience spurred me to dig deeper into the common pitfalls and, more importantly, how to fix them effectively.
Why Subfloor Reinforcement Matters More Than Ever
In 2026, tile installations are pushing boundaries with larger formats and more ambitious designs. But behind the scenes, your subfloor is often the silent culprit causing tiles to crack, pop, or feel bouncy. Why is this? Well, a weak or poorly prepared subfloor can lead to uneven weight distribution, resulting in those unsightly cracks or a floor that feels more like a trampoline than hard flooring.
Recent studies show that improper subfloor prep is a leading cause of tile failure, with some experts estimating that over 60% of tile issues stem from subfloor inadequacies (source). That’s a staggering number when you think about how much effort and money can be lost on redo projects that could have been prevented with proper reinforcement techniques.
Early on, I made the mistake of ignoring the importance of a solid subfloor, assuming that standard measures would suffice. That oversight cost me time, money, and trust. If you’ve ever faced similar frustrations, you know exactly what I mean. The good news? With the right reinforcement hacks, you can transform your subfloor into a stable, durable foundation for your tile project.
Have you struggled with unstable floors during your tile installs? You’re not alone, but there’s a solution waiting for you ahead.
In the upcoming sections, I’ll share three proven subfloor reinforcement hacks that will help you achieve a flawless, durable tile finish — especially as we roll into 2026’s design trends. Ready to put those bouncy floors behind you? Let’s get started and ensure your next tile project stands the test of time.
.
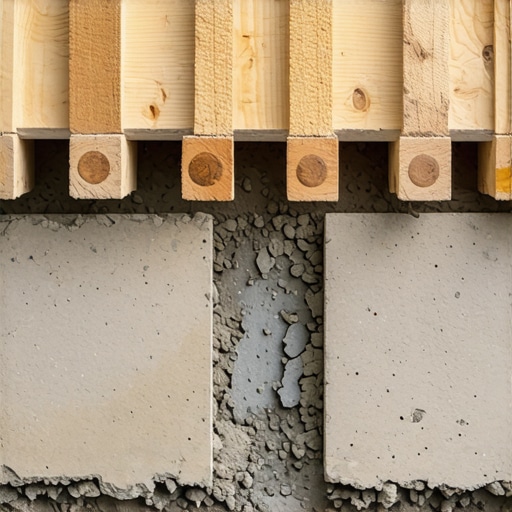
Prepare Your Subfloor Thoroughly
Start by inspecting your existing subfloor for irregularities. Use a long carpenter’s level or a laser level to check for high and low spots. If you notice any dips or uneven areas, mark them clearly. I once skipped this step and missed a significant low spot near a doorway, which caused my tiles to crack over time. To correct this, I applied a self-leveling compound, ensuring a smooth surface. Like pouring pancake batter, it needs to spread evenly without bubbles. After it cured, I tested again, and the difference was immediately noticeable, preventing future issues.
Reinforce Weak Spots with Additional Support
Identify areas that feel spongy or unstable—these are common weak points. Reinforcing these with proper framing or adding additional joists prevents flexing. I once drilled into a corner only to find the joists lacked proper support, which caused tiles over that area to feel bouncy. To fix it, I installed blocking between joists and added a layer of plywood to distribute weight evenly. Think of it as installing braces inside a broken bridge to prevent collapse. This step ensures the subfloor can handle the weight and movement without transmitting stress to the tiles.
Use Quality Underlayment for Stability
Lay down a high-quality underlayment, such as cement backer board, over your reinforced subfloor. Secure it with corrosion-resistant screws, spacing them according to manufacturer instructions. I prefer using a thinset mortar beneath the backer board to avoid any movement. This adds an extra layer of stability and isolates any minor subfloor imperfections. When I installed a 24-inch porcelain tile, this extra step prevented lippage and cracking, providing a perfectly flat surface for the tiles to adhere to. Proper underlayment acts like a buffer, absorbing small movements and maintaining flatness over time.
Control Moisture Before Installation
Test your subfloor’s moisture levels using a moisture meter. Excess moisture can weaken adhesives and cause tiles to lift or crack. I once neglected this during a basement tile job, and within months, grout started cracking due to moisture seeping through. To fix this, I applied a vapor barrier sheet before tiling. Think of it as waterproofing your roof before installing new shingles—it protects your investment from preventable damage. Ensuring the subfloor is dry creates a stable environment, promoting long-lasting adhesion.
Implement Proper Adhesion Techniques
Choose an appropriate thinset mortar suitable for your subfloor and tile type. Mix it to a workable consistency, avoiding overly watery or stiff mixtures. Spread the thinset with a notched trowel, pressing firmly to remove air pockets. I once used a cheap mortar, which led to uneven bonding and loose tiles. Switching to a high-quality product and using the correct trowel notch resulted in a solid, even bed for the tiles. Like laying bricks, proper adhesion starts with the right mortar application—force out the air and ensure contact with the entire surface.
Check Surface Flatness Regularly
Throughout the process, periodically check your surface with a straightedge or level. Small deviations can create lippage, leading to uneven tiles or cracking. During my last project, I kept a 2-meter straightedge nearby; each time I applied a thinset layer, I slid it across to catch imperfections early. If you detect high spots, grind them down carefully with a handheld concrete grinder. The goal is a flat, level surface—think of it as preparing a dance floor for smooth steps. Regular checks save you from bigger problems down the line, ensuring your tiles sit flush and last longer.
Finalize with Proper Grouting and Sealing
Once tiles are set and cured, apply grout evenly, pressing it into joints to fill gaps completely. Use color-matched grout for aesthetics and sealers to prevent moisture ingress. I learned the hard way that neglecting grout sealing led to staining and crack development, especially in humid areas. After sealing, maintain your floor with periodic cleaning and resealing as needed. Proper grouting not only adds to the visual appeal but also supports the adhesive bond, locking everything into place for enduring durability.
When it comes to flooring installation, there’s a wealth of advice floating around, but not all of it holds up under scrutiny. Many professionals and DIY enthusiasts alike get caught up in misconceptions that lead to mistakes and costly rework. Let’s bust some of the most persistent myths that even advanced installers might fall for, so you can avoid common pitfalls and achieve a flawless finish.
One widespread belief is that a perfectly flat subfloor is necessary before you start tiling. While surface flatness is crucial, the reality is that minor imperfections can be compensated for with proper underlayment and adhesive techniques. Relying solely on extensive subfloor leveling can be overkill and unnecessarily increase project costs. Industry experts suggest that understanding acceptable tolerances—such as those outlined in the [ultimate guide to floor leveling](https://tiletrendshop.com/the-ultimate-guide-to-floor-leveling-for-a-perfect-finish)—is more practical than striving for absolute perfection.
Another common misconception centers around moisture testing. Many installers assume that if a subfloor feels dry to the touch, it’s ready for tile. However, underlying moisture can persist and weaken adhesive bonds, leading to tiles lifting or cracking over time. Advanced methods involve using a calibrated moisture meter to detect hidden moisture issues, especially in concrete slabs or basement floors. For in-depth strategies, check out [4 moisture tests that can save your project](https://tiletrendshop.com/4-floor-leveling-scams-to-avoid-before-tiling-2026).
A trap I often see is the assumption that larger tiles require less preparation. It’s tempting to think that big tiles inherently look more luxurious and thus can overlook subfloor preparation, but that couldn’t be further from the truth. Larger tiles are more susceptible to lippage and cracking if the surface isn’t perfectly flat and stable. The added weight amplifies existing imperfections, which is why [specialized leveling systems](https://tiletrendshop.com/stop-tiling-over-dips-3-floor-leveling-secrets-pros-use-in-2026) are essential for this niche. Remember, larger tiles demand even greater attention to your subfloor’s integrity.
What about the notion that any thinset mortar will do, especially with the increase in rapid-setting formulas? The truth is, using the wrong mortar, or applying it improperly, can cause long-term issues like lippage, adhesive failure, and uneven surfaces. Advanced installers opt for products suited to specific tile types and substrate conditions, following manufacturer guidelines meticulously. For insight, see [adhesion hacks for 2026 tile and hardwood](https://tiletrendshop.com/3-adhesion-hacks-for-2026-hardwood-over-concrete-floors).
Finally, don’t underestimate the importance of proper joint spacing and grout application. A common mistake is to neglect expansion joints or under-seal grout lines, which can cause cracking as floors expand and contract. Sophisticated techniques involve planning joints during layout and sealing grout with moisture-resistant products that accommodate slight shifts. For deep dives on maintaining long-lasting grout, visit [hardwood floor care secrets](https://tiletrendshop.com/hardwood-floor-care-secrets-to-longevity-and-shine).
Making these nuanced adjustments can elevate your flooring projects from good to professional-grade. Let’s remember that even experts can believe in myths, which can sabotage our efforts. By challenging assumptions and applying advanced techniques, we can avoid costly mistakes and enjoy stunning, durable floors.
Have you ever fallen into this trap? Let me know in the comments or browse more tips to refine your skills at [expert flooring installation](https://tiletrendshop.com/revamp-your-home-with-expert-flooring-installation-tips).
Keep Your Floors in Top Shape with the Right Tools
Having the proper equipment is half the battle when it comes to maintaining flawless, durable floors. I personally rely on a high-quality laser level, such as the Bosch GSL 2 Professional, for ensuring ongoing flatness. Unlike traditional bubble levels, laser levels project a precise, consistent line across large areas, making it easier to spot and correct any shifts or dips over time. This is especially valuable when monitoring hardwood floors prone to warping or tile installations susceptible to lippage.
Besides a laser level, I use a digital moisture meter, like the Protimeter Surveymaster, to regularly check moisture levels beneath the surface. Moisture imbalance is a sneaky culprit in floor failure — it can cause tiles to crack or hardwood to cup. These tools provide real-time data, enabling me to catch issues early before they turn into costly repairs.
For ongoing cleaning and upkeep, I prefer microfiber mop systems combined with pH-balanced cleaning solutions specifically designed for hardwood or tile. Regular cleaning prevents debris buildup and maintains the integrity of protective finishes. I’ve found that sticking to manufacturer-recommended cleaners preserves floor longevity better than generic alternatives.
When it’s time for refinishing or repairs, I turn to orbital sanders with adjustable grit levels. Using a quality sander, like the Festool ETS EC 150/3, allows for precise feathering on worn spots without damaging the surrounding finish. This hands-on approach prolongs the life of hardwoods and keeps them looking fresh for years.
Where Do Trends Point in the Future?
Looking ahead, I predict smart-tech will become more integrated into flooring maintenance. IoT-enabled sensors embedded in floors could continuously monitor moisture, stress levels, and wear patterns. Imagine receiving alerts on your smartphone when your hardwood is approaching humidity thresholds detrimental to its structure. These innovations will empower homeowners and professionals to address issues proactively, saving time and money while extending flooring lifespan.
How do I maintain my flooring over time?
Consistency is key. Regular inspections using these tools help detect subtle changes early. Incorporate routine cleaning with gentle products, and schedule professional check-ups if you notice irregularities like squeaks, gaps, or warping. For example, if you suspect moisture issues, invest in a moisture meter to verify and consider applying vapor barriers or proper sealing as preventive measures. To deepen your understanding of preventative care, review our hardwood floor care secrets. Don’t overlook the importance of periodic maintenance—installing smart sensors or simply keeping a close eye on your floors can significantly prolong their beauty and function.
![]()