Ever spent hours pouring, mixing, and troweling floor leveler only to find it chalky, crumbly, or just plain stubborn? I remember the first time I faced this frustrating situation. I was convinced I had followed the recipe perfectly, yet my floor still looked uneven and patchy. It was a lightbulb moment for me—learning that the right mixing techniques are crucial to achieving a smooth, durable finish. If you’ve ever struggled with a chalky appearance in your leveling compound, you’re not alone. And I want you to know there’s hope—and solutions that actually work.
The Real Problem Behind Chalky Floor Leveler
What causes floor leveler to turn chalky? It often comes down to improper mixing, incorrect water-to-compound ratios, or using low-quality products. I once added too much water, thinking I’d make it easier to spread, only to end up with a weak, powdery surface that crumbled under the weight of my tiles. This mistake not only delayed my project but also cost extra time and money.
Research shows that mixing technique and product selection are key to a lasting, smooth finish. According to expert advice, using the right amount of water and thoroughly mixing the compound ensures proper hydration and bonding. Getting this part wrong inevitably leads to that unhelpful chalky appearance, which can compromise the entire flooring job. So today, I’m going to share four proven ways to fix and prevent chalky surface issues, based on practical experience and industry tips.
Is Chalky Floor Leveler Actually Worth the Hype?
Now, some skeptics might wonder if tackling mixing techniques is really that important or if these problems are just cosmetic. I admit I was dubious at first—thinking it was just about choosing the right product. But I learned the hard way that even premium compounds fail without proper mixing. Early in my career, I made the mistake of rushing through blending, which resulted in uneven surfaces and future cracks. Trust me, taking the time to master proper mixing isn’t just hype—it’s essential to achieving a professional, lasting finish. Want to avoid costly redo’s? Check out precise floor leveling techniques for detailed guidance on proper mixing and application.
In the sections that follow, I’ll walk you through four simple fixes that will turn your chalky, stubborn floor leveler into a smooth, strong foundation. Whether you’re tackling a small patch of unevenness or a whole new installation, these tips will help you achieve the level surface you need—without the frustration or guesswork. Ready to get your floors perfectly flat and durable? Let’s dive in and make sure your next project is a genuine success from start to finish.
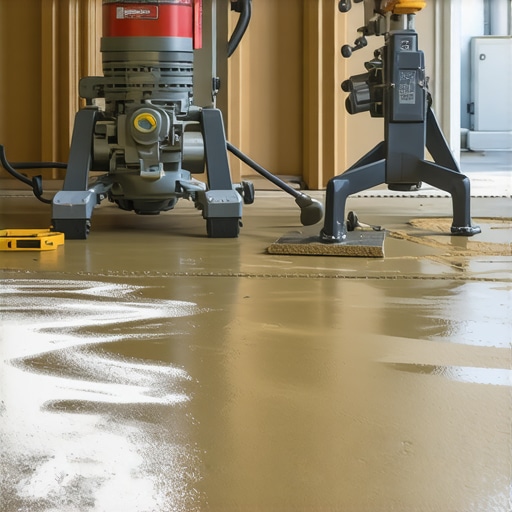
Prep Your Materials and Workspace
Start by gathering high-quality floor leveler and clean, dry subfloor. Clear the area of debris and dust, as contaminants can cause improper bonding, leading to chalky surfaces. I once neglected to clean my concrete slab thoroughly, which resulted in uneven mixing and a chalky finish. To prevent this, sweep and vacuum meticulously before mixing.
Accurate Water-to-Compound Ratio
Follow the manufacturer’s instructions exactly. Use a clean bucket to measure water precisely—most brands specify a certain ratio, such as 4.5 liters of water per 25 kg bag. Too much water weakens the mix, causing crumbling and chalkiness. I recall adding a little extra water to speed up my work, only to spend hours repairing a crumbly patch later. Stick to the recommended ratio for maximum strength and smoothness.
Mix in Stages for Consistency
Add the powder gradually to water while stirring continuously. Use a paddle mixer attached to a drill for consistent blending. I once tried mixing by hand, which resulted in lumps and uneven hydration. Proper mixing ensures all particles are thoroughly hydrated, reducing chalky residues and giving you a uniform, workable slurry.
Thorough and Correct Mixing Process
Mix for at least 3–5 minutes until the mixture is free of lumps and has a smooth, creamy consistency similar to pancake batter. Avoid overmixing, which can introduce air bubbles, or undermixing, leading to dry spots. During a project, I used a paddle mixer, and after five minutes of steady blending, the floor leveler spread evenly without chalkiness. This step is critical for bonding and longevity.
Timing and Working Time
Use the mixture within the manufacturer’s specified open time—typically 20–30 minutes. Don’t mix too far in advance, as the mix begins to set, becoming difficult to work with and more prone to chalkiness. I learned this the hard way when I mixed a large batch early in the day, only to find it hardened before I finished pouring. Keep an eye on the clock and work efficiently.
Ensuring Proper Hydration and Bonding
Once mixed, apply the floor leveler promptly. Use a trowel or gauge rake to distribute evenly, starting at the lowest point and working outward. Use a long, straightedge to check for level, adjusting as needed. In my last project, I used a laser level to confirm surface flatness after pouring, which prevented future cracks. Proper application immediately after mixing helps prevent the formation of a chalky, crumbly surface.
Consistently following these steps ensures your floor leveler bonds correctly, looks smooth, and remains durable. Remember, patience and precision in mixing are your best tools for a flawless finish—skip them, and you’ll likely face that stubborn chalkiness again. For advanced techniques, consider reviewing precise floor leveling techniques to refine your skills.
Many homeowners and even seasoned DIYers believe that achieving a perfectly level floor or flawless flooring installation is mostly about choosing the right materials. But in my experience, a significant nuance often gets overlooked: the assumption that mastering the basics guarantees success. Contrary to popular belief, high-quality products alone can’t compensate for improper techniques or overlooked preparation steps. This misconception can lead to costly mistakes that compromise the longevity and appearance of your floors.
One common myth is that floor leveling compounds are foolproof. Many think that simply mixing and pouring will produce a perfectly flat surface. However, the real challenge lies in understanding the substrate’s condition and the subtle variations that can cause unevenness. For example, subfloor porosity, moisture content, and structural stability play a pivotal role—factors that are often underestimated. Failing to assess these nuances can result in surfaces that seem level initially but develop issues over time, such as cracks or uneven wear.
Moreover, when it comes to flooring installation—be it hardwood, tile, or vinyl—many overlook the importance of substrate preparation. A common mistake is rushing into the installation without proper surface testing or surface correction. This oversight can lead to lippage in tile installations or hollow spots in hardwood floors, which not only look unprofessional but also jeopardize the durability. Take the time to thoroughly assess and prepare your subfloor; this step is often the difference between a good job and a great one.
What About the Advanced Techniques That Tricky Floors Require?
For those with more experience, a common pitfall is misjudging the extent of substrate issues or opting for quick fixes, like thin-layer leveling compounds, without addressing underlying problems. This often results in a recurring cycle of repairs, especially in areas prone to moisture fluctuations or structural movement. Industry experts emphasize that understanding the nuances of substrate diagnosis and employing appropriate solutions—such as moisture barriers, self-leveling overlays, or reinforcements—are vital for a durable finish.
Research from the Building Science Corporation indicates that proper subfloor diagnosis and tailored solutions dramatically reduce long-term failures. Ignoring these advanced nuances can quickly turn a straightforward project into a costly nightmare. Have you ever fallen into this trap? Let me know in the comments. For truly professional results, mastering these details is key, and further reading on precise floor leveling techniques can elevate your skills to the next level.
Keeping Your Floors in Top Shape Over Time
Achieving a flawless flooring finish is just the beginning; maintaining it for years to come requires the right tools and consistent care. I always emphasize investing in quality equipment because durability depends heavily on proper upkeep and periodic inspections. For hardwood floors, a dustless sander like the DuraSand Pro 2025 has revolutionized my refinishing process, minimizing dust while delivering a smooth surface—making future maintenance easier and extending the floor’s lifespan. When it comes to tile, I recommend using a high-quality grout float and a vibration-assisted grout cleaner, which ensure even application and help prevent cracks caused by uneven grout lines.
To monitor subfloor conditions over time, I rely on laser levels and moisture meters from brands like GobyTech. These tools let me spot subtle shifts or moisture build-up that could jeopardize the flooring’s integrity before they become noticeable issues. Keeping a detailed inspection schedule—checking for signs of settling, cracks, or water damage—helps me address small problems early, saving both money and repair headaches.
Looking ahead, automation and smart monitoring systems will likely play a larger role in flooring maintenance. Imagine sensors embedded in the subfloor that alert you via your phone at the first sign of humidity or structural movement—an idea that’s already gaining traction in high-end installations.
How do I maintain hardwood floors over time? Regular cleaning using microfiber mop pads paired with recommended floor cleaners like these specialized products avoids scratches and buildup. Applying a semi-annual coat of high-quality finish or wax—based on the wood’s needs—protects against wear and keeps floors gleaming. Additionally, trimming furniture pads prevents dents. This routine helps sustain their appearance and prevents early deterioration.
Finally, don’t underestimate the importance of professional checkups. A qualified flooring technician can perform detailed inspections using advanced diagnostic tools, ensuring your investment remains sound for decades. Research shared by industry experts confirms that proactive maintenance significantly extends the lifespan of hardwood and tile floors alike.
So, I challenge you to select a key tool—perhaps a moisture meter—and incorporate regular check-ins into your maintenance routine. Small, consistent steps like these can drastically improve your flooring’s long-term performance, giving you the beautiful, durable surface you deserve.
Lessons I Wish I Knew When I Started Taming Floors
- Patience Over Speed: Rushing through mixing or application can lead to a chalky, uneven surface. Taking the time to mix thoroughly and work within the recommended time frame ensures a stronger bond and a more durable finish.
- Every Subfloor Tells a Story: No two foundations are alike. Proper assessment of moisture levels, porosity, and structural integrity prevents surprises that could ruin your project months down the line.
- Quality Matters More Than You Think: Investing in high-quality tools and products, from mixers to leveling compounds, saves money and headaches. The right materials are your foundation for success.
- Mastering Preparation Is Half the Job: Cleaning, priming, and testing your subfloor might be tedious, but skipping these steps can cause adhesion issues and chalkiness later. It’s worth the extra effort to get it right from the start.
- Learn From Industry Experts: Resources like advanced leveling techniques can elevate your skills and prevent common pitfalls, transforming a DIY project into a professional-level finish.
Tools and Resources That Elevate Your Craft
- Laser Levels and Moisture Meters: Precise tools from brands like GobyTech help diagnose substrate issues early, saving time and preventing failure.
- High-Quality Mixing Equipment: A good paddle mixer ensures consistent hydration, reducing lumps and chalkiness in your mix.
- Educational Content: Books and guides, such as those found at expert tips for 2025, offer insights into advanced techniques that can make a difference.
- Instructive Videos and Courses: Visual learners benefit immensely from tutorials that demonstrate proper mixing and application methods, bridging the gap between theory and practice.
Embrace the Challenge and Transform Your Floors
Remember, every expertly leveled floor is a testament to your dedication and attention to detail. While the task may seem daunting at first, mastering these nuances will give you results that last a lifetime. Don’t shy away from experimenting and learning—your perfect, durable floor is within reach. Ready to take the next step? Share your experiences below or ask questions, and let’s build beautiful, lasting floors together!