It was late one evening when I stepped onto my freshly installed hardwood floor, only to feel a strange, unsettling bounce under my feet. My heart sank—despite months of meticulous planning and careful installation, there was a clear dip. That moment made me realize something crucial: in high-traffic areas, even tiny imperfections in floor leveling can become major headaches. Have you ever experienced that sneaky unevenness or a tile that cracks soon after installation? If so, you’re not alone. These issues aren’t just cosmetic; they threaten the durability and safety of your flooring, especially as we head into 2026, where retail spaces are expected to see even more foot traffic and wear. The good news? There are proven fixes that can save your project and your reputation.
Why Floor Leveling Will Be a Game-Changer in 2026 Retail Spaces
Retail environments are demanding. Heavy foot traffic, rolling carts, and constant movement can amplify the tiniest floor imperfections into critical problems. In fact, improper leveling is among the top causes of tile cracking and hardwood cupping in busy commercial settings. According to industry experts, a well-leveled subfloor is essential to prevent long-term damage and costly rework. I learned this lesson early after a costly mistake—rushing through subfloor preparation and ignoring moisture tests. That oversight led to buckling and a wave of complaints from tenants. Trust me, neglecting proper floor leveling techniques can turn your project into a nightmare, especially as 2026 approaches. To avoid these pitfalls, understanding the best fixes now is vital.
Are you tired of dealing with uneven surfaces or worried about costly repairs down the road? If so, keep reading. I’m about to share four high-traffic floor leveling fixes that will ensure your flooring stands up to the demanding retail environment in 2026 and beyond. And the best part? These solutions are straightforward and grounded in real-world experience—so you can confidently tackle your next project with a clear game plan.
Is Floor Leveling Actually Worth the Hype? You Bet It Is
Early in my career, I underestimated how critical proper floor leveling really was. I thought a quick shim or patch would do the trick, but I soon learned that this superficial approach only delayed problems and increased costs. Industry research supports this—proper subfloor preparation can extend the lifespan of your floors by years, saving you money and hassle in the long run. Whether installing tile, hardwood, or vinyl, neglecting detailed leveling steps is a mistake you can’t afford.
Now, let’s explore the proven fixes that can elevate your retail flooring projects in 2026 to a new level of quality and durability. For detailed techniques, check out [Floor Leveling Experts’ Tips](https://tiletrendshop.com/precise-floor-leveling-techniques-to-achieve-flawless-surfaces) to master every step from moisture testing to subfloor correction. Ready to make your next flooring job flawless? Let’s dive in.
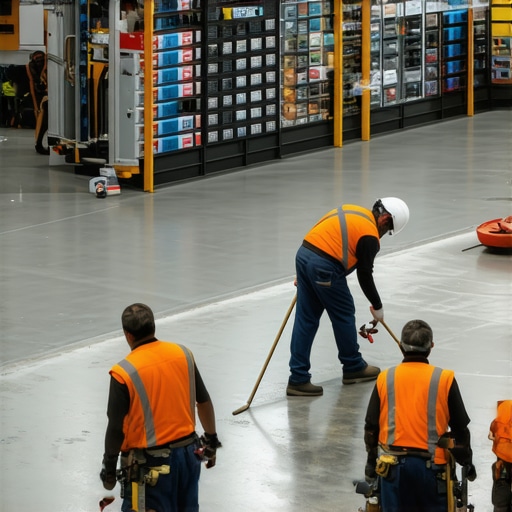
Assessing the Existing Floor Surface Thoroughly
Start by conducting a comprehensive inspection of your subfloor, checking for any dips, humps, or uneven spots—think of it as editing a rough draft before finalizing your flooring. Use a long spirit level or a laser level to identify these imperfections accurately. I once used a 4-foot level across my warehouse’s subfloor and noticed wavy patches that seemed minor but caused tile lippage. Document these areas meticulously; this step sets the foundation for targeted fixes. For detailed assessment methods, visit shortcuts that could sabotage your project.
Preparing the Subfloor for Optimal Leveling
Proper preparation is critical. Remove all debris, loose particles, and existing coatings—imagine smoothing a rough canvas before painting. Use a stiff-bristle brush or vacuum to clear dust and debris, then apply a moisture test if working with concrete or wood, ensuring the substrate’s stability. Moisture issues can cause your leveling compounds to fail, akin to trying to level a wobbly table. For moisture testing specifics, check moisture test techniques.
Applying Self-Leveling Compound with Precision
Now, it’s time to pour and spread your self-leveling compound. Choose a product suited for your material—consider a fast-setting formula if time is tight. Mix thoroughly according to manufacturer instructions, then pour onto the lowest point of the floor, letting gravity do the work. Use a trowel or gauge rake to feather the edges into adjoining sections, avoiding air pockets—think of it as smoothing out a rippling pond surface. I recommend working in sections, especially on large areas, to prevent premature setting. For expert tips on mixing and pouring, visit installation strategies for 2025.
Tiling or Installing Hardwood Over the Corrected Surface
Once your floor is level, proceed with your tile or hardwood installation, but don’t rush. Follow manufacturer guidelines precisely, especially regarding curing times. Use a straightedge to check your surface periodically—even after the compound sets, random dips can appear if the prep wasn’t thorough. For detailed installation steps, explore for lasting results. Ensuring a flat, stable surface minimizes issues like cracks, lippage, or squeaks down the line. Remember, a solid foundation is the cornerstone of durable flooring—like building on solid ground, your project’s success depends on it.While many believe that selecting the right flooring material is the key to a perfect finish, the real challenge often lies in the installation process itself. One widespread myth is that floor leveling can be overlooked in favor of quick fixes, but neglecting this step can lead to cracks, squeaks, and uneven surfaces down the line, especially in high-traffic retail settings where durability is paramount. Advanced professionals know that even tiny dips can cause significant issues over time, making meticulous subfloor assessment and correction critical.
Why Do So Many Installations Fail Even When the Material Is High Quality?
Because the nuance often resides in preparation, not just in the visible surface. A common mistake is assuming that a floor is flat enough when it appears to be visually straight, but subtle imperfections—less than a millimeter—can destabilize the entire flooring system. This is why experienced installers perform detailed tests such as the 4-foot level check or moisture tests, detailed in ultimate guide to floor leveling. Overlooking these nuances is a pitfall that can cost significant time and money. Moreover, choosing inappropriate leveling compounds or applying them improperly can lead to failure, such as delamination or cracking, which experts like those at precise leveling techniques strongly advise against. Remember, the surface you install your flooring on is the foundation of longevity. If you’re interested in mastering these detailed steps, visit design ideas for inspiration and ensure your project begins on the right foot. Making assumptions about flatness or rushing through moisture testing often leads to the ‘oops’ moments later—like cracked tiles or squeaky hardwoods—so invest time in getting this foundational step right. Before starting your next project, consider reviewing your process and consult with experts via contact us for tailored advice. We’ll help you avoid common traps and ensure your flooring stands the test of time. Have you ever fallen into this trap? Let me know in the comments.Maintaining high-quality flooring such as tile and hardwood requires more than just initial installation; it demands the right tools, ongoing care, and strategic upgrades to ensure durability and aesthetic appeal over time. One of the most valuable tools I personally rely on is a digital moisture meter, like the Protimeter Surveymaster, which provides precise readings of moisture levels in concrete and wood substrates. This helps prevent issues like cupping or buckling before they start, saving time and costly repairs. Additionally, a high-quality floor sander equipped with dustless technology enables me to perform refinishing or spot repairs on hardwood floors efficiently, maintaining their shine without the mess. To keep the surface uniformly leveled and prevent future dips or cracks, I recommend using a self-leveling compound such as Ardex K-15, applied meticulously with a gauge rake for consistent thickness—it’s a game-changer for large, high-traffic areas. Looking ahead, I believe advancements in hybrid leveling systems integrating laser guidance will revolutionize installation precision, making the process faster and more foolproof. To ensure your floors stay pristine, regularly using a microfiber mop designed for hardwood surfaces—like Bona Microfiber Floor Mop—removes dust and debris that can cause scratches, preserving that sleek appearance. How do I maintain flooring over time? Consistent inspection with tools like moisture meters and gentle cleaning routines are key. For more detailed techniques on long-term care, visit the hardwood floor care secrets. Concrete subfloor preparation is critical—always test moisture and levelness before and after installation. Don’t hesitate to experiment with these advanced tips; starting with a thorough moisture check can significantly improve your flooring lifespan. If you’re ready to elevate your maintenance game, contact us for personalized advice on tools and processes that match your specific project needs.
The Hardest Lesson I Learned About Floor Leveling and Durability
One of my most impactful lessons was realizing that no matter how high-quality your flooring material is, inadequate floor leveling can sabotage your entire project. I once rushed a subfloor assessment, assuming that visual flatness was enough, only to face cracks and squeaks months later. That experience taught me to prioritize thorough evaluation and not overlook small imperfections—they can be the difference between a long-lasting floor and costly repairs.
Another insight was understanding that moisture testing isn’t just a preliminary step—it’s the foundation of success. Ignoring moisture levels led to buckling in a hardwood floor I installed, which was a costly mistake. Now, I always utilize trusted tools like the moisture meter to ensure perfect conditions before proceeding, reaffirming that proper prep is everything.
Furthermore, I discovered that even the finest self-leveling compounds fail without proper mixing and application. Precision in pouring and feathering the compound is essential. For expert techniques, I recommend reviewing professional leveling strategies to avoid pitfalls and ensure a perfectly flat surface that withstands heavy foot traffic in retail environments.
Lastly, I learned the benefit of continuous education. Keeping updated with resources like ultimate guides and expert tips helped me refine my skills, leading to more durable, visually stunning floors that stand the test of time and traffic.