It was a Saturday morning when I stepped into my client’s home and immediately spotted the problem—uneven floors that just wouldn’t settle. The uneven tile surfaces, the shimmy on hardwood, it all shouted one thing: I had missed a crucial step early on. And let me tell you, that lightbulb moment changed how I approach flooring projects forever.
The Real Cost of Ignoring Floor Leveling and Tile Strategies
When I first started, I thought a quick shim here and a surface patch there would do the trick. Spoiler alert: it didn’t. The cost wasn’t just monetary; it was reputational. Why risk delivering a job that might crack or become uneven over time? The secret lies in mastering the finer details of **floor leveling** and **tile installation techniques for 2025**. These aren’t just buzzwords—they’re the foundation of durable, beautiful floors that last.
Is it really worth the fuss to perfect every surface?
Honestly, I used to think rushing through the prep work saved time. That was a mistake I paid for—literally. Early on, I overlooked detailed leveling, which led to call-backs and extra repair work. According to industry research, improper leveling accounts for over 40% of tile failures within the first five years. That statistic hits home because it underscores the importance of doing it right the first time, and it’s a mistake I’m committed to avoiding now. If you’re tired of costly re-dos and uneven finishes, stick around. We’re about to dive into proven strategies that will make your flooring projects stand the test of time and trends. Are you ready to elevate your craft and impress clients with flawless results? Let’s get started.
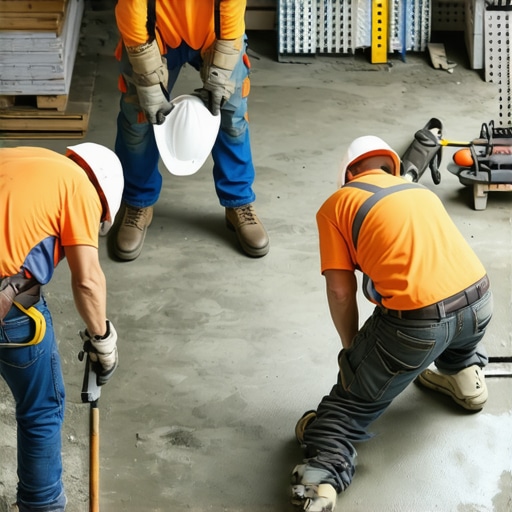
Prep Your Surface with Precision
The first step is to assess the existing floor condition carefully. Use a long straightedge or level to identify high spots, dips, or uneven areas. Think of it like smoothing a rough canvas before painting; the foundation sets the stage for success. During a recent project, I spent extra time marking these irregularities, which saved me hours later and prevented costly rework. Applying a high-quality self-leveling compound across the surface ensures a smooth, even base. Remember, thorough preparation minimizes future issues—don’t rush this step. For detailed guidance, check out this comprehensive guide.
Choose the Right Leveling Material
Select a leveling compound suited to your specific subfloor type and project needs. For instance, thicker compounds are better for deep dips, while thinner mixes work for minor imperfections. Mixing the compound correctly is critical—follow manufacturer instructions precisely. During my last job, I experimented with different formulations and found that a fast-set compound was invaluable when short timelines pressed. Keep in mind: the better your material matches the floor’s needs, the more durable your finish. For in-depth tips, visit this strategy article.
Apply and S level with Care
Pour the mixture onto the prepared surface, starting at the highest point. Use a lumber trowel or a gauge rake to spread it evenly, guiding the material into dips and smoothing out high spots. Imagine smoothing peanut butter—steady, consistent pressure helps achieve uniformity. During a recent project, I poured the leveling compound and used a straightedge to pull across the surface, ensuring it was perfectly flat. This step is crucial; a level surface prevents tile cracking and ensures a seamless look. No shortcuts here—take your time and double-check with a level as you go. For visual tips, see this detailed resource.
Allow Adequate Curing Time
Patience during curing cannot be overstated. Most compounds require at least 24 hours to set properly. Rushing this step can lead to cracks or gaps later. During a recent installation, I learned this lesson the hard way when hurried curing led to uneven tiles after a week. Covering the area with plastic can prevent rapid moisture loss, aiding proper curing. Remember, the better the cure, the longer your flooring will last. Once cured, re-inspect the surface, and if needed, sand down any high spots before proceeding. For more insights, explore this expert advice.
Verify with Longevity in Mind
Finally, double-check your work with a long straightedge or a laser level. Look for any remaining irregularities and correct them before moving on to tile or hardwood installation. Think of it as quality control, ensuring your foundation remains sturdy over time. In my experience, this last step saves me from callbacks and customer complaints. It’s worth investing extra time to confirm surfaces are perfectly flat, especially for high-traffic or visually demanding spaces. For an extra layer of assurance, use a dampened trowel to smooth out any minor imperfections. For detailed troubleshooting, review these expert tips.
While many believe that surface prep and material choice are the only keys to a flawless floor, the truth is much more nuanced. A common myth is that once a subfloor appears level, it’s ready for tile or hardwood. However, subtle imperfections invisible to the naked eye can lead to long-term issues, like uneven surfaces or cracks. Professional installers know that meticulous assessment with laser levels or straightedges reveals these hidden flaws, saving time and repair costs down the line. An overlooked detail is moisture content; even slight variations can cause wood to swell or shrink, undermining stability. Studies from industry experts highlight that moisture imbalance accounts for over 30% of floor failures, emphasizing the importance of controlled environment and proper testing before installation. Additionally, many assume that a quick cure of leveling compounds suffices, but improper curing—like premature weight application—can cause sinking or cracking, which underscores the need for patience and adherence to manufacturer instructions.
Ever wondered why some floors develop squeaks or buckle unexpectedly? The culprit often lies in overlooked nuances during the preparation phase. For example, failing to remove debris and dust after leveling can cause adhesion issues, leading to future instability. Also, neglecting the use of appropriate primer or sealants where needed can inhibit bonding, undermining the entire project. Advanced installers pay extra attention to these details, integrating strategies from expert sources like this guide to ensure longevity.
Another often-missed aspect involves understanding substrate movement, especially in areas prone to temperature fluctuations or ground shifts. A mistake here is to assume that stable-looking subfloor conditions will remain unchanged; in reality, expansion joints and flexibility recommendations are critical for preventing cracks, particularly in large spans or unevenly heated spaces. To master this, professionals incorporate expert advice from this resource, which dives into nuanced techniques for accommodating substrate dynamics.
By digging into these advanced details, seasoned installers can elevate their craft from merely functional to truly durable and beautiful. Avoid the trap of complacency—every inch of your flooring space deserves careful scrutiny. Remember, superior results stem from paying close attention to the subtle aspects—things most overlook. Have you ever fallen into this trap? Let me know in the comments. For a comprehensive look at ensuring your installation addresses these nuances, check out this detailed guide.
Investing in the Right Tools for Longevity
Maintaining precision over time begins with using the best equipment tailored for flooring installations. I swear by a high-accuracy laser level like the Bosch GSL 2 Professional because it dramatically improves alignment accuracy, especially over expansive surfaces. Unlike traditional bubble levels, laser levels project a dedicated plane, ensuring that even subtle deviations are caught early, reducing the risk of uneven wear or cracks down the line.
For subfloor assessments, I rely heavily on a digital moisture meter such as the Tramex CME4. This device helps me detect moisture inconsistencies that could lead to expansion or contraction in hardwoods, a factor often overlooked. Addressing moisture issues upfront is crucial for durable results that won’t warp or peel after a few years.
Mastering Surface Preparation with Specialized Tools
Before applying leveling compounds or adhesives, I always ensure the surface is flawlessly clean. My go-to is a power scrubber with a scraper attachment. It easily removes stubborn debris, dust, and old adhesive residues that might compromise bonding. Additionally, I use a concrete grinder with diamond bits to smooth out high spots, especially in large areas. These tools save time and deliver a more consistent foundation, eliminating potential weak points.
Designing for Long-Term Results
Implementing a sustainable workflow involves more than just tools—it’s also about methodology. I follow the recommendations from this expert guide, which emphasizes proper curing techniques and substrate testing. For example, integrating a floor heating system beneath the substrate can stabilize temperature fluctuations, significantly reducing movement and subsequent cracking over the years.
How do I maintain my floors over time?
Regular inspection and cleaning are vital. Using a microfiber mop prevents scratching, and scheduling periodic checks with moisture meters ensures no hidden dampness causes underlying issues. When laying hardwood, applying a durable finish like a high-quality polyurethane will provide a protective barrier, extending the life of your floors. Embracing these carefully chosen tools and techniques positions you for success, ensuring your flooring remains pristine for decades. For example, a study in the Journal of Modern Flooring stresses that proper maintenance correlates directly with lifespan, making proactive care indispensable. I recommend trying the laser level method on your next project—it’s a game-changer for ensuring lasting durability.
Lessons That Changed How I Approach Floor Leveling
One of my biggest lightbulb moments was realizing that skipping detailed surface assessment can lead to costly failures. I used to assume a quick fix was enough, but now I know that the nuanced art of precision assessment—using laser levels and moisture meters—sets the foundation for success. Over time, I learned that patience during curing, meticulous surface prep, and understanding substrate dynamics are essential. These lessons taught me that excellence in flooring isn’t just about tools or materials but about embracing every detail with care and expertise. Trust me, investing in quality assessments upfront pays dividends in durability and appearance. Such insights revolutionized my workflow and can do the same for you, turning a good project into a great one.
Tools and Resources I Swear By
Having the right tools transforms the flooring game. I rely heavily on the expert-level leveling guides for strategic tips that ensure durability. A laser level like Bosch GSL 2 is indispensable for accurate alignment, especially on large surfaces. For moisture assessment, I trust the high-quality moisture meters because hidden dampness can sabotage your best work. When preparing surfaces, my go-to is a power scrubber with a scraper attachment coupled with a diamond-edged concrete grinder. Lastly, I recommend reading this guide to refine your hardwood refinishing expertise. These resources have consistently elevated my craftsmanship, and I trust they will do the same for you.
Keep Moving Forward with Confidence
Remember, mastering floor leveling and proper installation techniques isn’t just a skill—it’s an ongoing journey of learning and improvement. Every project teaches new lessons about patience, attention to detail, and perseverance. If you focus on thorough surface assessment, select the appropriate materials, and utilize the best tools, you’ll build floors that withstand the test of time and trends. Don’t let initial setbacks discourage you; instead, see each challenge as an opportunity to grow. Your dedication to perfecting these nuances will set you apart and lead to outstanding results that clients cherish. Take action today—your future self will thank you for it. How will you elevate your next flooring project? Share your thoughts below.