Have you ever stepped onto your hardwood floors only to feel that unsettling unevenness beneath your feet? I vividly remember the first time I encountered a warped section in my living room floor. It was a jarring experience that made me realize how vital proper floor leveling truly is. That lightbulb moment pushed me to learn everything I could about achieving a flawless, durable surface that stands the test of time.
Why Proper Floor Leveling Matters More Than You Think
When I initially attempted to install new hardwood floors, I underestimated the importance of a perfectly level subfloor. My early mistake? Ignoring the uneven patches and rushing through the process. The result was a floor that creaked, squeaked, and developed visible dips within just a few months. Turns out, skipping proper leveling can lead to costly repairs down the line. According to flooring experts, an uneven subfloor can cause premature wear and tear, cracking, and even safety hazards. That’s why I now swear by meticulous floor leveling as the foundation of lasting beauty.
Is Floor Leveling Really That Crucial?
Absolutely. I once believed that minor imperfections wouldn’t matter much, but I learned the hard way. An unlevel surface puts extra strain on the flooring materials, leading to cracks and gaps. Plus, it affects the overall appearance — uneven floors just look sloppy. I made a costly mistake early on by trying to save time, but I wish I had known about the precise leveling techniques that professionals use. For a step-by-step approach, I recommend checking out this comprehensive guide.
If you’re facing a similar challenge or just want to ensure your hardwood floors last for decades, understanding the essentials of floor leveling is non-negotiable. Now, let’s dive into the practical tips to level your subfloor like a pro and lay the groundwork for stunning, resilient floors that truly stand the test of time.
Start with a Clear Assessment of Your Subfloor
Before diving into leveling, I recommend inspecting your subfloor thoroughly. During my first attempt, I used a long level and a straightedge to identify dips and high spots. It’s like tuning a guitar string—you need to know the starting point. Mark the uneven areas with chalk or painter’s tape so you can focus your efforts efficiently. This step ensures you don’t waste time on minor imperfections that won’t affect the final result.
Prepare Your Tools and Materials
Gather all necessary supplies: self-leveling compound, primer, a trowel, a mixing bucket, and a squeegee. I learned the importance of reading the manufacturer’s instructions carefully—skipping this led to inconsistent results. For larger areas, a power trowel can save time and produce a smoother surface. Think of this like baking—precise measurements and proper mixing are key to a perfect finish.
Apply Primer for Better Adhesion
Applying primer is crucial to ensure the leveling compound bonds properly. I applied it with a roller, working in sections. Waiting for the primer to dry completely—usually about 30 minutes—prevents bubbles or adhesion issues later. This step reminds me of painting walls; skipping primer can cause adhesion failures that compromise the entire process.
Mix and Pour the Self-Leveling Compound
Mix the compound according to the instructions, aiming for a pancake batter consistency. When pouring, start from the highest point and work towards the lowest, allowing the compound to flow naturally into dips. I found that working quickly is essential, as the compound begins to set within 15-20 minutes. Use a squeegee or trowel to spread it evenly, ensuring a smooth surface. Think of it like smoothing out a sheet of glass—flat and even is the goal.
Ensure Proper Curing and Final Checks
Let the compound cure fully—usually 24 hours—before proceeding with flooring installation. During this time, avoid walking on the surface to prevent indentations or uneven settling. Once cured, I used a straightedge to double-check the levelness; minor adjustments can be made with additional compound if necessary. This meticulous step guarantees your subfloor is ready for the final flooring, saving you from future headaches.
Refine Your Technique with Professional Tips
If you want to elevate your skills, check out this expert guide for advanced tips. Remember, patience and attention to detail are your best allies. Properly leveling your subfloor is the foundation for stunning, durable hardwood floors that last a lifetime.
Many homeowners and even DIY enthusiasts fall into traps when tackling floor leveling, often because of widespread myths or oversimplified advice. Let’s clear the air and dig into some of the most overlooked nuances that can make or break your project’s success.
Why the Myth of Perfect Subfloors Misleads You
One pervasive misconception is that you need a perfectly flat subfloor before starting. In reality, minor imperfections—like a few millimeters of dips—are acceptable and often unavoidable. The key lies in understanding the tolerances specified by experts. According to this comprehensive guide, professional-grade floor leveling doesn’t demand absolute perfection, but rather adherence to specific flatness standards. Over-sanding or over-priming to hide imperfections can cause more harm than good, leading to uneven wear or damage over time.
Beware the Oversimplification of Self-Leveling Compounds
Many assume that pouring self-leveling compound alone guarantees a flawless finish. The reality? Proper surface preparation, including cleaning, priming, and sometimes even mechanical grinding, is crucial. Skipping these steps can trap air bubbles, cause cracking, or result in uneven surfaces. A common mistake is rushing through mixing or pouring without considering ambient temperature and humidity, which can alter the curing process. As highlighted in this expert article, meticulous attention to environmental conditions and proper mixing techniques are vital for durability.
How Advanced Techniques Can Save Your Project
For those aiming for perfection, understanding the importance of layered approaches and advanced tools makes a difference. For example, using a laser level instead of a traditional spirit level can dramatically improve accuracy. Additionally, applying multiple thin layers of leveling compound, rather than a single thick pour, minimizes the risk of cracking and ensures a more uniform surface. The nuance here is understanding the material’s properties—such as its settlement behavior and curing time—which can vary based on climate and substrate. To master these subtleties, I recommend exploring this detailed guide.
Have you ever fallen into this trap? Let me know in the comments. Recognizing these hidden nuances can save you time, money, and frustration, leading to a much better foundation for your floors and, ultimately, a more satisfying finished result.
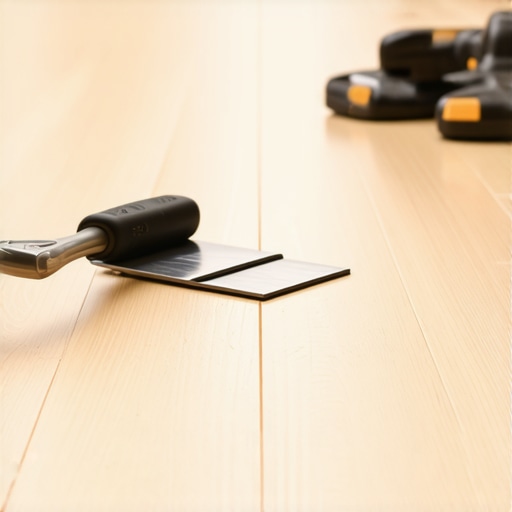
Choosing the Right Equipment for Precision
When I first started leveling floors, I quickly realized that investing in the right tools made all the difference. For instance, I swear by a high-quality laser level like the Bosch GLL 3-80. Its laser beam provides a 360-degree horizontal and vertical line, ensuring my measurements are consistently accurate across large areas. This precision eliminates guesswork and helps achieve a perfectly flat surface, which is fundamental for long-term durability. Using a laser level is the future of professional-grade floor leveling, especially as technology continues to advance and become more affordable.
Why I Trust Mechanical Levelers and Trowels
Manual tools like a sturdy trowel and a long straightedge are indispensable for fine adjustments. My go-to trowel, the Marshalltown Finishing Trowel, helps me smooth out self-leveling compounds and fill in minor dips. I prefer this over cheaper brands because of its durability and ergonomic handle, which reduces fatigue during extended work sessions. Mechanical tools such as an electric power trowel can save hours on large projects by delivering a uniformly smooth finish, but I always ensure to use them cautiously to avoid over-sanding or creating uneven spots. For detailed project planning, I often refer to this comprehensive guide for expert advice.
Maintaining Your Tools for Longevity
Proper maintenance extends the lifespan of your equipment. After each project, I clean my laser level lenses with a soft, lint-free cloth and store it in its protective case to prevent damage. For trowels and other hand tools, I wash off any residual compounds immediately and lightly oil metal parts to prevent rust. Regularly calibrating my laser level ensures it remains accurate, which is critical for long-term projects. Investing in quality storage solutions and routine checkups minimizes downtime and keeps tools performing at their best.
Keeping Results Long-Lasting
To ensure your leveled floor remains durable over time, consider applying a protective sealant or primer designed for your specific subfloor material. I often use a high-quality primer like this primer before pouring leveling compounds, which enhances adhesion and prevents future cracks. Additionally, controlling environmental factors such as humidity and temperature during curing can significantly impact the longevity of your work. I recommend regularly inspecting your floors for signs of settling or shifting, especially in areas prone to moisture or temperature fluctuations.
How Do I Maintain My Floor Leveling Over Time?
Periodic inspections are key. I check for any signs of unevenness or cracks every few years, particularly in high-traffic areas. Minor dips can often be corrected with quick touch-ups using additional leveling compounds, which I apply carefully after cleaning and priming the affected area. For ongoing maintenance, I also recommend using floor-specific cleaning products that won’t degrade your finish or compromise the subfloor. Staying proactive with maintenance ensures your investment continues to look great and performs well for decades.
If you’re serious about long-term success, I suggest trying out a laser level for your next project and making routine tool maintenance a habit. Proper care not only saves money in repairs but also guarantees a beautiful, durable floor that stands the test of time. For detailed strategies on refinishing or repair, explore this expert guide.
Lessons from the Trenches That Transformed My Flooring Journey
- One of the hardest lessons I learned was that rushing the subfloor preparation can cost you dearly later. Taking the time to thoroughly assess and mark uneven spots before pouring leveling compound saved me hours of troubleshooting and rework.
- Another insight was realizing that environmental factors like humidity and temperature are often overlooked but crucial. Waiting for ideal conditions and following the manufacturer’s instructions precisely made the difference between a durable surface and a future headache.
- Finally, I discovered that investing in quality tools, especially laser levels and durable trowels, provided accuracy that no amount of manual effort could match. These tools turned what seemed like a daunting task into a manageable project with professional results.
My Go-To Resources for Floor Leveling Success
- This comprehensive guide on floor leveling offers step-by-step instructions and troubleshooting tips that have become my go-to reference, especially for complex projects.
- High-quality tools like the Bosch GLL 3-80 laser level have revolutionized my measurements, ensuring consistent accuracy across large areas and reducing guesswork.
- Expert articles and tutorials from trusted sources like Tile Trend Shop have provided insights into advanced layering techniques and environmental considerations that elevate my craftsmanship.
- Regular tool maintenance routines keep my equipment performing optimally, saving money and ensuring long-term reliability.
Ignite Your Passion for Perfect Floors
Don’t let fears of uneven surfaces hold you back from creating beautiful, durable floors. With the right knowledge, tools, and patience, you can achieve professional-level results and enjoy the satisfaction of a job well done. Remember, your journey to flawless hardwood floors begins with a solid foundation — start leveling today and transform your space into something truly remarkable.
Have you ever encountered a tricky spot in your floor leveling process? Share your experience below and let’s learn together!