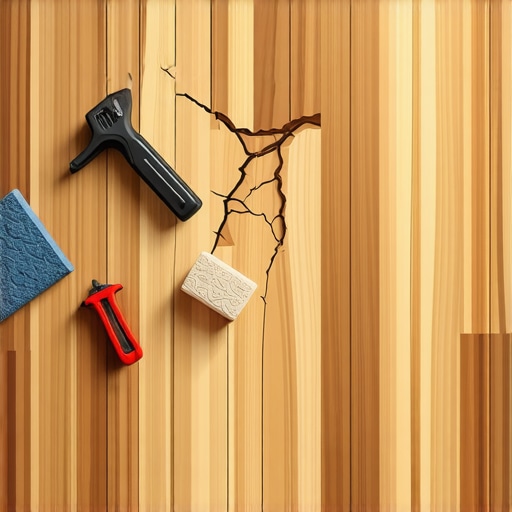
I vividly remember the gut-wrenching moment I discovered my newly installed hardwood floors had warped within just a few months. Despite following all the generic advice I found online, something went terribly wrong. The subtle creaking and slight buckling made me realize I had overlooked critical acclimation steps—mistakes that could easily sabotage your flooring investment.
Why Skipping Proper Acclimation Can Cost You Big Time
If you’re planning to install hardwood floors in 2026, understanding the importance of correct acclimation isn’t just a good idea—it’s essential. Improper acclimation can lead to gaps, buckling, or even cracked tiles, draining your budget and delaying your project. I learned this the hard way after rushing through the initial steps, believing I could fix issues later. That assumption was a costly error, and I don’t want you to make the same mistake.
Is Skipping Acclimation Actually Worth the Hype?
Early on, I thought I could bypass the detailed acclimation process, assuming my environment was stable enough. But the truth is, even small differences in humidity and temperature can cause hardwood to expand or contract. According to industry experts, failure to properly acclimate wood flooring can cause irreversible damage—something that might not become apparent until months later (source). My mistake was thinking my living room was dry enough; turns out, unbalanced moisture levels are silent enemies of hardwood stability. If you’ve faced similar doubts or mishandled acclimation, you’re not alone. But the good news? There’s a straightforward way to avoid these pitfalls and ensure your floors stand the test of time.
In the upcoming sections, I’ll guide you through the five common acclimation mistakes that could ruin your 2026 hardwood floors—and, more importantly, how you can prevent them. From evaluating your subfloor to managing environmental conditions, these practical tips will help you achieve a flawless finish and longevity. Ready to dive into the solutions? Let’s get started!
,
Preparing Your Environment for Hardwood Success
Before laying down your hardwood, you need to create a stable environment. Use a high-quality hygrometer to measure humidity levels—aim for 35-55%. If readings are outside this range, employ humidifiers or dehumidifiers to stabilize the air. This step is critical; I learned the hard way when I skipped this, leading to future buckling. Ensuring consistent moisture levels prevents the wood from expanding or contracting unexpectedly.
Controlling Temperature and Humidity
Set your thermostat to maintain a consistent temperature, ideally between 60-80°F. Avoid extreme swings that cause expansion or shrinkage. For floors with radiant heating systems, consult the manufacturer to adjust the settings properly before installation. When I installed my floors, I integrated a portable humidity controller for a week, which smoothed out any fluctuations. These small measures make a significant difference in the long-term stability of your hardwood.
Allowing Material to Acclimate
Bring the hardwood planks into your home at least 72 hours prior to installation. Stack the boxes in the central area, removing them from packaging but keeping the cartons to allow air circulation. This practice lets the wood adjust to your home’s specific humidity and temperature, reducing the risk of warping later. During my project, I opened all boxes and rotated planks daily, which minimized expansion gaps after installation. Skipping this step can be costly, as unacclimated wood often shrinks or swells after fixation.
Addressing Subfloor Levelness
An uneven subfloor is like a bumpy road—your hardwood won’t sit flush, leading to squeaks and cracks. Use a highly accurate floor leveler—see how to level your subfloor. I once poured a self-leveling compound without checking its curing process; the result was a cracked surface needing rework. Follow manufacturer instructions precisely, and use a straightedge or laser level to spot dips or high spots. For large uneven areas, consider re-surfacing or replacing sections of the subfloor to ensure a smooth base.
Managing Moisture Barriers Effectively
An effective moisture barrier prevents underground dampness from affecting your hardwood. Install a vapor retarder, like a polyethylene sheet, over the slab or ground, especially in basements or crawlspaces. I secured the barrier smoothly without tears, which is crucial—any breach defeats its purpose. Additionally, seal all gaps around the perimeter with compatible sealant. Proper installation of these barriers helps maintain consistent moisture content in the wood and prolongs your floor’s lifespan.
Final Checks Before Installation
Perform a 2-minute test: place a damp cloth on the subfloor for 24 hours; if it collects moisture or shows signs of dampness, address the source before proceeding. Double-check humidity and temperature levels, and confirm acclimation time has been sufficient. Skipping these final checks is a common mistake I made early on, leading to unexpected issues. Patience now pays off—your floors will thank you for it.
By meticulously controlling your environment and properly preparing materials, you set the foundation for a durable, beautiful hardwood floor. For more detailed techniques, consider reviewing guides on floor leveling methods or contacting flooring experts through their help page. Proper acclimation isn’t just a step—it’s the secret to a flawless finish that lasts for decades.
While many believe that following standard procedures guarantees a perfect result, the reality is that seasoned professionals understand the subtle details that can make or break your flooring project. One common misconception is assuming that the type of flooring—be it hardwood or tile—is the main factor in installation success. Actually, the real game-changer lies in mastering floor leveling and understanding environmental nuances that impact long-term durability.
Many homeowners overlook the importance of addressing minor subfloor imperfections, thinking they are negligible. However, even small dips or high spots can cause uneven surfaces, leading to squeaks, cracks, or gaps over time. An often unnoticed detail is the moisture content of the subfloor and flooring materials. Ignoring this can result in expansion, contraction, or warping, especially in fluctuating climates. Industry experts emphasize that thorough prep work, including precise moisture testing and correction—like proper drying or sealing—is crucial (source).
How Does Floor Leveling Influence Longevity Beyond Surface Appearance?
Understanding that impeccable surface finish is only achievable on a perfectly flat and dry base underscores the need to invest in quality leveling methods. Using the right self-leveling compounds or underlayment techniques, such as those detailed in this guide, can prevent costly repairs down the line. My own experiences show that quick fixes like shimming or uneven patching fail quickly, emphasizing the importance of professional-grade solutions.
The myth that every subfloor is inherently flat is a trap; in reality, most existing structures require significant preparation. Skipping this step not only undermines the aesthetic but also risks structural issues. Ensuring your subfloor is level and dry isn’t just a preparatory task—it’s the foundation for all subsequent installation and long-term performance. For those serious about a perfect finish, continuous quality checks during installation and post-installation inspections are essential.
Don’t forget that moisture migration can subtly warp floors over years, especially in basement or crawlspace environments. Effective moisture barriers and proper sealing techniques are critical to prevent this insidious damage. Failing to address these hidden factors leads to expensive replacements or refinishing—far more costly than proper upfront preparation. If you’re contemplating a flooring upgrade in 2026, pay special attention to subfloor assessment and environmental controls.
Building on these insights, consider reviewing advanced floor leveling strategies at this resource to elevate your project standards. Remember, the key isn’t just in choosing the right material but understanding and executing the intricate steps that ensure stability and durability. Have you ever fallen into this trap? Let me know in the comments.
Maintaining Your Floors for Long-Term Success
Once your hardwood or tile floors are installed and properly leveled, ongoing maintenance becomes key to preserving their beauty and functionality. I personally recommend investing in a combination of specialized tools and routine checks to ensure your floors stay in top condition over the years. One tool I find indispensable is a high-precision moisture meter; it helps monitor humidity levels beneath the surface, which is crucial in preventing warping or buckling, especially in fluctuating climates. Regularly checking moisture content aligns with insights from hardwood floor care secrets that emphasize moisture management as a cornerstone of durability.
For cleaning, avoid overly damp mops or harsh chemicals that can degrade finishes and underlying materials. Instead, use microfiber sweepers paired with gentle, pH-neutral cleaners. In addition to these basics, I recommend periodic inspections with a laser level or long straightedge to detect subtle unevenness or settling over time. These tools allow you to catch issues early, enabling targeted repairs before they escalate, which is more cost-effective and less disruptive.
Future Trends in Floor Maintenance and Scaling
Looking ahead, I predict a rise in smart home integrations for flooring maintenance. Sensor-equipped mats or embedded moisture sensors connected to your smartphone could provide real-time alerts if humidity or temperature levels stray outside optimal ranges. This technology will empower homeowners and professionals alike to react promptly, extending the lifespan of flooring materials effortlessly. As these innovations become more accessible, adopting such systems now can give you a head start in maintaining a resilient floor surface well into the future.
How do I keep my floors in prime condition over time?
Effective maintenance begins with routine cleaning, moisture control, and periodic inspections. Incorporate a high-quality moisture meter to regularly assess humidity below the surface, and perform visual checks using a laser level or straightedge to spot unevenness early. Additionally, scheduling professional inspections every few years can help catch developing issues before they affect your flooring’s integrity. To deepen your knowledge, consider exploring the full guide on floor leveling and maintenance techniques. Don’t overlook the importance of preventive care; try implementing a weekly moisture check and see how proactive steps can save costs and extend your gorgeous floors’ lifespan.
Lessons That Changed My Perspective on Flooring Success
- Never underestimate the power of thorough environmental assessment—initially, I rushed the process and paid the price with warped floors and costly repairs. Taking the time upfront to measure humidity and temperature can save months of frustration.
- Choosing quality tools, like a high-precision moisture meter and laser level, isn’t just about accuracy; it’s about peace of mind that your foundation is flawless. Investing in these made my project smoother and more professional-looking.
- Listening to industry experts and real-world experiences truly shifts your approach—tutorials are helpful, but firsthand insights reveal nuances that often go unnoticed, such as subtle moisture shifts that cause future buckling.
- Mindset is everything—view each step as building a legacy of durability. Rushing or cutting corners may seem convenient, but the long-term benefits of patience and precision are well worth the wait.
- Understanding that even tiny imperfections in subfloor leveling can sabotage your entire project encourages meticulousness—prepping is the secret ingredient to a stunning, lasting finish.
My Top Resources for Flooring Mastery
- The Ultimate Floor Leveling Guide: This comprehensive resource became my go-to for mastering perfect leveling techniques; it offers step-by-step instructions that build confidence.
- Precise Techniques for Flawless Surfaces: Practical tips in here helped me troubleshoot uneven spots without expensive rework, saving both time and money.
- Expert Tips for Lasting Hardwood Floors: Insights from seasoned pros gave me the assurance that I was on the right track, especially for tricky environments.
- Connecting with Experts: When uncertainties arose, reaching out through this contact page provided personalized advice, transforming my approach from guesswork to expertise.
Your Path to Flooring Confidence Starts Here
Embarking on a flooring project might seem daunting, but with the right knowledge and tools, you can create a stunning, durable surface that stands the test of time. Remember, every perfect finish begins with understanding the importance of proper preparation and environmental control. Don’t let small missteps turn into costly regrets—your dream floors are within reach. So, are you ready to take your flooring game to the next level and avoid the pitfalls I encountered? Share your plans or questions below, and let’s build beautiful spaces together.
Comments are closed.