It was a quiet Sunday afternoon when I finally noticed a unsettling bounce in my living room floor. At first, I thought it was just my imagination—until I stepped onto the hardwood and felt that telltale give, like the floor wasn’t quite anchored. That moment was a lightbulb moment for me. I realized that a bouncy subfloor isn’t just an annoyance; it can spell trouble for your entire flooring, from cracked tiles to squeaky hardwoods. If you’ve experienced something similar, you’re not alone. Many homeowners face this sneaky problem and wonder whether it’s fixable without tearing everything apart.
Today, I want to share how I tackled my own issue with a game plan that was surprisingly straightforward. We’ll go over three proven fixes that can help stiffen up your subfloor, ensuring your floors stay durable, quiet, and safe for years to come. These aren’t just temporary patches—they’re lasting solutions that can transform your space.
Why Ignoring a Bouncy Floor Is a Bad Idea
A soft or bouncing subfloor can accelerate damage over time. Every step you take doesn’t just feel uncomfortable; it can also lead to increased wear and tear, like tiles cracking or hardwood cupping. Plus, a unstable foundation invites moisture and mold, risking your home’s health and value. Recognizing the signs early can save you from costly repairs down the line. If you’re questioning whether your floor needs attention, consider doing a quick test outlined in our related guide; it can help you determine if a professional assessment is necessary.
Is this frustrating wobble the result of poor installation, age, or subfloor deterioration? Oftentimes, it’s a mix of factors, but fear not—there are practical, effective fixes. I made the mistake early in my renovation journey by assuming a simple layer of flooring would cover underlying issues. That oversight cost me time and money, but it was a valuable lesson. For a detailed look at common flooring mistakes and how to avoid them, check out this comprehensive [guide](https://tiletrendshop.com/flooring-installation-mistakes-to-avoid-for-lasting-results). It’s a great resource to help you steer clear of pitfalls and ensure your upgrades last.
Now, let’s look at three tried-and-true methods to restore stability to your subfloor. Whether you’re a DIY enthusiast or planning to hire a professional, these techniques can make a real difference in how your floors perform and feel. Ready to move from shaky to solid? Keep reading—your perfect, stable floor is within reach.
Assess the Damage Thoroughly
Start by identifying the exact areas where the floor feels bouncy. Place a level on the surface to check for dips or humps. If you notice unevenness, mark those spots with chalk. I remember the first time I did this, I was surprised how extensive the problem was, even beyond where I initially felt the wobble. Pinpointing all weak points prevents future surprises and saves time during repair.
Prepare the Area for Repair
Clear furniture and loose items from the affected zones. Vacuum or sweep to remove debris, which helps in detecting any subtle movement during testing. Wearing gloves and eye protection is advisable when handling tools and materials. In my attempt, I underestimated the mess, but proper preparation made the process smoother and prevented accidents.
Choose the Right Fix Based on Your Situation
Adding Shims for Minor Instability
For localized soft spots, small wedges or shims can be inserted between the joists and subfloor. Drive shims gently to lift the sagging areas. Think of it like infusing a weak link in a chain to distribute weight evenly. This method worked well in my living room, restoring firmness without major disruption.
Sistering Joists for Structural Weakness
If the problem stems from deteriorated joists, sistering involves attaching new, solid joists alongside the existing ones using heavy-duty screws and brackets. This strengthens the framework beneath the floor. I watched a tutorial on hardwood floor leveling strategies, which clarified how important strong support is for longevity. In my experience, this is more labor-intensive but offers long-term stability.
Installing a Self-Leveling Compound
For uneven subfloors, liquid self-leveling compounds create a smooth surface suitable for tile or hardwood. Mix the compound as per manufacturer instructions, then pour and spread evenly with a trowel. Imagine pouring pancake batter — it flows to fill all gaps and creates a flat canvas. I applied this in my bathroom, following floor leveling guides. The result was a flawless foundation that prevented tiles from cracking.
Secure and Reinforce the Floor
Once the primary fixes are in place, reinforce the subfloor with construction adhesive between layers or screws spaced every 6-8 inches to prevent future squeaks and movement. Use a power drill to drive screws at a slight angle, ensuring a tight fit. During my project, I noticed that re-tightening screws periodically kept the floor feeling solid over time. This step mimics tightening a loose screw on furniture to restore firmness.
Finish with Proper Flooring Installation
After stabilizing the subfloor, proceed with your flooring installation. Precise techniques prevent new problems. For tiles, ensure the surface is perfectly flat; for hardwood, acclimate the planks and use appropriate fastening methods. For expert advice, check out flooring installation tips that guarantee durability. My experience confirms that a stable subfloor leads to a pristine, lasting finish.
Many homeowners believe that following the basic steps is enough for perfect tile and flooring installations, but in reality, there’s a lot more beneath the surface that can trip you up. One widespread misconception is that achieving a level floor is just about chipping away at high spots; however, the truth is that hidden subfloor issues like moisture or subtle dips can compromise the entire project. So, instead of just eyeballing the surface, investing in comprehensive testing—such as moisture and flatness assessments—can make all the difference. I learned this the hard way when I overlooked moisture levels, leading to cracked grout later on. As noted by industry experts, neglecting these details can cause long-term failures, making your investment less valuable.
Contrary to popular belief, tile and hardwood floors don’t merely require a flat surface—they demand a structurally sound base that can handle everyday stresses. Common mistakes include rushing the preparation phase or using ill-suited leveling compounds, which can create a false sense of security. For example, self-leveling compounds are excellent tools but only effective if the subfloor is free of moisture and properly primed. This is why I suggest reviewing detailed guides, such as the ultimate floor leveling guide, to avoid costly redo’s.
Why do many installers overlook the importance of proper subfloor assessment?
This question is critical for advanced readers because neglecting this step often results in lippage, tile cracking, or squeaky floors years down the line. Expert opinions, including those from flooring pros, emphasize that a perfect finish stems from a meticulous evaluation of subfloor integrity, moisture content, and flatness, not just the visible surface. Inaccurate assessments can lead to issues like tile lippage, which is not merely aesthetic but can cause safety hazards as discussed by professionals.
Another common myth is that expensive materials will automatically fix foundation problems; however, even premium tiles or hardwoods won’t compensate for a poorly prepared base. Instead, mastering subtle nuances—such as the correct application of leveling compounds and proper joint spacing—is essential. For nuanced, high-quality results, it’s worth consulting specialized resources like expert installation strategies.
Remember, the devil is in the details. Taking the time to conduct thorough assessments, understanding the limitations of your materials, and applying expert techniques can dramatically extend the lifespan of your floors. So, before you lay that first tile or hardwood plank, ask yourself: Have I evaluated every hidden aspect of my subfloor? If not, it’s time for a closer inspection.
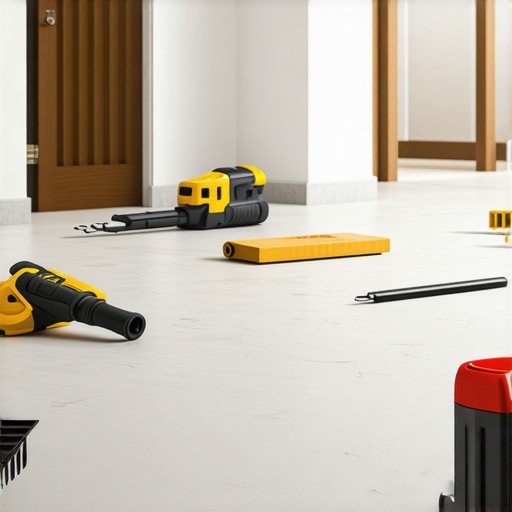
Have you ever fallen into this trap? Let me know in the comments.Maintaining your tile, hardwood, or level subflooring requires the right equipment and consistent care. Personally, I rely on a precise laser level, such as the Bosch GLL 3-330CG, which ensures that every surface is perfectly flat before installation or after any repairs. This tool provides accurate readings over large areas, saving me time and preventing future problems like tile lippage or squeaky floors. Additionally, I always keep a high-quality moisture meter, like the Tramex MM5, to test the subfloor for excess moisture, a critical step highlighted in this guide. Moisture issues are often overlooked but can cause significant damage over time, so regular testing helps maintain a healthy environment for your floors.
For general upkeep, I use a microfiber mop and a pH-neutral cleaner designed explicitly for hardwood or tiles. Routine cleaning prevents dirt buildup, which can scratch surfaces or embed into grout lines, leading to staining or deterioration. In the future, I predict that smart tools—like connected moisture sensors and app-guided leveling systems—will significantly streamline maintenance processes, making it easier for homeowners to catch issues early.
How do I keep my floors in good shape over time? Regular inspections are key. I recommend setting reminders to check for signs of unevenness, cracks, or squeaks every six months. When you detect early troubles, addressing them promptly can extend the lifespan of your investment. For example, if you notice some tile lippage developing, using a self-leveling compound from this detailed guide can help bring the surface back to perfect flatness.
One advanced tip I swear by is applying a dehumidifier in spaces prone to humidity fluctuations, especially basements or bathrooms. This simple step prevents moisture buildup beneath flooring, which can cause expansion, contraction, and eventual buckling. For long-term results, combining proper equipment with consistent maintenance routines is crucial. So, I encourage you to invest in a reliable laser level and moisture meter tonight—these tools can dramatically improve your ability to maintain flawless, durable floors over the years. To deepen your understanding, take a look at this resource for detailed maintenance and repair strategies.
The Hardest Lesson I Learned About tile,floor leveling,flooring installation,hardwood floors
The biggest mistake I made was rushing through the assessment phase. I thought I could spot unevenness visually and move on, but hidden issues like moisture and subtle dips only revealed themselves later, causing costly repairs. Now I know thorough testing—using tools like a laser level and moisture meter—is the cornerstone of a successful flooring project.
How Overconfidence Can Sabotage Your Flooring Goals
I used to believe that applying a leveling compound would fix everything, but I overlooked the importance of pre-installation prep. Proper priming and moisture control are vital; skipping these steps led to grout and tile cracks down the line. Learning from this, I now prioritize proper subfloor diagnostics before pouring or installing.
The Value of a Solid Foundation in Flooring
It may sound obvious, but investing in quality tools and expert resources truly changed my results. My trusty laser level and moisture tester, recommended by seasoned pros, saved me weeks of frustration by catching issues early. For anyone tackling similar projects, I highly suggest equipping yourself with these essentials, which are invaluable for long-lasting results.
Curated Tips for Better Floor Outcomes
Beyond tools, I found that following guides like this comprehensive leveling guide helped me avoid common pitfalls. Also, consulting trusted sources on flooring installation strategies fuels confidence and competence. Remember, knowledge truly is power in home improvement.
Embrace the Learning Curve and Take Action
Building a durable, stable floor isn’t instant—it’s a journey of patience and continuous learning. My advice? Start small, educate yourself with reputable resources, and don’t hesitate to invest in quality tools. Your floors, your home’s foundation, deserve that effort. With the right mindset and equipment, you can achieve professional-level results and enjoy a truly solid surface for years to come.