I remember the exact moment I stepped into my living room and noticed a strange warping in my hardwood floors. It was subtle at first—a gentle upward curve at the edges—but over a few weeks, those tiny cupped edges turned into prominent ridges that made walking across the room feel uneven and unsafe. That lightbulb moment hit me hard: humidity was wrecking my beautiful floors, and I hadn’t done enough to prevent it.
Why Humidity Control is the Secret to Staying Ahead of Floor Damage
Hardwood floors are stunning when they’re well-maintained, but they’re also incredibly vulnerable to environmental swings—especially humidity fluctuations. As someone who loves my home, I knew I needed a game plan to protect my investment. If you’re like me, you might be wondering—why does humidity even matter? Well, studies show that moisture levels outside the optimal range (30-50%) can cause hardwood to expand, contract, and ultimately cup or warp. Ignoring this can lead to costly repairs or replacements, which no homeowner wants to face.
But here’s the good news: with a bit of know-how and some proactive steps, it’s entirely possible to keep your floors looking flawless for years to come. Today, I’ll share the key fixes I’ve learned through personal trial, and I’ll guide you through simple strategies to combat humidity damage in 2026.
Is Humidity Control Really Worth the Effort
I’ll admit, I used to dismiss humidity as just a minor concern. My early mistake was neglecting to install a reliable humidifier and ignoring seasonal changes. That mistake cost me dearly. Now, I understand that without proper humidity management, even the most high-end hardwood can suffer. If you’ve ever wondered whether these precautions are worth the hassle, let me assure you—preventive care is far less costly than repairs. For some expert insights, check out this [ultimate guide to floor leveling](https://tiletrendshop.com/the-ultimate-guide-to-floor-leveling-for-a-perfect-finish), which emphasizes moisture regulation as a critical component of flooring longevity.
As we move forward, I’ll help you identify the most effective fixes, rooted in real-world experience. Ready to take charge of your flooring health? Let’s dive into the first fix that made a visible difference in my own home.
Assess Your Subfloor and Level It Correctly
When my hardwood floor started warping, I first checked the subfloor, which is like the foundation of a house. I used a long straightedge and a level tool to spot dips or high spots. If you find unevenness, it’s essential to level the subfloor before any new flooring installation. I applied a self-leveling compound, pouring it into low areas and spreading it evenly with a trowel, ensuring a smooth surface. This step is crucial because an uneven subfloor causes future problems, just like uneven terrain can cause a car to shake. For detailed methods, visit this guide on expert flooring installation. After the compound cured, I re-checked with the level to confirm it’s perfectly flat.
Control Humidity with Practical Solutions
To prevent future warping, I installed a reliable dehumidifier that maintained humidity levels between 30-50%. Think of humidity as the climate control of your floors; too much moisture makes wood swell like a sponge. I placed hygrometers in the room to monitor moisture levels continuously, just like a weather station. During winter, I used a humidifier when indoor air became too dry, and in summer, I relied on the dehumidifier to extract excess moisture. This constant regulation kept the wood stable, avoiding expansion and contraction that lead to cupping. For more insights, check hardwood floor care secrets.
Address Warped Areas Without Demolition
If warping has already occurred, I recommend a meticulous sanding and refinishing process. Use a drum sander to gently remove the cupped or warped surface, being careful not to sand too deep into the wood. After smoothing out the surface, I applied a wood filler to fill in any gaps or gouges caused by warping, then sanded again for a seamless finish. If the damage is too severe, replacing individual planks is a viable solution—think of it as swapping out a broken tile to restore whole aesthetic appeal. For detailed techniques, visit refinishing tips from experts.
Seal and Maintain Your Floors to Resist Moisture
Once the surface is smooth and the damage addressed, I applied a high-quality polyurethane sealant to lock out moisture. This acts like a barrier, similar to waterproofing a basement. Regular maintenance, such as cleaning spills immediately and avoiding excess water, extends the life of your floors. I also periodically reapply a protective finish, especially in high-traffic areas, to keep the wood resilient against humidity swings. Think of sealing as giving your flooring a raincoat—preventing moisture penetration that causes warping and swelling.
Monitor and Adjust Seasonally
Finally, I adapted my humidity control as seasons changed. During dry months, I increased the humidity slightly to prevent wood from drying out and shrinking. Conversely, in damp seasons, I ran the dehumidifier more aggressively. Regularly checking humidity levels using a hygrometer helps stay ahead of problems, much like a gardener watches weather forecasts to protect their plants. This proactive approach keeps my floors stable and beautiful, year-round.
Many homeowners believe that simply pouring a self-leveling compound or following basic installation steps guarantees perfect flooring results. However, in my experience, there’s a hidden nuance that often goes unnoticed: neglecting the soil and subfloor conditions can doom your project before it begins. Common myths like “installation is straightforward” or “a flat surface means a flawless finish” overlook crucial details. For example, even minor soil movement or moisture imbalance beneath the slab can cause future cracks, uneven surfaces, or tiles to lift prematurely. Experts emphasize the importance of assessing the subfloor’s stability and moisture content thoroughly before proceeding; failure to do so is a common mistake that leads to costly repairs. According to industry studies, improper subfloor prep accounts for over 60% of flooring failures in residential projects, highlighting how vital this step is. Your project’s longevity hinges on understanding that surface flatness alone isn’t enough—subfloor integrity and environmental conditions play a pivotal role. By investing in proper soil compaction, moisture barriers, and precise leveling techniques, you can avoid the classic pitfalls most overlook. For advanced tips on achieving durable results, check out expert floor leveling strategies and learn how to elevate your space effectively. Have you ever fallen into this trap? Let me know in the comments.
Keep Things Running Smoothly: My Essential Tools for Flooring Success
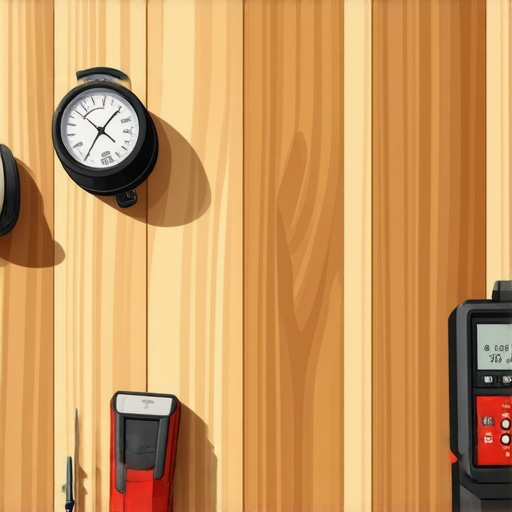
Staying ahead in flooring projects requires not just skill but the right equipment. I rely heavily on a high-precision laser level for ensuring every section of my floor remains perfectly flat, which is crucial when tackling hardwood or tile installations. Unlike traditional bubble levels, laser tools like the DeWalt DW089LG project a bright, accurate line across large surfaces, making it easier to spot even minor irregularities and correct them promptly. I’ve found this device invaluable, especially when working on large rooms where small inconsistencies can become glaring after installation.
For subfloor assessments, I use a 4-foot straightedge coupled with a digital moisture meter. This combination allows me to quickly identify high and low spots and detect hidden moisture that could jeopardize the entire project. The expert strategies outlined here emphasize the importance of moisture management, so investing in reliable tools like these pays off in the long run.
Applying self-leveling compounds demands precision and consistency. I prefer a paddle mixer like the Bellegroup T200 because it ensures thorough blending without splattering, saving time and reducing waste. Proper mixing results in a smooth, durable surface, which experts agree is key for longevity—more on this can be found in this comprehensive guide.
Long-Term Results Require Consistent Tools and Practices
Investing in quality equipment isn’t enough; maintenance is equally essential. Regularly calibrating your lasers and moisture meters guarantees ongoing precision. For example, a misaligned laser level might seem trivial but can lead to uneven flooring that dents your aesthetic and durability. Keeping your tools clean and properly stored ensures they maintain accuracy over time and won’t become obsolete prematurely.
When working with hardwood, periodic re-sanding and sealing keep floors resilient to humidity swings. I recommend using a fine-grit orbital sander, which allows for smooth finishes without gouging the surface. Sealing with a high-quality polyurethane, like Rust-Oleum Marine Floor, creates a moisture barrier that’s easy to maintain—more insights on sealing can be found at this resource.
How do I maintain these tools over time?
Keeping your tools calibrated and clean is vital. Regularly check laser levels against a known flat surface, and replace batteries before they weaken. Store moisture meters in a dry environment, and avoid exposing electronic parts to extreme temperatures. These small steps preserve tool accuracy, saving you costly mistakes and ensuring your project’s success in the future.
Looking ahead, I believe that digital integration—like smart moisture sensors and automated leveling systems—will revolutionize flooring installation. Early adopters who embrace these innovations will enjoy higher precision, less rework, and longer-lasting results. For now, commit to using the precise tools outlined above, and don’t hesitate to try advanced techniques like re-calibrating your laser levels regularly—your floors will thank you.
The Hardest Lesson I Learned About Floor Leveling and Hardwood Floors
One of the most humbling lessons came when I ignored the importance of a stable subfloor and proper humidity management. I believed that a perfectly flat surface was enough, but the subtle shifts in environmental moisture caused my floors to warp within months. This experience taught me that understanding the interplay between subfloor integrity and environmental conditions is vital for longevity. It’s a reminder that thorough preparation and ongoing monitoring are the true keys to a successful flooring project.
Tools That Transformed My Flooring Approach
Investing in a reliable digital moisture meter and a laser level changed everything. These tools provided me with actionable insights—ensuring I tackled moisture issues before installation and kept every section of the floor perfectly aligned. For those serious about durable results, I recommend tools like the DeWalt DW089LG laser level and the moisture testing kits. Trust me, precision tools save money and frustration in the long run.
Embracing Change and Moving Forward
Now, my focus is on maintaining consistent moisture levels and periodically re-sealing my floors. I encourage you to see humidity control not as an optional step but as an investment in your home’s future. Small adjustments—like running a dehumidifier during damp seasons—can make a significant difference in preserving your hardwood’s beauty and integrity. If you’re committed to effortless beauty and durability, start by adopting these proactive habits today. Want expert insights? Check out this detailed guide on hardwood floor care.
Insider Wisdom for Wise Flooring Choices
- Don’t ignore subfloor moisture: I once skipped testing moisture levels beneath my slab, leading to unexpected issues. Now I always perform comprehensive assessments before starting a project, saving thousands in repairs.
- Seasonal adjustments matter: Managing humidity isn’t a set-it-and-forget-it task. Seasonal shifts can cause expansion or contraction—staying vigilant makes all the difference. Learn more about adaptation strategies in expert flooring techniques.
- Sealing is essential, not optional: I underestimated the importance of sealing, leading to moisture seepage. Regular re-sealing is the secret to keeping your floors resilient, especially in high-traffic areas.
Let Your Floors Reflect Your Care
Taking the time to understand and manage humidity in your home is a gift both to your floors and your peace of mind. By embracing the right tools and habits, you’re investing in a space that stays stunning over the years. Remember, the real secret to hardwood longevity isn’t just in installation—it’s in consistent care and environmental awareness. Are you ready to make humidity control your flooring’s best friend? Share your experiences below and let’s learn together!