
It always happens in the dead of night. You are creeping toward the kitchen for a quiet glass of water, trying your absolute best not to wake the kids or the dog. You take one careful step right into the center of the hallway, and—CREAK!—it sounds like a wooden ship snapping in a storm. For years, my own hallway had this exact high-pitched, agonizing squeak right in the high-traffic zone. Every single time someone stepped on it, my chest tightened. I tried ignoring it, but that squeak was a daily reminder of a job left unfinished. I knew I had to find a way to silence it without ripping up my beautiful, expensive finished planks. This isn’t just about noise; it is about reclaiming the peace and quiet in your own home. Today, I am going to share the exact, non-invasive methods that actually work to silence those annoying floor noises for good, saving you from a costly and unnecessary demolition.
Why Do Finished Floors Start Squeaking in the First Place?
Before we grab our tools, we need to understand what is actually causing that racket under your feet. A squeak is almost never the wood itself crying out. Instead, it is the sound of friction. Over time, wood expands and contracts with the changing seasons. When this happens, the subfloor can slightly pull away from the joists, or the finished floorboards can start rubbing against each other or against the shafts of loose, old nails. I learned this the hard way during an early project when I tried to fix a squeak by simply dumping tons of baby powder into the seams. It was a messy, temporary band-aid that did absolutely nothing to address the structural movement underneath. The real culprit is movement, and to silence the noise, we must stop the wood from shifting. If you are dealing with broader structural movement, you might also find that your new floor is squeaking near the heat vents due to localized temperature changes. According to the National Wood Flooring Association, wood is a hygroscopic material, meaning it constantly absorbs and releases moisture from the surrounding environment, which is the primary driver behind the physical shifting that causes these annoying squeaks. When those boards rub together under the weight of your step, you get that classic, sharp protest.
Is fixing a squeak from above actually going to ruin my finished floor?
This is the number one fear I hear from homeowners, and honestly, it is a very valid worry. Nobody wants to drive a massive, ugly screw straight through a gorgeous, satin-finished oak plank. Early in my DIY journey, I made the mistake of using standard finish nails on a squeak, which immediately bent, scarred the wood, and popped back up a week later. It looked terrible and solved nothing. But here is the good news: you do not have to ruin your floor. With specialized breakaway screws designed specifically for finished wood, or by utilizing clever bracing techniques from underneath, you can achieve a completely invisible fix. If you have access to a basement or crawlspace below the noisy spot, you can use simple adjustments like the shim trick for fixing a bouncy plywood subfloor to stop the vertical movement without ever touching the finished surface from above. Have you ever tried to fix a noisy floorboard only to make the squeak worse or scar your wood? Drop a comment below and let me know—I have been there, and we can troubleshoot it together. Let us dive into the actual step-by-step methods to get your quiet home back.
Locating and Fixing the Squeak From Below
If you have access to a basement or crawlspace beneath your noisy floorboards, you are in luck. This is the absolute best way to silence the noise because you can tackle the problem directly without touching your finished floor surface. I remember a particularly stubborn hallway floor in my old house where a joist had warped just enough to create a gap. Every time we stepped on that spot, the floorboard sagged and creaked. I solved it by having my brother walk slowly above while I stood below with a flashlight, tracking down the exact spot where the plywood subfloor rubbed against the wood joist. Once you pinpoint the movement, you can permanently secure the wood using the right hardware. For general structural support, you might want to look into the plywood sandwich trick for fixing bouncy floor joists to stop the vertical movement.
Driving Screws Upward Safely
To fix the issue from underneath, use short wood screws to pull the subfloor tight against the finished wood planks. Be absolutely certain your screws are not long enough to pierce through the top of your beautiful finished floorboards. I always measure the combined thickness of my subfloor and finished planks first, then select a screw that is at least a quarter-inch shorter than that total thickness. You want to drive the screws through the subfloor from underneath directly into the bottom of the squeaking finished board. As the screw threads catch, they pull the two layers tightly together, erasing the tiny air pocket that allowed the wood to slide and squeak in the first place.
The Wood Shim Method for Minor Gaps
If you notice a small gap between a joist and the subfloor, do not try to pull the joist up. Instead, gently tap a thin wooden shim coated in wood glue right into the gap. Do not hammer it in with brute force, or you will actually lift the subfloor and create a hump in your finished floor. Just snug it in there to act as a solid wedge. I once rushed this on a job and hammered a shim so hard it caused a noticeable bump in the hallway above, which required a lot of extra sanding work later. Tap it gently, let the glue dry, and the shifting will stop.
Quiet Your Floors From Above Without Leaving a Trace
When you do not have basement access, you must work from the top down. This is where many homeowners hesitate because they fear damaging their beautiful flooring. But there is a smart, reliable way to secure your boards invisibly from above. If you are preparing a floor for a larger project or need to ensure your surface is perfectly flat before any major flooring installation, addressing these loose spots early is critical to your success.
Using Specialized Breakaway Screws
The secret weapon for fixing squeaks from above is a specialized breakaway screw kit. These screws have a unique design where the head of the screw automatically snaps off just below the surface of the wood once it reaches a certain depth. You drill a tiny pilot hole directly through your finished floorboard and into the joist below, insert the screw through a plastic alignment guide, and drive it down. The screw snaps clean, leaving the threaded shaft holding the floorboard tight to the joist while leaving only a tiny, pin-sized hole on the surface. You can easily fill this small hole with a bit of matching wood putty, making the repair completely invisible to the naked eye. This technique is incredibly helpful to master before you begin any major projects like hardwood floor refinishing, as it ensures a completely stable, quiet foundation before you sand and seal.
Applying Lubricants to Stop Board Friction
If the squeak is caused by two adjacent floorboards rubbing together rather than a loose subfloor, you can often solve it without screws. Applying a dry lubricant like powdered graphite or talcum powder directly into the joints between the noisy planks can work wonders. Simply sprinkle the powder over the squeaky area, sweep it into the cracks with a soft brush, and walk over the boards to help the lubricant settle deep into the seams. Wipe away any excess powder on the surface to prevent slipping. This reduces the friction between the boards, instantly silencing those minor, high-pitched floorboard rubs.
The Subfloor Delusion Most Homeowners Fall For
Most DIY manuals and well-meaning forum experts will tell you that a squeaking floor is simply a cosmetic annoyance caused by dry wood. They suggest dumping gallons of baby powder, cornstarch, or WD-40 into the seams. In my experience, this is a massive mistake that only creates a sticky, hard-to-clean residue. The truth is that squeaks are structural warning signs. If you ignore the underlying movement, you are simply masking a symptom. Even worse, many believe that adding more fasteners from above will always solve the problem. In reality, over-fastening a floorboard without locating the joist can split the wood or create new pivot points for friction, actually multiplying the noise. A study by the Forest Products Laboratory highlights that wood-frame floor systems must be evaluated for deflection and fastener withdrawal resistance to truly cure noise issues. If you do not address the root subfloor movement, any quick fix will fail within a single season change.
Why does your floor keep squeaking even after you anchored it?
This is the ultimate frustration for many homeowners: you followed the instructions, drove the screws, and yet the exact same spot still protests when you step on it. The hidden nuance lies in the gap between the subfloor and the joist. If a joist has bowed downward, driving a screw straight through the top can pull the subfloor down into an unnatural curve, creating tension. When you walk over it, the boards rub against the screw shaft itself, creating a high-pitched metallic creak. This is why you must check for voids first. If you are preparing a flat surface for a larger project, neglecting this step can ruin your entire foundation. For instance, failing to prep correctly is the primary reason why your self-leveler is pulling away from the concrete or subfloor in adjacent rooms, as unaddressed structural movement eventually cracks the self-leveling underlayment. Always ensure the subfloor is structurally stable before attempting to level or finish the surface. Have you ever fallen into this trap and made a squeak worse by over-securing it? Let me know in the comments below!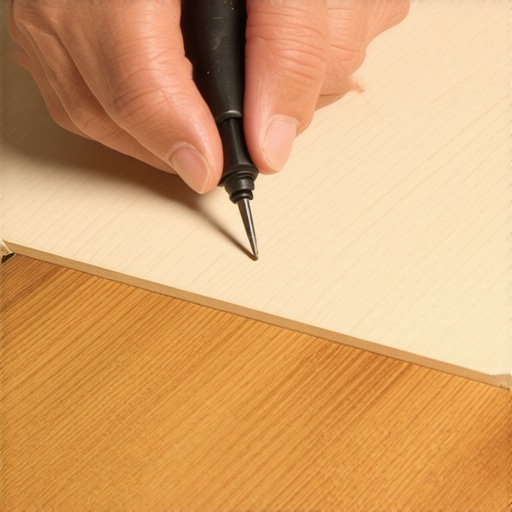
The Expansion Gap Trap in Modern Installations
When dealing with engineered wood or floating floors, people often mistake a localized squeak for a loose subfloor when it is actually a tension squeeze. Floating floors require a strict expansion gap around the perimeter of the room. If the installer skipped this step, the floor expands in humid weather, presses hard against the drywall, and buckles slightly. When you step on it, the entire locked system rubs together under immense pressure. If you are trying to find where the tension is building up, using the quarter trick for checking expansion gaps in luxury vinyl floors is an incredibly simple way to diagnose the issue. Ensuring your floors have room to breathe is just as critical as any fastening method, saving you from having to pull up your beautiful work later.
Essential Tools for Restoring Peace to Your Floors
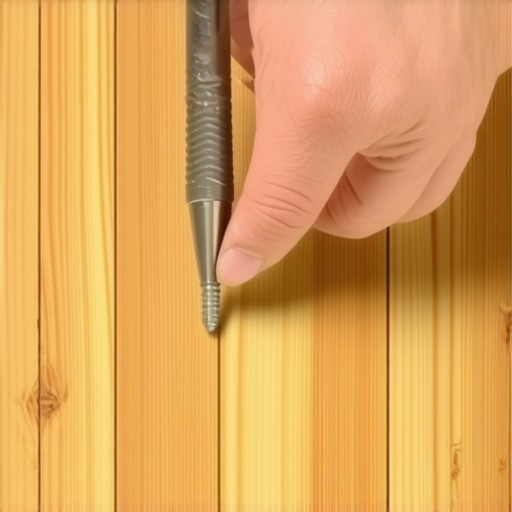
Over the years, I have tested almost every device and gadget on the market to fix noisy floorboards. You do not need a massive commercial workshop, but having a few highly specialized items in your toolbox will make the difference between a temporary patch and a lifetime fix. First, throw away standard construction screws; their threads run all the way to the top, which prevents them from drawing the floorboard tight against the joist. Instead, I personally rely on the Squeeeeek No More kit. The alignment tripod and driver bit are engineered beautifully to snap the screw head exactly beneath the wood surface without damaging your finish. For measuring flat surfaces and verifying joist movement, I also use a heavy-duty, machined aluminum straightedge. To ensure a professional finish before any major job, check out my guide on mastering floor leveler pro secrets for perfect installations. Mastering these diagnostic tools will save you days of guesswork.
How do I maintain quiet floors over time?
Keeping your floors quiet for the long haul requires controlling environmental humidity and protecting the wood from sudden seasonal shocks. Wood reacts constantly to the moisture level in your home. According to the structural engineers at the Forest Products Laboratory, keeping your indoor relative humidity strictly between 35% and 55% is the single best way to prevent the expansion and contraction that loosens fasteners. I highly recommend installing a whole-home humidifier connected to your HVAC system, or at least running a dedicated humidifier in the winter months. During the coldest seasons, you can learn how to keep your hardwood floors from gapping in the winter to stay ahead of the dry air. Additionally, periodic inspections of your basement joists will help you spot emerging gaps before they turn into full-blown squeaks. If you want to keep your floors looking as beautiful as they sound, practicing proper upkeep is vital. You can explore my top hardwood floor care secrets to longevity and shine to preserve your investment for years to come.
The Future of Quiet Flooring Systems
As we look toward the future of home construction, flooring technology is evolving rapidly to eliminate structural noise entirely. We are starting to see the rise of advanced composite subfloor materials that do not expand or contract with moisture changes, alongside smart polymer adhesives that remain highly flexible for decades. Acoustic underlayment technology is also advancing, offering superior sound dampening under floating systems. If you are planning a fresh start instead of patching old boards, learning the absolute best methods for a new setup is a smart move. Check out my comprehensive step-by-step guide to flooring installation and leveling success to ensure your next project is flawless from the very beginning. I highly encourage you to try the breakaway screw method on your most stubborn squeak this weekend—you will be amazed at how easily you can reclaim your quiet home.
What Experts Won’t Tell You About Fixing Noisy Floorboards
After years of wrestling with noisy floorboards, I realized that the biggest mistake most homeowners make is assuming every squeak requires the exact same fix. Here are the three most critical lessons I learned the hard way so you can avoid making the same errors: First, never rush to drive screws without knowing exactly where your joists run; missing a joist creates a loose metal hazard that will rattle forever. Second, liquid lubricants like WD-40 are a temporary trap that will eventually attract dust and ruin the wood fibers. Lastly, temperature and humidity control are your ultimate defenses; even a perfect mechanical repair will eventually fail if your home undergoes massive seasonal humidity swings.
My Essential Toolkit for Restoring Peace and Quiet
You do not need a truck full of commercial equipment to silence your home, but using the correct tools makes all the difference. I highly recommend keeping these items on hand before you begin:
- The Squeeeeek No More Kit: This is the absolute gold standard for top-down repairs because it cleanly snaps the screw head off below the wood line.
- A Machined Aluminum Straightedge: Essential for checking floor flatness and locating structural dips before you begin any major flooring installation and leveling success projects.
- A Reliable Stud Finder with Deep-Scan Mode: This is crucial for locating the exact center of your floor joists through thick subflooring.
- High-Quality Wood Putty: Opt for an acrylic-based, non-shrinking putty that closely matches your wood species to fill the tiny pilot holes invisibly.
Take Back Your Quiet Home
There is no reason to live with the daily stress of noisy floorboards. By taking a methodical, step-by-step approach—whether you are working from the crawlspace below or securing boards invisibly from above—you can easily eliminate those irritating squeaks. Taking the time to secure your subfloor now not only restores quiet but also prevents future wear on your wood, ensuring your investment remains structurally sound for decades. If you are preparing for a larger home upgrade down the line, mastering these stability basics is the perfect preparation before you tackle advanced projects like hardwood floor refinishing or adding gorgeous new accents to your space.
Have you ever tried to fix a stubborn squeak only to have it pop up a few inches away? Let me know your experiences and questions in the comments below!