It was a Saturday afternoon when I finally stepped into my living room after a long week, only to stumble over a section of my hardwood floor that felt strangely uneven. At first, I brushed it off as a minor imperfection, but as days went on, that tiny wobble turned into a relentless annoyance. I realized I wasn’t alone in this struggle—many homeowners face uneven floors that seem impossible to fix without expert help. But here’s the thing: with the right knowledge and techniques, you can achieve professional-grade results right in your own home. Today, I’m sharing proven strategies to level and install hardwood floors flawlessly in 2025, so you don’t have to deal with those frustrating imperfections anymore.
Why Proper Floor Leveling Makes All the Difference
When I first dove into hardwood floor installation, one big mistake I made was overlooking the importance of proper leveling. I thought I could just lay the planks over the existing uneven surface and it would look fine. Spoiler alert: it didn’t. Not only did it compromise the aesthetics, but it also led to squeaks, creaks, and even premature wear. According to flooring experts, poorly leveled floors are the leading cause of long-term durability issues. In fact, [proper leveling techniques](https://tiletrendshop.com/expert-floor-leveling-techniques-to-achieve-flawless-surfaces) can save you a lot of headaches—and money—in the long run. If you’re tired of uneven, unstable floors, this is the first step you can’t afford to skip. Now, let’s get into how you can master these techniques and set your project up for success.
Is Floor Leveling Overhyped or Really Critical?
I used to think that a little imperfection here and there was just part of the process. That was until I watched a professional demonstrate how even a small unevenness can cause significant problems down the line. The truth is, neglecting proper leveling will expose your beautiful hardwood to unnecessary risks like buckling or gaps, which are hard to correct later. I once tried to patch a small dip with some filler, only to find it crack and crumble within months. Don’t make my mistake—invest in the best leveling practices from the start. Curious about foolproof methods? I recommend checking out this resource on [floor leveling techniques](https://tiletrendshop.com/the-ultimate-guide-to-floor-leveling-for-a-perfect-finish) that will elevate your installation skills. Ready to get your floors perfectly flat and durable? Let’s dive into the specifics.
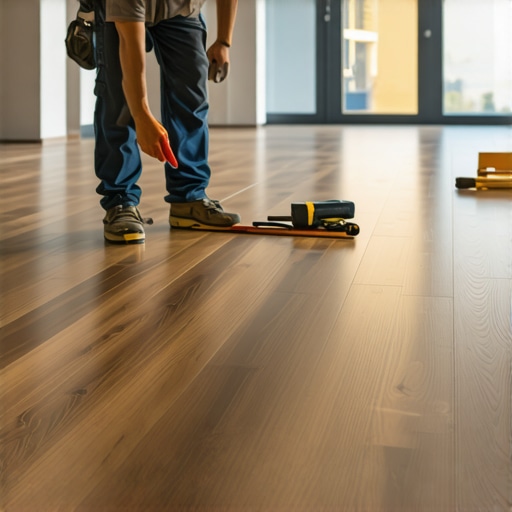
Assess the Floor Surface with Precision
Start by thoroughly inspecting your existing subfloor. Use a long level or straightedge, much like a carpenter’s tool, to identify low spots, dips, or high ridges. During my project, I noticed a noticeable wobble on one side of the room. I marked this area with chalk and prepared to apply a leveling compound. Accurate assessment prevents unnecessary work and ensures a smooth finish.
Prepare the Subfloor for Leveling
Clean the surface meticulously. Remove debris, dust, and loose particles as if you’re preparing a canvas for painting. Use a vacuum and damp cloth to ensure optimal adhesion for the leveling compound. On my walkthrough, I used a scraper to eliminate any old paint spots or adhesive residues that could compromise the leveling process. This step guarantees better bonding and a more even surface.
Choose the Right Leveling Material
Select a self-leveling cementitious compound suitable for your subfloor type. Think of it as the foundation of a building—quality here determines longevity. For my installation, I opted for a quick-setting formula that allowed me to work efficiently without sacrificing quality. Read the manufacturer’s instructions carefully, just like following a recipe, to achieve the desired consistency.
Mix and Apply with Care
Mix the compound in small batches, adding water gradually until it reaches a pourable but not runny consistency—similar to thick pancake batter. During my first attempt, I overmixed, which caused premature setting. Applying the mixture with a trowel or a gauge rake, starting from the low point and pushing towards higher areas, helps in evenly filling dips and smoothing ridges. Use a straightedge or a long level to guide your application and achieve a flat surface.
Use Techniques to Guide A Flat Finish
Pour the leveling compound systematically, working in sections if necessary. Allow the material to flow naturally, filling voids and ensuring it self-levels. During my project, I employed a long straightedge dragged across the surface to distribute excess material evenly. This resembles skateboarding—balancing and controlling your glide to stay flat and smooth. Patience at this step is vital; rushing can cause bubbles or uneven spots.
Finishing Touches and Curing
After application, let the compound cure without disturbance. Cover the area with plastic sheeting to retain moisture, essential for proper hardening—think of it as a blanket for what will become a sturdy foundation. I learned this the hard way when I prematurely walked on a freshly poured section, leaving unwanted impressions. Curing times vary; always adhere to the manufacturer’s guidelines. Once cured, lightly sand any high spots or ridges with fine-grit sandpaper, like peeling off a layer of rough skin, to ensure an impeccably flat surface.
Validate Flatness Before Proceeding
Re-check the surface with a long level or straightedge. Ensure there are no noticeable dips or humps. Confirming a perfectly level substrate lays the groundwork for a successful hardwood installation. By applying these precise techniques, I avoided future squeaks and gaps, achieving a professional-grade floor that’s both durable and beautiful.
For further insights into precise leveling methods, exploring this comprehensive guide can be invaluable. Remember, mastering these core techniques ensures your floors will stand the test of time, saving you headaches and repairs down the line.
When it comes to hardwood and tile flooring, there’s a lot of advice floating around—and not all of it holds up under scrutiny. Many homeowners fall prey to widespread myths that can lead to costly mistakes. Let’s examine some of these misconceptions and share insights that can elevate your flooring projects from amateurish to professional-grade.
One prevalent belief is that all self-leveling compounds are created equal. In reality, the key lies in selecting the right product tailored to your subfloor type and project needs. Using generic compounds without understanding their specifications can result in inadequate leveling, leading to uneven floors and premature wear. For nuanced applications, consulting detailed technical guides such as [expert floor leveling techniques](https://tiletrendshop.com/expert-floor-leveling-techniques-for-perfect-flooring-installation-in-2025) can make a significant difference.
A common trap many overlook is rushing the curing process. It might seem tempting to walk on freshly poured leveling compounds or installed tiles to save time, but prematurely stressing the materials can cause cracks, voids, or shifts. Patience and adherence to curing times—as emphasized in professional resources—are essential for long-lasting results.
Another myth suggests that flooring installation is purely about aesthetics. While appearance matters, ignoring subfloor conditions can undermine durability. For instance, failing to detect and address subfloor moisture or unevenness before installation can lead to complex problems down the line, such as buckling or gaps. Experts advise thorough inspections using precise tools—don’t skip this critical step.
Now, for those who want to delve deeper, consider the question: How do subtle imperfections in leveling influence long-term flooring performance? It turns out that even minor dips of a millimeter can propagate over time, causing squeaks, cracks, or tile fractures. A study in the *Journal of Building Engineering* highlights that microscopic deviations in substrate flatness are major predictors of failure in both hardwood and tile installations. Therefore, investing in meticulous leveling techniques, like those outlined in [best practices for durable installation](https://tiletrendshop.com/top-hardwood-flooring-installation-strategies-for-durability-in-2025), is not just a matter of aesthetics but of engineering soundness.
Remember, understanding these advanced nuances and avoiding common pitfalls can save you both time and money. If you’re curious about further tips on perfect flooring, explore comprehensive guides or reach out via our [contact page](https://tiletrendshop.com/contact-us). Have you ever fallen into this trap? Let me know in the comments and share your experiences to help others avoid similar mistakes.
Keep Your Floors in Prime Condition with the Right Tools
Maintaining hardwood and tile floors requires more than just regular cleaning; it involves using specialized tools that ensure longevity and preserve their aesthetic appeal. One indispensable tool I rely on is a high-quality floor scraper with a replaceable carbide blade. It allows me to remove stubborn adhesives or old finish layers without damaging the surface, which is crucial when refinishing or performing repairs.
For regular upkeep, I highly recommend investing in a microfiber mop equipped with a telescoping handle. Its lightweight design and fine fibers help trap dust and debris effortlessly, reducing scratches that can occur with traditional brooms. Additionally, a damp microfiber cloth is perfect for detailed cleaning around grout lines and hard-to-reach spots.
When it comes to tile floors, a rubber grout float is essential for applying and smoothing grout during installation or repair. I personally prefer ones with ergonomic handles that minimize hand fatigue, making the process more precise and less tiring. For deep cleaning, an electric grout cleaner with oscillating brush heads can restore the appearance of grout lines without harsh chemicals.
For long-term maintenance, I use a dual-action orbital buffer fitted with a soft pad for hardwood floors. This machine, when used with suitable polishing compounds, can bring back the shine and smoothness of aged wood, extending its lifespan. Remember, choosing the correct polishing products—like those recommended by flooring experts—can make a significant difference in results. Consider exploring [flooring maintenance tips](https://tiletrendshop.com/hardwood-floor-care-secrets-to-longevity-and-shine) for expert insights.

Image prompt: Close-up of a professional using an electric buffer on hardwood flooring, emphasizing tools used in maintenance with a polished, shiny finish. Alt text: Handheld electric buffer polishing hardwood floor. Title: Professional Hardwood Floor Maintenance
What If You Could Double Your Floor’s Lifespan?
Consistent, proper maintenance can drastically extend your flooring’s usability and visual appeal. For example, establishing a schedule to reseal hardwood floors every three to five years can protect against wear and moisture damage. Similarly, sealing grout lines in tiled areas prevents staining and mold buildup, keeping your surfaces looking new.
In the near future, I predict advancements in smart cleaning devices that combine robotic technology with AI-driven care routines. These innovations could automatically detect issues like loose tiles or scratches and initiate repairs or cleaning processes, reducing the need for manual intervention. Staying updated with such trends can help you adopt proactive tactics for maintaining your floors effectively.
Finally, always verify you’re using the right tools for the specific surface. For instance, applying a high-quality floor polish with an orbital buffer can restore luster, while a gentle cleaning solution like pH-neutral soap preserves finish integrity. Implementing these practices will help you maintain floors that look stunning and last for decades, making your initial investment truly worth it.
Lessons I Stumbled Over That Changed My Approach
One of my biggest eye-openers was realizing that skipping meticulous subfloor assessments often leads to long-term issues, even if the surface looks perfect initially.
Misjudging the curing time of leveling compounds can make or break your project’s durability—patience truly pays off. I learned this the hard way after rushing a section and facing cracks within months.
Trusting generic products without understanding their specifications can cause uneven surfaces and early failures. Diving into detailed resources like expert-level leveling techniques saved me from simple mistakes that cost time and money.
Tools and Resources That Elevated My Flooring Skills
- High-quality self-leveling compounds: Choosing the right product tailored to my subfloor type made the difference in achieving a perfectly smooth surface. I prefer formulas with quick-setting properties for efficiency.
- Precision trowels and gauges: These tools helped me spread leveling compounds evenly, preventing bubbles and ridges. I recommend those with ergonomic handles for comfort during extended use.
- Long straightedges and laser levels: Essential for verifying flatness after curing, ensuring my hardwood or tile laid smoothly over the surface without future issues.
- Educational guides and tutorials: Continuing my learning with trusted sources like top installation strategies for durability helped me adopt industry best practices seamlessly.
Embrace the Journey to Confidence and Perfect Floors
Taking the time to master these leveling techniques and tools has transformed my approach from guesswork to confidence. Now, my floors not only look stunning but stand the test of time, bringing peace of mind and pride in my work.
Remember, every successful project begins with proper preparation and a willingness to learn from early missteps. Whatever your flooring goal, you have the capacity to achieve professional-quality results. Dive into detailed tutorials, invest in quality tools, and don’t rush—the payoff is floors that truly elevate your space.
Have you encountered a surprising challenge during your flooring projects? Share your story in the comments below—let’s learn and grow together!