
I will never forget the smell of singed white oak on a Tuesday evening. I was just trying to light a few candles for a dinner party when a stray match head took a dive directly onto my floor. I watched in slow motion as it sizzled, leaving behind a nasty, charred crater. My heart sank. Most people think a burn is a permanent death sentence for a floor board, but after years of DIY trials and errors, I have learned that you do not have to tear everything up to make it look brand new again. Today, I am going to walk you through the exact process I used to erase that scar. We are not just talking about covering it up with a rug; we are going to actually restore the wood fibers and match the finish. You do not need a professional contractor license, and you definitely do not need to learn how to repair a loose hardwood plank without tearing up the row just to fix a small surface blemish. Have you ever stared at a floor blemish and felt that immediate pit in your stomach? Tell me about your worst flooring mishap in the comments!
Stop panicking about that black mark on your floor
The first thing everyone does is reach for a damp cloth, hoping the blackness is just soot. It is not. When wood burns, the lignin and cellulose structurally change into carbon. Early in my DIY journey, I made the huge mistake of trying to sand a spot down without checking the depth first, which resulted in a massive, shallow divot that caught the light from every window. It looked worse than the burn! To avoid those flooring installation mistakes to avoid for lasting results, you need to understand that mastering hardwood floor refinishing starts with patience and surgical precision. According to the National Wood Flooring Association (NWFA), most surface burns can be remediated without board replacement if the damage does not penetrate more than 1/8th of an inch into the wood. Setting the stage for a repair requires cleaning the area and prepping your tools, much like the hardwood floor care secrets to longevity and shine that I always preach.
Can you really hide a burn without it looking like a giant smudge?
I get it. You are skeptical. You think you will end up with a spot that is a slightly different shade than the rest of the room. But here is the secret: it is all about the scrape, not just the sand. If you have ever had to how to match new stain to old sun-faded cherry wood, you know that color matching is an art. We are going to carefully remove only the charred material using a sharp blade before even thinking about fillers or stains. This prevents the black ash from mixing with your finish and creating a muddy mess that screams ‘bad repair job.’
Don’t sand until the char is completely gone
The biggest mistake you can make right now is reaching for the sandpaper too early. If you sand over that black carbon, you are essentially grinding charcoal into the healthy wood fibers around the burn. It creates a dark, permanent stain that no amount of bleach will fix. Instead, take a sharp utility knife or a specialized curved scraper and gently flake away the burnt material. You want to see nothing but fresh, pale wood at the bottom of that divot. I remember a time I was working on a project similar to the sanding secret for old heart pine floors, where I thought I could skip this step. I ended up with a greyish smudge that looked like a permanent dirt stain. It was a mess. By carefully scraping, you create a ‘clean’ wound that is ready to accept filler.
Why epoxy is your best friend for deep craters
If your burn is deeper than a fingernail’s thickness, standard wood putty isn’t going to cut it. Putty shrinks as it dries, which leads to a dip in the floor. For a truly professional result, use a two-part wood epoxy or a high-quality wood filler that specifically mentions it is non-shrinking. Think of this like the precision required for how to achieve flawless floor leveling before tile laying—it’s all about creating a flat, stable surface. Mix your filler according to the instructions and overfill the hole slightly. This is critical. You want a tiny mound of filler sitting above the floor level because you will sand it flush later. 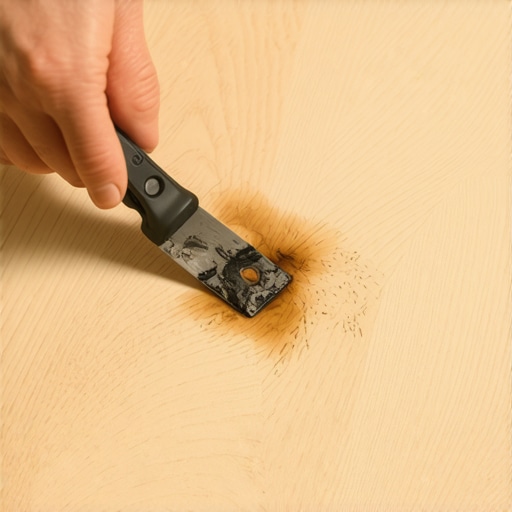
Leveling the playing field with a sanding block
Once your filler is rock hard, it’s time to level it. Do not use your bare hand to sand; your fingers are soft and will create an uneven surface. Use a hard sanding block. This ensures that the sandpaper only hits the high points of your patch. It’s a micro-version of mastering hardwood floor refinishing. Use a fine-grit paper—something around 120 to 180 grit—and work in the direction of the wood grain. I once tried to fix a gouge on a cherry floor and sanded against the grain; those tiny scratches stood out like a sore thumb once I applied the finish. If you’re worried about the mess, you can use techniques like how to sand a hardwood floor without creating a massive dust cloud by using a vacuum attachment or just keeping the area localized.
The trick to blending the color perfectly
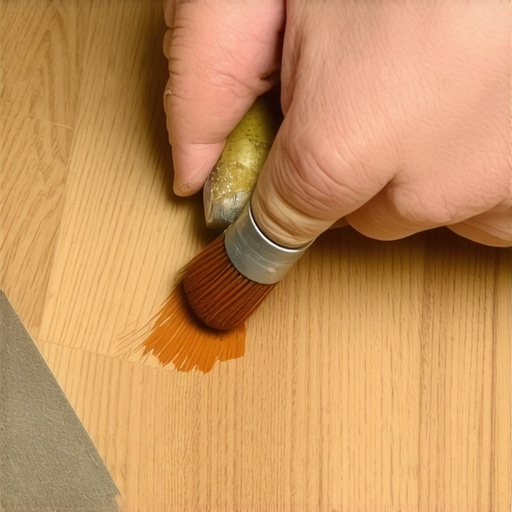
Now comes the part that scares everyone: matching the stain. If you are working with a common wood, you might be able to find a pre-mixed stain, but if your floors have aged, you’ll need to learn how to match new stain to old sun-faded cherry wood. Use a tiny artist’s brush to apply the stain only to the patch. If the color looks too light, don’t just add more stain; let it dry and apply a second coat. It’s like painting a miniature—patience is your best tool. You can even use a graining pen to draw in the wood grain lines across the patch so it disappears completely. This level of detail is what separates a DIY ‘fix’ from true restoration and is part of those hardwood floor care secrets to longevity and shine that keep a home looking premium for decades. Make sure you have the 7 tools you actually need for a professional diy hardwood install on hand to ensure you aren’t improvising with the wrong equipment.
Let’s dig deeper into why most people fail even after they’ve scraped away the char. They assume that if they can match the color, they’ve won the battle. That is a dangerous myth. In my years of fixing everything from cigarette burns to dropped soldering irons, I’ve found that texture and light reflection are actually 70% of the visual match. Everyone tells you to sand, but sanding creates a flat, polished plane that reflects light differently than the surrounding wood, which has been walked on and micro-abraded for years. This creates the ‘shiny spot’ syndrome. Instead of reaching for 80-grit paper, I recommend ‘buffing’ the edges of your repair with a crumpled piece of brown paper bag. It’s just abrasive enough to take the factory shine off your repair without creating deep scratches. This is a level of detail you won’t find in basic flooring installation mistakes to avoid for lasting results guides.
The gloss level trap that ruins most DIY patches
Even if you have the right stain, the sheen is where the ‘oops’ factor lives. If you apply a standard semi-gloss over a floor that has been cleaned with wax-based products for a decade, the new finish will ‘crawl’—it literally pulls away from the edges of the repair like water on a greasy pan. You need to chemically clean a six-inch radius around the burn with a specialized dewaxer before you even start. This is similar to the preparation required for how to achieve flawless floor leveling before tile laying; if the bond isn’t there, the aesthetics don’t matter. I once ignored a tiny bit of residue and ended up with a repair that peeled off like a sunburned skin. It was embarrassing.
How do I match the texture of hand-scraped or wire-brushed boards?
If your floor has a heavy texture, a smooth epoxy patch will look like a plastic insert. Here is the pro move: once your filler is about 90% dry, take a stiff brass brush and lightly drag it across the patch in the direction of the grain. This creates micro-grooves that catch the stain and light exactly like the original wood. This level of precision is what separates an amateur fix from mastering hardwood floor refinishing. To ensure your repair doesn’t fail from the inside out, you must understand the science of wood movement. The National Wood Flooring Association (NWFA) notes that wood expands and contracts significantly with seasonal humidity changes. If your filler is too rigid, it will crack the surrounding wood fibers. Always check your subfloor conditions with a moisture meter, a technique highlighted in how to use a moisture meter to prevent floor failure. #IMAGE_PLACE_HOLDER_C#
Why ‘spot sanding’ creates a physical valley
If you focus your sanding only on the burn, you’re creating a literal hole in your floor’s profile. When the sun hits that spot at a low angle in the afternoon, the shadow will make the floor look wavy. You have to ‘long-board’ your sanding. This means using a sanding block that is at least twice as long as the repair area. It’s one of those 7 tools you actually need for a professional diy hardwood install that most people swap for a small sponge, to their own detriment. If your finish isn’t behaving, check out why your hardwood finish is drying too fast and leaving streaks to avoid a messy overlap. Have you ever fallen into this trap where your repair looked great for a day and then looked like a disaster in the morning light? Let me know in the comments!Once you’ve conquered the visual match, you have to ensure that repair stays put for years to come. I’ve seen so many homeowners do a beautiful job on a Tuesday, only to have the patch pop out by Christmas because they used a generic filler that couldn’t handle seasonal expansion. That is why my personal toolkit always includes a dedicated carbide-tipped scraper like the Bahco 625. It’s small enough for surgical precision but stays sharp enough to handle the hardest white oak fibers without tearing. If you’re serious about your home’s aesthetics, checking out the 7 tools you actually need for a professional diy hardwood install is a non-negotiable step before you ever touch your floor. I also recommend keeping a set of stainless steel artist’s palette knives; they are far superior for mixing custom epoxy tints than a bulky hardware store putty knife. 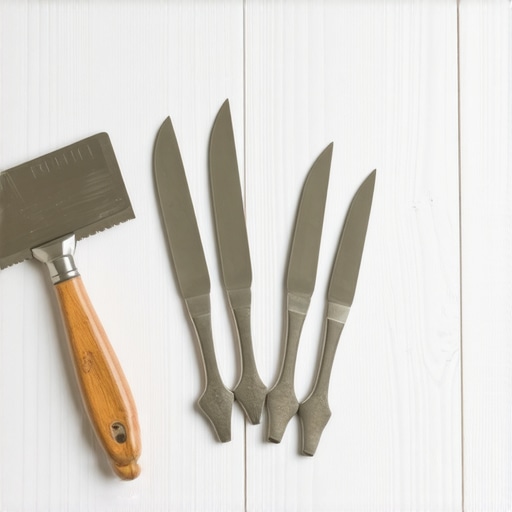
How do I maintain a repaired floor over time?
The secret to longevity isn’t in a magic spray; it’s in preventing the chemical breakdown of the bond between the old wood and your new patch. Most people don’t realize that the aggressive surfactants in common household cleaners are designed to eat through grease, which means they are also fantastic at dissolving the bond of your new finish. This leads to ‘edge failure’ where the repair starts to peel at the perimeter. According to the Bona Technical Data Manual, using a strictly pH-neutral cleaner is the only way to ensure the long-term adhesion of a localized spot-repair. You should definitely explore hardwood floor care secrets to longevity and shine to see why I am so obsessive about chemical compatibility. If you’ve just repaired a burn, treat that spot like a healing wound for at least 30 days while the finish fully cross-links.
The invisible enemy in your mop bucket
I cannot stress this enough: why you should never mop your floors with dish soap is perhaps the most important lesson for post-repair maintenance. Dish soap contains degreasers that will cloud your new patch and make it stand out against the original floor like a sore thumb. If you want a seamless look, you have to treat the whole room with the same respect as the repair itself. I’ve found that using a microfiber mop with just a damp—never soaking wet—pad is the gold standard for preserving the integrity of the wood fibers. It prevents moisture from seeping into the micro-gaps at the edge of your repair, which is a common way people accidentally trigger flooring installation mistakes to avoid for lasting results years after the initial work is done.
Will we be using lasers for wood repair soon?
Looking toward the future, I predict the DIY world will soon shift toward UV-cured repair resins. In professional wood-finishing shops, we already use high-intensity UV lamps to cure finishes in seconds rather than hours. Soon, you’ll likely be able to buy a small handheld UV light and a syringe of resin that matches your wood’s refractive index perfectly. It will make mastering hardwood floor refinishing feel more like using a precision 3D pen. No more waiting 24 hours for epoxy to dry or worrying about dust nibs falling into wet polyurethane. This technology is already trickling down from the dental and automotive industries, and it’s going to change how we handle surface damage forever. My advice for now? Start getting comfortable with high-precision scrapers today, because even with laser tech, the quality of your prep work will always be the difference between a visible patch and a true restoration. Grab a scraper and try flaking off a tiny, inconspicuous test spot in a closet—getting that ‘feel’ for the wood grain is the first step to becoming an expert.
I will never forget the smell of singed white oak on a Tuesday evening. I was just trying to light a few candles for a dinner party when a stray match head took a dive directly onto my floor. I watched in slow motion as it sizzled, leaving behind a nasty, charred crater. My heart sank. Most people think a burn is a permanent death sentence for a floor board, but after years of DIY trials and errors, I have learned that you do not have to tear everything up to make it look brand new again. Today, I am going to walk you through the exact process I used to erase that scar. We are not just talking about covering it up with a rug; we are going to actually restore the wood fibers and match the finish. You do not need a professional contractor license, and you definitely do not need to learn how to repair a loose hardwood plank without tearing up the row just to fix a small surface blemish. Have you ever stared at a floor blemish and felt that immediate pit in your stomach? Tell me about your worst flooring mishap in the comments!
Stop panicking about that black mark on your floor
The first thing everyone does is reach for a damp cloth, hoping the blackness is just soot. It is not. When wood burns, the lignin and cellulose structurally change into carbon. Early in my DIY journey, I made the huge mistake of trying to sand a spot down without checking the depth first, which resulted in a massive, shallow divot that caught the light from every window. It looked worse than the burn! To avoid those flooring installation mistakes to avoid for lasting results, you need to understand that mastering hardwood floor refinishing starts with patience and surgical precision. According to the National Wood Flooring Association (NWFA), most surface burns can be remediated without board replacement if the damage does not penetrate more than 1/8th of an inch into the wood. Setting the stage for a repair requires cleaning the area and prepping your tools, much like the hardwood floor care secrets to longevity and shine that I always preach.
Can you really hide a burn without it looking like a giant smudge?
I get it. You are skeptical. You think you will end up with a spot that is a slightly different shade than the rest of the room. But here is the secret: it is all about the scrape, not just the sand. If you have ever had to how to match new stain to old sun-faded cherry wood, you know that color matching is an art. We are going to carefully remove only the charred material using a sharp blade before even thinking about fillers or stains. This prevents the black ash from mixing with your finish and creating a muddy mess that screams ‘bad repair job.’
Don’t sand until the char is completely gone
The biggest mistake you can make right now is reaching for the sandpaper too early. If you sand over that black carbon, you are essentially grinding charcoal into the healthy wood fibers around the burn. It creates a dark, permanent stain that no amount of bleach will fix. Instead, take a sharp utility knife or a specialized curved scraper and gently flake away the burnt material. You want to see nothing but fresh, pale wood at the bottom of that divot. I remember a time I was working on a project similar to the sanding secret for old heart pine floors, where I thought I could skip this step. I ended up with a greyish smudge that looked like a permanent dirt stain. It was a mess. By carefully scraping, you create a ‘clean’ wound that is ready to accept filler.
Why epoxy is your best friend for deep craters
If your burn is deeper than a fingernail’s thickness, standard wood putty isn’t going to cut it. Putty shrinks as it dries, which leads to a dip in the floor. For a truly professional result, use a two-part wood epoxy or a high-quality wood filler that specifically mentions it is non-shrinking. Think of this like the precision required for how to achieve flawless floor leveling before tile laying—it’s all about creating a flat, stable surface. Mix your filler according to the instructions and overfill the hole slightly. This is critical. You want a tiny mound of filler sitting above the floor level because you will sand it flush later.
Leveling the playing field with a sanding block
Once your filler is rock hard, it’s time to level it. Do not use your bare hand to sand; your fingers are soft and will create an uneven surface. Use a hard sanding block. This ensures that the sandpaper only hits the high points of your patch. It’s a micro-version of mastering hardwood floor refinishing. Use a fine-grit paper—something around 120 to 180 grit—and work in the direction of the wood grain. I once tried to fix a gouge on a cherry floor and sanded against the grain; those tiny scratches stood out like a sore thumb once I applied the finish. If you’re worried about the mess, you can use techniques like how to sand a hardwood floor without creating a massive dust cloud by using a vacuum attachment or just keeping the area localized.
The trick to blending the color perfectly
Now comes the part that scares everyone: matching the stain. If you are working with a common wood, you might be able to find a pre-mixed stain, but if your floors have aged, you’ll need to learn how to match new stain to old sun-faded cherry wood. Use a tiny artist’s brush to apply the stain only to the patch. If the color looks too light, don’t just add more stain; let it dry and apply a second coat. It’s like painting a miniature—patience is your best tool. You can even use a graining pen to draw in the wood grain lines across the patch so it disappears completely. This level of detail is what separates a DIY ‘fix’ from true restoration and is part of those hardwood floor care secrets to longevity and shine that keep a home looking premium for decades. Make sure you have the 7 tools you actually need for a professional diy hardwood install on hand to ensure you aren’t improvising with the wrong equipment.
Let’s dig deeper into why most people fail even after they’ve scraped away the char. They assume that if they can match the color, they’ve won the battle. That is a dangerous myth. In my years of fixing everything from cigarette burns to dropped soldering irons, I’ve found that texture and light reflection are actually 70% of the visual match. Everyone tells you to sand, but sanding creates a flat, polished plane that reflects light differently than the surrounding wood, which has been walked on and micro-abraded for years. This creates the ‘shiny spot’ syndrome. Instead of reaching for 80-grit paper, I recommend ‘buffing’ the edges of your repair with a crumpled piece of brown paper bag. It’s just abrasive enough to take the factory shine off your repair without creating deep scratches. This is a level of detail you won’t find in basic flooring installation mistakes to avoid for lasting results guides.
The gloss level trap that ruins most DIY patches
Even if you have the right stain, the sheen is where the ‘oops’ factor lives. If you apply a standard semi-gloss over a floor that has been cleaned with wax-based products for a decade, the new finish will ‘crawl’—it literally pulls away from the edges of the repair like water on a greasy pan. You need to chemically clean a six-inch radius around the burn with a specialized dewaxer before you even start. This is similar to the preparation required for how to achieve flawless floor leveling before tile laying; if the bond isn’t there, the aesthetics don’t matter. I once ignored a tiny bit of residue and ended up with a repair that peeled off like a sunburned skin. It was embarrassing.
How do I match the texture of hand-scraped or wire-brushed boards?
If your floor has a heavy texture, a smooth epoxy patch will look like a plastic insert. Here is the pro move: once your filler is about 90% dry, take a stiff brass brush and lightly drag it across the patch in the direction of the grain. This creates micro-grooves that catch the stain and light exactly like the original wood. This level of precision is what separates an amateur fix from mastering hardwood floor refinishing. To ensure your repair doesn’t fail from the inside out, you must understand the science of wood movement. The National Wood Flooring Association (NWFA) notes that wood expands and contracts significantly with seasonal humidity changes. If your filler is too rigid, it will crack the surrounding wood fibers. Always check your subfloor conditions with a moisture meter, a technique highlighted in how to use a moisture meter to prevent floor failure. #IMAGE_PLACE_HOLDER_C#
Why ‘spot sanding’ creates a physical valley
If you focus your sanding only on the burn, you’re creating a literal hole in your floor’s profile. When the sun hits that spot at a low angle in the afternoon, the shadow will make the floor look wavy. You have to ‘long-board’ your sanding. This means using a sanding block that is at least twice as long as the repair area. It’s one of those 7 tools you actually need for a professional diy hardwood install that most people swap for a small sponge, to their own detriment. If your finish isn’t behaving, check out why your hardwood finish is drying too fast and leaving streaks to avoid a messy overlap. Have you ever fallen into this trap where your repair looked great for a day and then looked like a disaster in the morning light? Let me know in the comments!Once you’ve conquered the visual match, you have to ensure that repair stays put for years to come. I’ve seen so many homeowners do a beautiful job on a Tuesday, only to have the patch pop out by Christmas because they used a generic filler that couldn’t handle seasonal expansion. That is why my personal toolkit always includes a dedicated carbide-tipped scraper like the Bahco 625. It’s small enough for surgical precision but stays sharp enough to handle the hardest white oak fibers without tearing. If you’re serious about your home’s aesthetics, checking out the 7 tools you actually need for a professional diy hardwood install is a non-negotiable step before you ever touch your floor. I also recommend keeping a set of stainless steel artist’s palette knives; they are far superior for mixing custom epoxy tints than a bulky hardware store putty knife.
How do I maintain a repaired floor over time?
The secret to longevity isn’t in a magic spray; it’s in preventing the chemical breakdown of the bond between the old wood and your new patch. Most people don’t realize that the aggressive surfactants in common household cleaners are designed to eat through grease, which means they are also fantastic at dissolving the bond of your new finish. This leads to ‘edge failure’ where the repair starts to peel at the perimeter. According to the Bona Technical Data Manual, using a strictly pH-neutral cleaner is the only way to ensure the long-term adhesion of a localized spot-repair. You should definitely explore hardwood floor care secrets to longevity and shine to see why I am so obsessive about chemical compatibility. If you’ve just repaired a burn, treat that spot like a healing wound for at least 30 days while the finish fully cross-links.
The invisible enemy in your mop bucket
I cannot stress this enough: why you should never mop your floors with dish soap is perhaps the most important lesson for post-repair maintenance. Dish soap contains degreasers that will cloud your new patch and make it stand out against the original floor like a sore thumb. If you want a seamless look, you have to treat the whole room with the same respect as the repair itself. I’ve found that using a microfiber mop with just a damp—never soaking wet—pad is the gold standard for preserving the integrity of the wood fibers. It prevents moisture from seeping into the micro-gaps at the edge of your repair, which is a common way people accidentally trigger flooring installation mistakes to avoid for lasting results years after the initial work is done.
Will we be using lasers for wood repair soon?
Looking toward the future, I predict the DIY world will soon shift toward UV-cured repair resins. In professional wood-finishing shops, we already use high-intensity UV lamps to cure finishes in seconds rather than hours. Soon, you’ll likely be able to buy a small handheld UV light and a syringe of resin that matches your wood’s refractive index perfectly. It will make mastering hardwood floor refinishing feel more like using a precision 3D pen. No more waiting 24 hours for epoxy to dry or worrying about dust nibs falling into wet polyurethane. This technology is already trickling down from the dental and automotive industries, and it’s going to change how we handle surface damage forever. My advice for now? Start getting comfortable with high-precision scrapers today, because even with laser tech, the quality of your prep work will always be the difference between a visible patch and a true restoration. Grab a scraper and try flaking off a tiny, inconspicuous test spot in a closet—getting that ‘feel’ for the wood grain is the first step to becoming an expert.
The Hardest Lesson I Learned About Hardwood Restoration
After years of fixing scars on various wood species, I realized that your eyes can lie to you, but light never does. The most humbling moment for any DIYer is finishing a repair at noon, only to see it look like a lump of plastic when the evening sun hits it from the side. Always keep a high-lumen flashlight on hand to check for ‘shoulders’ around your patch—those tiny ridges where your filler meets the wood. Another hard-earned truth? Chemicals are finicky. I once used a cleaner that reacted with my new topcoat, turning a beautiful repair into a cloudy mess overnight. This is why following hardwood floor care secrets to longevity and shine is just as important after the fix as it is during the prep. Patience is more than a virtue here; it is the difference between a repair that lasts a decade and one that peels in a month.
Toolkit Essentials for Invisible Repairs
To move beyond basic patches, you need a few specialized items that the average hardware store might not emphasize. I swear by my set of fine-tipped artist’s markers for mimicking grain lines—it’s much more precise than a brush for adding those tiny dark flecks in oak or cherry. For the finish, I always keep a small can of dewaxed shellac; it acts as a ‘universal bond’ layer between old finishes and new topcoats. You can find more about the basics in my guide on the 7 tools you actually need for a professional diy hardwood install. I also recommend keeping a small moisture meter to ensure your subfloor isn’t working against your repair, a concept I explain in depth in my post on how to use a moisture meter to prevent floor failure. These tools turn a guessing game into a science. #IMAGE_PLACEHOLDER_E#
Give Your Floor a Second Chance
A burn mark doesn’t have to be the end of your hardwood’s beauty or value. With a little patience and the right scraping technique, you can turn a permanent mistake into an invisible victory that restores the character of your home. Don’t be afraid of that initial scrape; it is the most satisfying part of the process once you see that fresh, healthy wood grain underneath the char. If you’re planning a bigger project, like mastering hardwood floor refinishing, these small repairs are the perfect training ground to build your confidence. Your floor tells the story of your life, and while a burn is a rough chapter, you have the power to write the ending. Have you ever tried to hide a floor blemish only to make it stand out even more? Share your ‘oops’ stories or your biggest flooring successes in the comments below!