
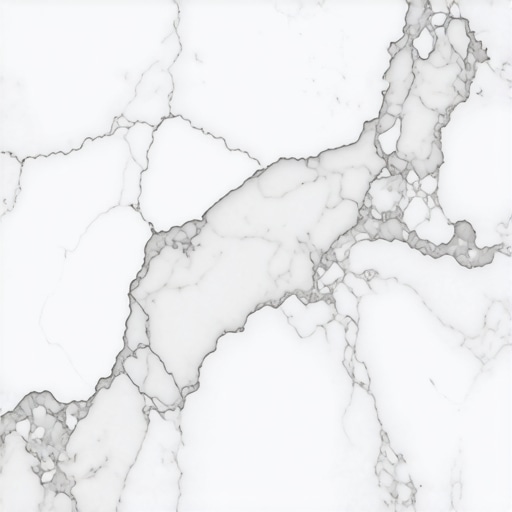
I still remember the smell of success—or what I thought was success. It was a few years back, and I had just finished a gorgeous travertine installation in my own kitchen. To get it hospital-clean for a family gathering, I went full scorched-earth with a heavy-duty mop and a generous splash of bleach. By the next morning, my shimmering stone looked like a chalky, tired mess. I had etched the surface, and my heart sank. It was a rookie mistake, a total failure of judgment that cost me weeks of restoration work. We often treat our floors like indestructible surfaces, but natural stone is a completely different animal than the standard tile installation most are used to. Today, I want to show you why that jug of bleach belongs under the sink, not on your floors, and how to keep your home healthy without destroying your investment.
That Jug of Bleach is Stripping Away Your Floor’s Value
Most people don’t realize that natural stone—whether it’s slate, granite, or marble—is essentially a porous sponge. It’s not like ceramic or porcelain that has a factory-baked glaze to protect it. When you pour bleach on it, you aren’t just cleaning; you’re triggering a chemical reaction that strips away the protective sealers you meticulously applied during your flooring installation. I made the mistake of thinking ‘stronger is better,’ but in reality, I was just melting the finish. Once that barrier is gone, the bleach starts ‘eating’ the minerals in the stone, leading to permanent dullness. If you want your floors to last, you have to look at hardwood floor care secrets to longevity and shine and apply that same gentle philosophy to your stone. This isn’t just about aesthetics; it’s about structural integrity. When the chemical bond of the stone is compromised, it becomes more susceptible to cracking and staining from simple things like spilled water or juice. [image_placeholder]
Is bleach actually the only way to kill germs?
I get the skepticism. We’ve been conditioned to think bleach equals safety. But according to the Natural Stone Institute, highly alkaline or acidic cleaners are the primary cause of stone degradation in residential homes. Even if you dilute it, you’re slowly causing ‘spalling’—where the stone starts to flake and pit. You can achieve a sanitary surface without the chemical warfare that ruins your flooring installation fundamentals. Have you ever noticed a ‘clean’ floor that looks dirtier every year? Tell me about your cleaning routine in the comments—I bet we can find a better way together. You should definitely stop using bleach on your grout before you read this as well, because the damage spreads faster than you think. Natural stone requires a pH-neutral cleaner to stay healthy, and switching today could save you the thousands of dollars I had to spend on professional resurfacing.
Stop the Sandpaper Effect Before it Starts
Every time you walk across a stone floor with even a tiny bit of grit on your shoes, you are basically taking a piece of 60-grit sandpaper to the finish. Before a drop of water touches the surface, you need to remove those abrasive particles. I once skipped this step on a dark granite foyer after a particularly muddy weekend. I went straight to wet mopping, and the sound of the dirt scraping against the stone haunts me to this day—it left thousands of micro-scratches that eventually required a professional buffer to fix. Use a high-quality dust mop or a vacuum with a soft brush attachment. If you are dealing with a new installation, you might even perform the 3-foot level test for checking subfloor flatness like a pro to ensure there are no high spots where dirt naturally collects and grinds into the surface.
Ditch the Scrub Brush for a Microfiber Mop
When it is time to actually get the floor wet, forget the old-school cotton string mops. They tend to just move dirty water around rather than lifting it. You want a microfiber flat mop; these grab the microscopic particles that stone loves to hide in its pores. Mix a few drops of specialized, pH-neutral stone soap into a bucket of warm water. If you cannot find stone soap, a tiny bit of mild dish soap works in a pinch, but do not overdo it or you will leave a sticky film. Think of this process like the wet sponge move for professional grout lines; you want just enough moisture to lift the dirt without flooding the grout joints. 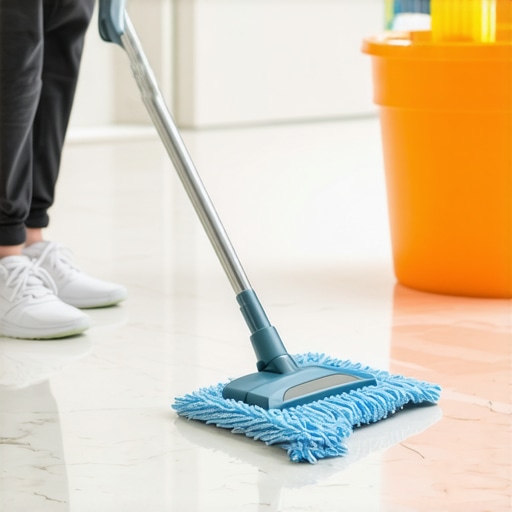
Why You Must Dry the Stone Immediately
This is where most homeowners fail. They let the stone air-dry. Stone is naturally thirsty, and if the wash water has any dissolved minerals or leftover dirt, it will soak right back into the pores as the liquid evaporates. This causes ‘clouding’ or ‘hazing.’ I learned this the hard way on a slate floor where I left puddles to dry on their own. The result was a patchy, white-filmed mess that looked like I had not cleaned at all. Always follow your damp mop with a dry microfiber cloth or a clean towel. This buffing action not only prevents streaks but also mimics the best way to clean a new hardwood floor for the first time, ensuring a streak-free shine that highlights the natural depth of the minerals.
Protect Your Investment from the Inside Out
Once the floor is clean and dry, check the integrity of the sealer. If water does not bead up on the surface, your protection is gone. If you have been using bleach, your sealer is definitely compromised. You should notice if your floor is absorbing liquid quickly, which is one of the 7 signs your tile contractor is cutting corners on prep work or ongoing maintenance. Re-sealing is not a massive chore; it is a simple wipe-on, wipe-off process that keeps the ‘sponge’ of the stone from drinking in spills and stains. If you notice your stone looking dull despite frequent cleaning, the issue might be deeper. Poor flooring installation fundamentals often lead to uneven tiles that trap dirt in the edges where even the best mop cannot reach.
The Hidden Danger of Over-Sealing Your Surfaces
Everyone tells you that sealer is the magic shield for stone, but I’ve found that more isn’t always better. In fact, many high-end homeowners accidentally ‘suffocate’ their floors by applying sealer every few months. Natural stone is a geological leftover that needs to exchange vapor with the air. When you build up too many layers, you create a plastic-like film that traps moisture beneath the surface. This leads to efflorescence—those unsightly white salt deposits—or worse, it can cause the stone to soften and crumble from the inside out. Before you reach for the bottle again, you should how to use a moisture meter to prevent floor failure to see if there is actually a need for a new coat. If the stone isn’t thirsty and water still beads, leave it alone. I have seen beautiful travertine ruined because the owner thought a shiny ‘wet look’ sealer was a cleaning substitute; they ended up with a yellowing, peeling mess that required a diamond-grind to fix.
Why does my stone crack even though the floor is perfectly flat?
This is the ultimate ‘expert’ hurdle that catches even seasoned renovators off guard. You can spend days on the ultimate guide to floor leveling for a perfect finish and still end up with a hairline fracture across your beautiful marble foyer. The culprit is usually ‘deflection.’ The Tile Council of North America (TCNA) specifies that for natural stone, the substrate must meet an L/720 deflection standard. This means your floor needs to be twice as stiff as it would be for standard ceramic tile. If your floor joists have even a tiny bit of ‘bounce’ when you walk, the rigid stone will eventually snap because it has zero flex. It is not just about how level the room is; it is about the structural physics beneath your feet. #IMAGE_PLACE_HOLDER_C#
Stop Chasing Level and Start Finding Flat
A common myth in the DIY community is that ‘level’ and ‘flat’ are interchangeable terms. They aren’t. A floor can be perfectly level—meaning it is parallel to the horizon—but still be as wavy as a roller coaster. For natural stone installation, flatness is the only metric that truly matters. If you have subtle dips and peaks, you will inevitably experience ‘lippage,’ where one tile edge sits slightly higher than its neighbor. This isn’t just a trip hazard; it is a point of vulnerability where the finish gets chipped away by heavy vacuum cleaners or sliding furniture. I always recommend mastering floor leveling pro secrets for perfect installations to ensure a surface that won’t eat your shoes or your stone. If you start to notice a ‘hollow’ sound when walking across certain sections, you likely fell victim to the trowel size error that leads to hollow sounding tiles, which means your mortar didn’t provide the 95% coverage required for natural stone. This lack of support makes the stone prone to cracking under simple point loads. Another trap is using ‘standard’ dark mortar. With light-colored marble or limestone, this can lead to ‘ghosting’—where the dark color of the mortar actually bleeds through the stone. Always use a high-quality white thinset specifically rated for natural stone. Have you ever fallen into this trap? Let me know in the comments.I’ve learned the hard way that your eyes are the most unreliable tools in the shed. When I’m checking a subfloor now, I don’t just ‘feel’ for a dip; I reach for a pinless moisture meter. If you’re wondering how to use a moisture meter to prevent floor failure, it’s about establishing a baseline before the first plank even touches the ground. The National Wood Flooring Association (NWFA) explicitly states in their technical guidelines that hardwood must be within a specific percentage range of the subfloor’s moisture content to avoid cupping or gapping later. I personally use a high-end digital meter that tracks environmental humidity alongside wood moisture, giving me actionable data rather than a gut feeling. This is one of the 7 tools you actually need for a professional diy hardwood install if you want the job to survive the seasonal shifts in your home.
Lasers Change the Game for Hallway Alignment
Precision doesn’t stop at moisture. I’ve completely switched to the laser level move for perfectly straight hallways because a traditional chalk line can be off by an eighth of an inch over twenty feet if the string isn’t snapped perfectly. When I’m prepping for a new tile layout, I obsess over precise floor leveling techniques to achieve flawless surfaces. I’ve found that using a 10-foot aluminum straight edge reveals more ‘waves’ in a concrete slab than a standard 4-foot level ever could. It’s the difference between a floor that looks okay and one that reflects light like a sheet of glass. 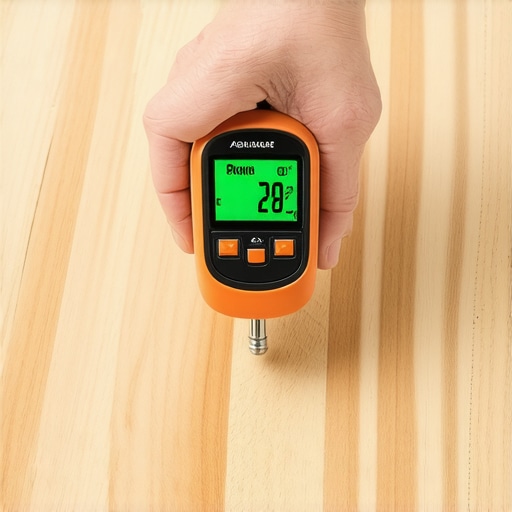
How can I keep my flooring looking brand new for a decade?
The secret isn’t a magic chemical; it’s a routine that respects the material. For wood, that means mastering hardwood floor care secrets to longevity and shine, such as using felt pads that are actually screwed into the furniture legs. Those cheap stick-on pads always fall off, leaving your chair to gouge the finish when you least expect it. For tile, maintenance is about checking the grout for hairline cracks annually. If you find a loose spot, you should learn how to fix a hollow sounding tile without tearing it up using a specialized injection resin that fills the void beneath. This simple fix saves you from a full demolition three years down the road.
Health and Technology are the Future of Flooring
Looking ahead, I see the industry moving toward even thinner, more resilient wear layers and a massive focus on indoor wellness. People are finally realizing that what’s under their feet off-gasses into their lungs, which is why learning how to choose flooring that wont kill your indoor air quality is becoming a priority for modern homeowners. We’re moving toward a ‘set it and forget it’ era with advanced hybrid cores, but the fundamentals of a flat subfloor will always remain the king of the job site. Try this today: go buy a 10-foot piece of straight aluminum box tubing and lay it across your floor. If you see light underneath it in multiple spots, you’ve got some leveling work to do before you even think about buying your material.I still remember the smell of success—or what I thought was success. It was a few years back, and I had just finished a gorgeous travertine installation in my own kitchen. To get it hospital-clean for a family gathering, I went full scorched-earth with a heavy-duty mop and a generous splash of bleach. By the next morning, my shimmering stone looked like a chalky, tired mess. I had etched the surface, and my heart sank. It was a rookie mistake, a total failure of judgment that cost me weeks of restoration work. We often treat our floors like indestructible surfaces, but natural stone is a completely different animal than the standard tile installation most are used to. Today, I want to show you why that jug of bleach belongs under the sink, not on your floors, and how to keep your home healthy without destroying your investment.
That Jug of Bleach is Stripping Away Your Floor’s Value
Most people don’t realize that natural stone—whether it’s slate, granite, or marble—is essentially a porous sponge. It’s not like ceramic or porcelain that has a factory-baked glaze to protect it. When you pour bleach on it, you aren’t just cleaning; you’re triggering a chemical reaction that strips away the protective sealers you meticulously applied during your flooring installation. I made the mistake of thinking ‘stronger is better,’ but in reality, I was just melting the finish. Once that barrier is gone, the bleach starts ‘eating’ the minerals in the stone, leading to permanent dullness. If you want your floors to last, you have to look at hardwood floor care secrets to longevity and shine and apply that same gentle philosophy to your stone. This isn’t just about aesthetics; it’s about structural integrity. When the chemical bond of the stone is compromised, it becomes more susceptible to cracking and staining from simple things like spilled water or juice. [image_placeholder]
Is bleach actually the only way to kill germs?
I get the skepticism. We’ve been conditioned to think bleach equals safety. But according to the Natural Stone Institute, highly alkaline or acidic cleaners are the primary cause of stone degradation in residential homes. Even if you dilute it, you’re slowly causing ‘spalling’—where the stone starts to flake and pit. You can achieve a sanitary surface without the chemical warfare that ruins your flooring installation fundamentals. Have you ever noticed a ‘clean’ floor that looks dirtier every year? Tell me about your cleaning routine in the comments—I bet we can find a better way together. You should definitely stop using bleach on your grout before you read this as well, because the damage spreads faster than you think. Natural stone requires a pH-neutral cleaner to stay healthy, and switching today could save you the thousands of dollars I had to spend on professional resurfacing.
Stop the Sandpaper Effect Before it Starts
Every time you walk across a stone floor with even a tiny bit of grit on your shoes, you are basically taking a piece of 60-grit sandpaper to the finish. Before a drop of water touches the surface, you need to remove those abrasive particles. I once skipped this step on a dark granite foyer after a particularly muddy weekend. I went straight to wet mopping, and the sound of the dirt scraping against the stone haunts me to this day—it left thousands of micro-scratches that eventually required a professional buffer to fix. Use a high-quality dust mop or a vacuum with a soft brush attachment. If you are dealing with a new installation, you might even perform the 3-foot level test for checking subfloor flatness like a pro to ensure there are no high spots where dirt naturally collects and grinds into the surface.
Ditch the Scrub Brush for a Microfiber Mop
When it is time to actually get the floor wet, forget the old-school cotton string mops. They tend to just move dirty water around rather than lifting it. You want a microfiber flat mop; these grab the microscopic particles that stone loves to hide in its pores. Mix a few drops of specialized, pH-neutral stone soap into a bucket of warm water. If you cannot find stone soap, a tiny bit of mild dish soap works in a pinch, but do not overdo it or you will leave a sticky film. Think of this process like the wet sponge move for professional grout lines; you want just enough moisture to lift the dirt without flooding the grout joints.
Why You Must Dry the Stone Immediately
This is where most homeowners fail. They let the stone air-dry. Stone is naturally thirsty, and if the wash water has any dissolved minerals or leftover dirt, it will soak right back into the pores as the liquid evaporates. This causes ‘clouding’ or ‘hazing.’ I learned this the hard way on a slate floor where I left puddles to dry on their own. The result was a patchy, white-filmed mess that looked like I had not cleaned at all. Always follow your damp mop with a dry microfiber cloth or a clean towel. This buffing action not only prevents streaks but also mimics the best way to clean a new hardwood floor for the first time, ensuring a streak-free shine that highlights the natural depth of the minerals.
Protect Your Investment from the Inside Out
Once the floor is clean and dry, check the integrity of the sealer. If water does not bead up on the surface, your protection is gone. If you have been using bleach, your sealer is definitely compromised. You should notice if your floor is absorbing liquid quickly, which is one of the 7 signs your tile contractor is cutting corners on prep work or ongoing maintenance. Re-sealing is not a massive chore; it is a simple wipe-on, wipe-off process that keeps the ‘sponge’ of the stone from drinking in spills and stains. If you notice your stone looking dull despite frequent cleaning, the issue might be deeper. Poor flooring installation fundamentals often lead to uneven tiles that trap dirt in the edges where even the best mop cannot reach.
The Hidden Danger of Over-Sealing Your Surfaces
Everyone tells you that sealer is the magic shield for stone, but I’ve found that more isn’t always better. In fact, many high-end homeowners accidentally ‘suffocate’ their floors by applying sealer every few months. Natural stone is a geological leftover that needs to exchange vapor with the air. When you build up too many layers, you create a plastic-like film that traps moisture beneath the surface. This leads to efflorescence—those unsightly white salt deposits—or worse, it can cause the stone to soften and crumble from the inside out. Before you reach for the bottle again, you should how to use a moisture meter to prevent floor failure to see if there is actually a need for a new coat. If the stone isn’t thirsty and water still beads, leave it alone. I have seen beautiful travertine ruined because the owner thought a shiny ‘wet look’ sealer was a cleaning substitute; they ended up with a yellowing, peeling mess that required a diamond-grind to fix.
Why does my stone crack even though the floor is perfectly flat?
This is the ultimate ‘expert’ hurdle that catches even seasoned renovators off guard. You can spend days on the ultimate guide to floor leveling for a perfect finish and still end up with a hairline fracture across your beautiful marble foyer. The culprit is usually ‘deflection.’ The Tile Council of North America (TCNA) specifies that for natural stone, the substrate must meet an L/720 deflection standard. This means your floor needs to be twice as stiff as it would be for standard ceramic tile. If your floor joists have even a tiny bit of ‘bounce’ when you walk, the rigid stone will eventually snap because it has zero flex. It is not just about how level the room is; it is about the structural physics beneath your feet. #IMAGE_PLACE_HOLDER_C#
Stop Chasing Level and Start Finding Flat
A common myth in the DIY community is that ‘level’ and ‘flat’ are interchangeable terms. They aren’t. A floor can be perfectly level—meaning it is parallel to the horizon—but still be as wavy as a roller coaster. For natural stone installation, flatness is the only metric that truly matters. If you have subtle dips and peaks, you will inevitably experience ‘lippage,’ where one tile edge sits slightly higher than its neighbor. This isn’t just a trip hazard; it is a point of vulnerability where the finish gets chipped away by heavy vacuum cleaners or sliding furniture. I always recommend mastering floor leveling pro secrets for perfect installations to ensure a surface that won’t eat your shoes or your stone. If you start to notice a ‘hollow’ sound when walking across certain sections, you likely fell victim to the trowel size error that leads to hollow sounding tiles, which means your mortar didn’t provide the 95% coverage required for natural stone. This lack of support makes the stone prone to cracking under simple point loads. Another trap is using ‘standard’ dark mortar. With light-colored marble or limestone, this can lead to ‘ghosting’—where the dark color of the mortar actually bleeds through the stone. Always use a high-quality white thinset specifically rated for natural stone. Have you ever fallen into this trap? Let me know in the comments.I’ve learned the hard way that your eyes are the most unreliable tools in the shed. When I’m checking a subfloor now, I don’t just ‘feel’ for a dip; I reach for a pinless moisture meter. If you’re wondering how to use a moisture meter to prevent floor failure, it’s about establishing a baseline before the first plank even touches the ground. The National Wood Flooring Association (NWFA) explicitly states in their technical guidelines that hardwood must be within a specific percentage range of the subfloor’s moisture content to avoid cupping or gapping later. I personally use a high-end digital meter that tracks environmental humidity alongside wood moisture, giving me actionable data rather than a gut feeling. This is one of the 7 tools you actually need for a professional diy hardwood install if you want the job to survive the seasonal shifts in your home.
Lasers Change the Game for Hallway Alignment
Precision doesn’t stop at moisture. I’ve completely switched to the laser level move for perfectly straight hallways because a traditional chalk line can be off by an eighth of an inch over twenty feet if the string isn’t snapped perfectly. When I’m prepping for a new tile layout, I obsess over precise floor leveling techniques to achieve flawless surfaces. I’ve found that using a 10-foot aluminum straight edge reveals more ‘waves’ in a concrete slab than a standard 4-foot level ever could. It’s the difference between a floor that looks okay and one that reflects light like a sheet of glass.
How can I keep my flooring looking brand new for a decade?
The secret isn’t a magic chemical; it’s a routine that respects the material. For wood, that means mastering hardwood floor care secrets to longevity and shine, such as using felt pads that are actually screwed into the furniture legs. Those cheap stick-on pads always fall off, leaving your chair to gouge the finish when you least expect it. For tile, maintenance is about checking the grout for hairline cracks annually. If you find a loose spot, you should learn how to fix a hollow sounding tile without tearing it up using a specialized injection resin that fills the void beneath. This simple fix saves you from a full demolition three years down the road.
Health and Technology are the Future of Flooring
Looking ahead, I see the industry moving toward even thinner, more resilient wear layers and a massive focus on indoor wellness. People are finally realizing that what’s under their feet off-gasses into their lungs, which is why learning how to choose flooring that wont kill your indoor air quality is becoming a priority for modern homeowners. We’re moving toward a ‘set it and forget it’ era with advanced hybrid cores, but the fundamentals of a flat subfloor will always remain the king of the job site. Try this today: go buy a 10-foot piece of straight aluminum box tubing and lay it across your floor. If you see light underneath it in multiple spots, you’ve got some leveling work to do before you even think about buying your material.
Hard Lessons from the Stone-Cold Reality of DIY
I’ve realized that stone doesn’t just sit there; it reacts to every chemical and movement in your home. One lightbulb moment for me was discovering that most grout issues aren’t about the installation, but about the house breathing. If you’ve ever wondered why your tile grout is cracking at the room corners, it is usually due to structural expansion, not a cleaning error. Similarly, if you have seen why your self-leveling compound is cracking like a dry lake bed, you know that the prep work dictates the life of the stone. My biggest takeaway? Respect the pH scale. Neutrality isn’t just a recommendation; it is a survival tactic for your home’s value.
The Only Three Tools You Really Need for Maintenance
I don’t believe in cluttered cabinets filled with gimmick products. I trust a high-end 10-foot aluminum straight edge to verify the work from the 3-foot level test for checking subfloor flatness like a pro during any repair. I also keep a pinless moisture meter in my bag; understanding how to use a moisture meter to prevent floor failure is the only way to know if your stone is truly ready for its next sealer coat. Finally, a dedicated stone soap is non-negotiable. It is worth the small investment to save a floor that should last a lifetime.
Creating a Legacy Under Your Feet
You have put in the sweat equity to understand your home’s unique geological needs. Whether you are currently tackling flooring installation mistakes to avoid for lasting results or just refining your weekly cleaning routine, remember that stone is a long-game investment. It gets better with age if you treat it with the care it deserves. Now that you know how to ditch the bleach and embrace the buffer, your floors will finally reflect the quality of the home you have built. Have you ever encountered a mystery stain on your stone that refused to come out no matter what you tried? Let me know in the comments below!