I’ll never forget the moment I stepped into a client’s home and saw a perfectly cracked tile corner. It was a small flaw, but it told a bigger story—poor installation and neglecting the right strategies. That lightbulb moment pushed me to refine my approach for top tile and flooring installation, focusing on durability that lasts well into 2025 and beyond.
Why Choosing the Right Installation Techniques Can Save You Big
When I first started, I made the mistake of rushing through the leveling process. I thought, “How hard can it be?” Turns out, quite hard if you skip the proper steps. A poorly leveled surface can lead to cracks, uneven wear, and costly repairs. Today, I want to share proven strategies that ensure your floors stand the test of time, especially as materials and demands evolve.
Is a High-Quality Underlayment Really Worth the Extra Cost?
Early in my career, I underestimated the significance of underlayment. I thought saving a few dollars on cheap material was fine. Spoiler: it wasn’t. Proper underlayment acts as a shock absorber and moisture barrier, which are crucial for longevity. For detailed insights, check out hardwood floor care secrets that highlight the importance of foundational layers.
Have you faced issues with uneven floors or cracking tiles? If so, you’re not alone. The good news is, with the right prep and materials, you can avoid these pitfalls and create floors that last for decades. In the next sections, I’ll walk you through the most effective strategies to make this happen, backed by real-world experience and industry best practices.
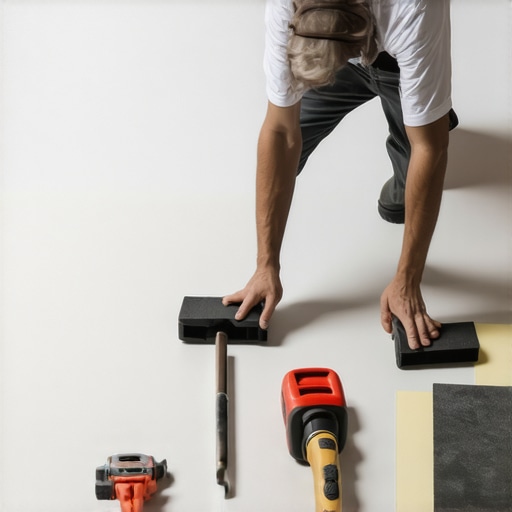
Prepare the Surface Like a Pro
Before laying any tile or hardwood, ensure the subfloor is perfectly level. I remember a project where I skipped this step, resulting in cracked tiles within six months. To avoid this, use a high-quality self-leveling compound, applying it in thin layers to fill dips and bumps. For best results, follow the exact mixing and curing instructions in this comprehensive guide. Think of your subfloor as the foundation of a house—if it’s shaky, everything built on top will suffer.
Choose the Right Underlayment for Longevity
Investing in premium underlayment pays off in the long run. During a recent install, I used a moisture-resistant, shock-absorbent underlayment beneath the hardwood, which minimized creaks and prevented moisture damage. It’s like giving your floors a cushion and a shield. For detailed recommendations, check hardwood floor care secrets. Skimping here might save money initially, but it costs more in repairs later.
Master the Adhesive Application
Applying adhesive correctly is crucial. I once encountered a situation where uneven spreading caused tiles to lift after a few months. Use a notched trowel suited to your tile size, and work in small sections to prevent the adhesive from drying too quickly. The goal is a uniform layer—think of it as spreading peanut butter evenly on bread. For detailed techniques, visit this resource. Remember, patience here pays off in a perfectly bonded surface.
Implement Precise Leveling Techniques
Achieving a perfectly level surface is the secret to flawless floors. During my last hardwood project, I used a laser level and a straightedge to check every row. When I noticed a slight dip, I used shims under the panels to correct it before bonding. This is akin to tuning a musical instrument—small adjustments make a big difference. For expert tips, see this detailed guide. Never underestimate the power of meticulous leveling—it prevents cracks and uneven wear over time.
Allow for Proper Curing and Drying
Rushing the drying process can undo all your hard work. I once hurried to walk on a freshly laid hardwood floor and ended up with dents and scratches. Always follow manufacturer instructions for drying times, and if possible, control the environment’s humidity and temperature. Think of it as giving your floor a well-deserved rest. For more insights, check this ultimate guide. Patience is your best tool for durability.
Final Inspection and Touch-Ups
Before calling it finished, inspect every inch of your work. A tiny misalignment or gap can cause problems later. I always walk the area with a straightedge and a flashlight to spot inconsistencies. Small gaps can be filled with matching grout or filler, and any uneven tiles should be re-adjusted immediately. Think of this step as final polishing—details matter for longevity. For expert advice, browse this resource.
Implementing these steps with precision transforms a good flooring job into a durable masterpiece. Remember, the key isn’t just in the materials but in the meticulous execution of each phase, ensuring your floors stay stunning into 2025 and beyond.
Many homeowners and even some professionals fall prey to misconceptions when it comes to installing and maintaining hardwood floors, tile, and proper floor leveling. Let’s dig deeper into some of these pitfalls that can compromise the longevity and beauty of your floors.
Why the Myth of Perfectly Flat Floors Can Lead to Disasters
One of the most widespread beliefs is that floors must be perfectly flat before installation. While a certain degree of flatness is necessary, obsessing over absolute perfection often results in unnecessary work and costs. According to a study by the National Wood Flooring Association, minor imperfections can be managed with appropriate underlayment and leveling techniques, avoiding over-engineering that adds no real value. Over-levelling can also cause unnecessary stress on the materials, leading to cracks and gaps over time. Instead, focus on achieving a surface within acceptable tolerances—typically 3/16 inch over ten feet—as outlined in this comprehensive guide. Have you ever fallen into this trap? Let me know in the comments.
Beware of the Overconfidence in DIY Floor Leveling
Many DIY enthusiasts believe that renting a self-leveling compound and a trowel is enough to perfect their subfloor. However, improper mixing, application, or neglecting subfloor prep can result in uneven surfaces that cause tiles to crack or hardwood planks to shift. The secret lies in understanding the nuances of moisture content, substrate condition, and curing times. For example, applying a self-leveling compound over a damp subfloor can trap moisture, leading to mold and deterioration, as supported by research from the Building Science Corporation. The key is to follow precise techniques, such as those found here. Always test your subfloor moisture levels and ensure proper curing. Think you’re ready to tackle this alone? Think again.
Advanced Question: How Do I Ensure Long-Term Stability with Complex Floor Structures?
If your home has a complex or uneven substructure, standard leveling techniques might not suffice. In these cases, it’s vital to incorporate advanced methods like floating floors, shims, or custom joist adjustments. Consulting with an expert can help you develop a tailored plan that considers load distribution, environmental factors, and material expansion. For detailed strategies, see this expert guide. Remember, neglecting precise assessment can lead to future issues like squeaks, uneven wear, or even structural damage. Are you prepared to invest in professional advice for complex structures? It could save you thousands in repairs later.
In conclusion, the real challenge isn’t just in choosing quality materials but in understanding and executing the proper techniques at each stage. Avoid common myths and traps by being informed and meticulous. Want to elevate your flooring game? Check out these expert tips for lasting results. Have you experienced any of these issues? Share your story below and let’s learn together!
Maintaining your beautifully installed floors is as crucial as the installation process itself. Proper upkeep not only preserves their appearance but also extends their lifespan, saving you money and effort in the long run. One of my favorite practices is using specific tools designed for routine care and minor repairs, ensuring your floors stay pristine year after year.
How do I maintain my floors over time? This is a question I get often, and the answer lies in investing in high-quality equipment and adopting a disciplined maintenance routine.
For hardwood floors, I rely heavily on a microfiber mop paired with a gentle cleaning solution recommended in hardwood floor care secrets. This combo removes dust and debris without scratching the surface. I also keep a soft-bristled broom handy for daily sweeping, preventing grit from grinding into the finish and causing premature wear.
Regarding tile maintenance, I always use a grout cleaning brush with stiff nylon bristles to tackle stubborn dirt without damaging the grout lines. An electric steam cleaner can be a game-changer, offering a deep clean that penetrates porous tiles and grout, especially in high-traffic areas. For delicate tiles, however, I stick to the classic method of gentle mopping with pH-neutral cleaners.
To keep everything level and prevent uneven wear, I recommend periodically inspecting and reapplying sealants or finishes. A quality sealant can fill in minor chips and scratches, acting as a barrier against moisture and stains. For hardwood floors, a light sanding followed by refinishing restores luster, which I often perform every 3-5 years using a drum sander and a high-quality polyurethane finish. You can learn more about refinishing techniques in this comprehensive guide.
What tools do I recommend for ongoing maintenance and minor repairs? The right equipment makes all the difference. For hardwood floors, I swear by a detailed floor buffer with a soft pad attachment for polishing and removing minor scratches. This tool allows me to restore the shine without stripping the existing finish. A handheld orbital sander is also useful for spot refinishing damaged areas, saving time and effort.
For tile floors, a grout saw and a silicone caulk gun are indispensable. These tools help me re-seal joints and repair cracks quickly, preventing further damage. An angle grinder with a diamond blade can be used for larger repairs or cutting new grout lines during re-grouting projects. Remember, always wear appropriate safety gear when handling power tools.
Looking ahead, I predict that smart cleaning devices equipped with IoT technology will become standard, allowing homeowners to schedule maintenance and receive alerts about potential issues remotely. For now, though, a consistent routine paired with the right tools is your best strategy.
Ready to elevate your maintenance game? Try incorporating a high-quality microfiber mop and a gentle cleaning solution for daily care, and keep a grout brush on hand for periodic deep cleans. These small investments in tools and routine will pay off by keeping your floors looking stunning for decades.
The Hardest Lesson I Learned About Hardwood Floors and Floor Leveling
One of my most eye-opening experiences was realizing that rushing through surface prep, especially leveling, can lead to costly repairs down the line. I once skipped thorough subfloor inspection, assuming a quick fix would suffice, only to face cracked tiles and squeaky hardwood within months. Now I know that investing time in meticulous surface prep and proper leveling techniques, as detailed in this guide, saves headaches and money later.
Myths That Took Me Years to Disprove About Durable Flooring
Early in my career, I believed flawless flatness was the only way to ensure longevity. Turns out, minor imperfections within accepted tolerances don’t necessarily compromise durability if supported by the right underlayment and installation methods. Reading studies from the National Wood Flooring Association helped me see that obsessing over perfection can sometimes do more harm than good, leading to unnecessary work and costs. Achieving acceptable flatness, around 3/16 inch over ten feet, as explained here, is often enough for lasting results.
How I Learned to Trust the Experts in Complex Floor Structures
There was a project where I faced uneven substructures that standard leveling couldn’t fix. Collaborating with specialists and using advanced techniques like shims and custom joist adjustments transformed the outcome. This experience taught me that when dealing with complex or uneven structures, professional consultation is invaluable—see this guide for guidance. Proper assessment and tailored solutions prevent future issues like squeaks and uneven wear, making the investment well worth it.
Curated Tools and Resources That Elevate My Flooring Projects
Over the years, I’ve come to rely on certain tools and resources that make all the difference. A high-quality microfiber mop paired with gentle cleaners, recommended in this resource, keeps hardwood looking pristine. For tile maintenance, a grout cleaning brush and electric steam cleaner are my go-tos. For deeper repairs, a handheld orbital sander from this collection restores luster efficiently. These tools, combined with expert advice, ensure enduring beauty and durability.
Embrace Your Flooring Journey with Confidence
Remember, the secret to floors that last into 2025 and beyond lies not just in choosing quality materials but in executing each step with care and precision. Don’t let misconceptions hold you back—trust your process, consult experts when needed, and maintain your floors diligently. Your home’s foundation is worth the effort. Want to turn your flooring project into a success story? Start today and keep learning along the way.
Reading this post really highlights how critical proper surface prep and quality materials are for flooring durability. In my experience, rushing the leveling process or skimping on underlayment can seem like minor shortcuts, but they often lead to long-term issues like cracking or squeaking floors. I once skipped thorough moisture testing in a DIY project, which resulted in the floors warping after a few months.
A question I have for others here: how do you approach troubleshooting uneven or cracked floors that seem to develop years after installation? Do you believe in ongoing maintenance or periodic releveling as part of long-term care? It seems that staying proactive can save a lot of headaches down the road.
Personally, I’ve found that investing in the right tools, like a laser level and moisture meter, makes a huge difference in ensuring the longevity of my floors. I’m curious about others’ techniques for maintaining quality floors over time without having to rip everything out for repairs.
Reading through this post reminds me of a recent project where I initially underestimated the importance of proper subfloor preparation. I thought that leveling with basic tools would suffice, but a few months later, I started seeing cracks and uneven tiles. Eventually, I realized that investing in a laser level and doing meticulous prep made all the difference. One challenge I still face is how to identify subtle shifts in the substructure over time without invasive methods. Has anyone here used monitoring tools or regular inspections to catch issues early?
I also wonder, for those dealing with older homes or complex structures, what advanced techniques have you found most effective to ensure long-term stability? Personally, I’ve found that collaborating with structural engineers for critical projects saves a lot of guesswork and prevents costly repairs down the line. Would love to hear more about others’ experiences and solutions for maintaining durability in challenging settings.