
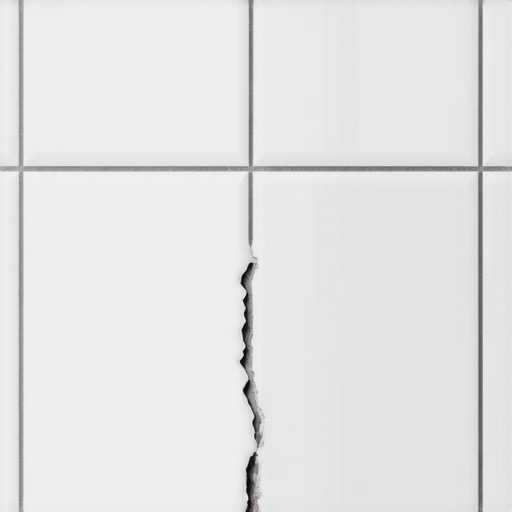
I was standing in my kitchen about three years ago, nursing a cup of lukewarm coffee and staring down at the corner where my beautiful new floor met the pantry wall. There it was. A thin, jagged, ugly little line running right through the grout. I felt like a failure. I had spent weeks [installing tiles like a pro](https://tiletrendshop.com/installing-tiles-like-a-pro-step-by-step-strategies-for-2025) and following every video I could find, yet my floor was already starting to look tired and broken. It wasn’t just a cosmetic issue; it felt like a personal insult to my DIY skills. I realized then that I had made the ultimate rookie mistake: I assumed that grout was the solution for every gap. It turns out, that hard, sandy stuff we love is actually quite brittle, and corners are where your house tries to tell you its secrets. Today, I am going to show you exactly why this happens and how you can fix it without ripping up your entire floor.
That Ugly Jagged Line in the Kitchen Corner
When I first started tiling, I thought if a little grout was good, a lot of grout was better. I packed it into every single crevice, including the spots where the floor meets the wall and where two walls meet in a corner. That was my first big mistake. You see, your house is a living, breathing thing. It expands and contracts with the seasons, and those corners—known in the industry as change-of-plane joints—are where the most movement occurs. If you used the wrong materials during your [flooring installation](https://tiletrendshop.com/flooring-installation-mistakes-to-avoid-for-lasting-results), that rigid grout simply cannot handle the stress. It’s like trying to bend a cracker; it’s going to snap. I’ve seen homeowners ignore this until it becomes a haven for moisture and mold, especially if it’s happening in wet areas. If you’ve seen similar issues in your bathroom, you might want to check out [why your grout is crumbling in the shower corners](https://tiletrendshop.com/why-your-grout-is-crumbling-in-the-shower-corners) to see if the cause is the same.
Is My House Actually Falling Apart?
This is the biggest fear every homeowner has when they see a crack. You start imagining foundation issues or sinking piers. But take a deep breath; most of the time, it is just physics. According to the Tile Council of North America (TCNA), movement joints are mandatory in tile installations because all materials expand and contract at different rates. When you lock two planes together with rigid grout, you’re fighting against the natural settling of your home. It’s not that your house is falling down; it’s just that it’s moving, and your grout isn’t. Have you ever noticed these cracks appearing right after the seasons change from summer to winter?
Why Rigid Grout and Moving Walls Simply Don’t Mix
In my early days, I didn’t realize that [precise floor leveling techniques](https://tiletrendshop.com/precise-floor-leveling-techniques-to-achieve-flawless-surfaces) were only half the battle. Even if your floor is perfectly flat, the junction where the floor meets the wall is a high-stress zone. The wood framing in your walls reacts to humidity differently than the concrete or plywood under your tile. This discrepancy is what creates that shearing force that pops the grout right out of the joint. I once spent an entire weekend re-grouting a laundry room, only to have the cracks return two months later because I refused to use color-matched caulk. It was a humbling lesson in how a $10 tube of silicone could have saved me weeks of frustration. Here is how you stop the cycle of cracking and do it the right way.
Scrape Away the Failure First
Before you can fix the joint, you have to get rid of every single crumb of the old, failed grout. I used to think I could just caulk over the cracks, but that’s like putting a fresh coat of paint over a peeling wall—it’s going to fail. Grab a manual grout saw or a carbide-tipped scraper. If you are dealing with a massive area where the grout is stubborn, you might even need the hammer drill hack for removing old ceramic tile using a specialized chisel bit, though you have to be incredibly careful not to chip the edges of your porcelain. Your goal is to create a clean ‘U’ shaped channel.
Clear the Dust for Better Adhesion
Once the grout is out, vacuum the joint thoroughly. Any leftover dust acts like a barrier, preventing your new sealant from sticking. I once skipped this step in a rush to finish a guest bathroom, and the caulk peeled away within a week. Now, I always wipe the area down with a bit of denatured alcohol on a rag. This ensures the surface is bone-dry and free of oils.
Pick a Material That Actually Moves with Your House
This is where most DIYers get confused. You’ll see bags of sanded and unsanded grout at the store, and while knowing the difference between sanded and unsanded grout for tile projects is essential for the main floor, it’s the wrong choice for corners. For a change-of-plane joint, you need color-matched 100% silicone caulk. It’s flexible, waterproof, and—most importantly—it stretches. Think of grout as a brittle stone and silicone as a heavy-duty rubber band. When the house shifts with the seasons, the rubber band stretches while the stone simply snaps. 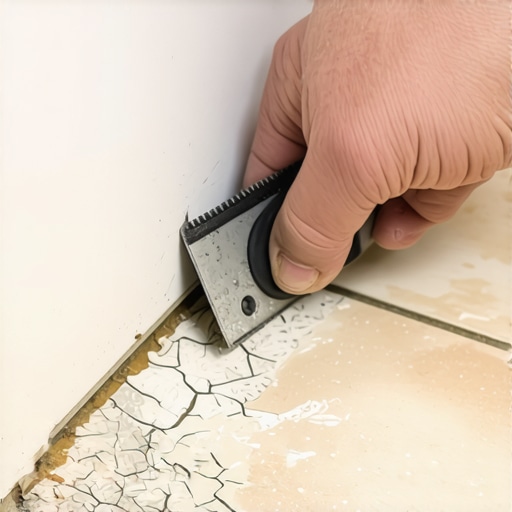
How to Achieve a Professional Bead Without the Mess
Applying caulk can feel like trying to wrangle an octopus if you aren’t prepared. The trick is in the prep. I highly recommend using blue painter’s tape on both sides of the joint, leaving about an 1/8th of an inch of tile exposed on each side. I remember my first attempt at this without tape—I ended up with silicone in my hair, on my knees, and smeared across three feet of expensive tile. It was a nightmare to clean up. Now, I tape the lines, apply a thin bead of caulk, and smooth it with a finger dipped in a little soapy water. Pull the tape while the caulk is still wet, and you’ll have a line so crisp it looks like a professional contractor did it.
Don’t Ignore the Subfloor Beneath the Surface
Sometimes, the crack isn’t just about the grout; it’s about the bounce. If your floor feels springy when you walk near the wall, your subfloor might be the real culprit. You should perform the 3-foot level test for checking subfloor flatness like a pro to see if there is a dip causing extra movement in that corner. If the subfloor is flexing, no amount of silicone will stay pretty forever. You might need to look into a step-by-step guide to flooring installation and leveling success to address the structural issues. I once spent days fixing a corner only to realize the joist underneath was loose. It’s much easier to fix a squeaky subfloor before you lay your new floor than it is to chase cracks in the grout for the next decade.Now that we’ve addressed the visible cracks, let’s talk about the foundation of the problem—the floor itself. Most people assume that if they buy a bag of ‘self-leveling’ compound, the product will do the work for them. This is the single most dangerous myth in the industry. In my experience, self-leveler is anything but automatic. It requires an incredible amount of prep, or you’ll end up with a mess that’s harder to fix than the original dip. Many DIYers think they can skip the primer or just use water. That is a recipe for disaster. If you don’t use the specific primer recommended by the manufacturer, you’ll likely find that your floor primer is making the leveler bubbling worse or, even worse, your self-leveler is peeling off the concrete in sheets. The concrete or wood underneath is thirsty; if you don’t prime it, it sucks the moisture right out of the compound, causing it to crack and fail before it even sets. 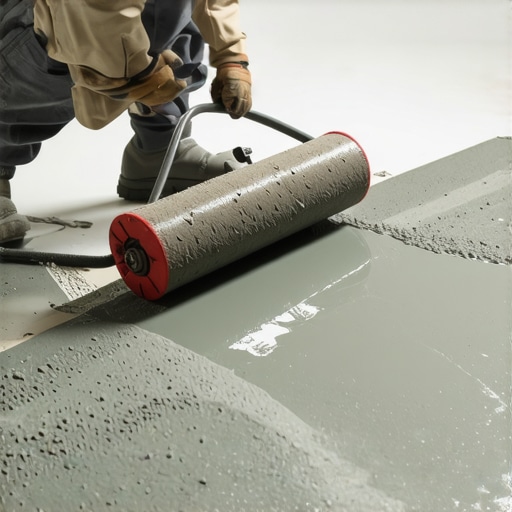
Why Does My Leveling Compound Look Like a Dry Lake Bed?
If you’ve ever poured a bag and come back the next morning to see a network of spiderweb cracks, you likely committed the ‘oops’ factor of over-watering. Adding just a half-cup too much water to the mix to make it ‘flow better’ actually destroys the polymer bonds. According to ASTM C1708 standards, which govern the testing of self-leveling underlayments, the water-to-powder ratio is non-negotiable for structural integrity. When you mess with the chemistry, you get a weak surface that cannot support the weight of your tiles. Here is a nuanced truth that pros know: level and flat are not the same thing. You can have a floor that is perfectly level but has a hump in the middle that makes it impossible to lay wide-plank hardwood properly. Conversely, a floor can be slightly sloped but perfectly flat. For tile, flatness is king. If you don’t master precise floor leveling techniques to achieve flawless surfaces, you will experience ‘lippage’—where the edge of one tile sits higher than the next. Before you pour a single bag, make sure you’ve mastered the best way to mix self-leveler for a perfectly smooth surface. It involves a high-speed mixer and a very specific sequence. If you try to hand-stir it, you’re going to have lumps that turn into permanent mountains on your floor. Have you ever fallen into this trap of thinking the product would do the work for you? Let me know in the comments—I’ve definitely been there. If you’re still in the planning stages, avoid these flooring installation mistakes to avoid for lasting results before you get too deep.I used to think a standard bubble level was enough to get by, but I quickly learned that precision is the only way to avoid callbacks. Nowadays, my secret weapon is a 360-degree green beam laser level. If you are mastering floor leveling pro secrets for perfect installations, you need to see the high and low spots across the entire room simultaneously. A bubble level only tells you about the space directly beneath it, whereas a laser shows the ‘big picture’ of the subfloor. I use it to map out the entire room before I even mix a bag of compound. It allows me to see exactly where the dips are so I can apply the product with surgical precision.
The Laser Level Changed My Entire Workflow
When I started using a high-visibility laser, I realized that my previous ‘flat’ floors were actually slightly bowl-shaped. For someone who wants to elevate your space choosing the right hardwood floors for your home, this discrepancy matters. If you have a 1/8th inch dip over ten feet, your hardwood might bridge that gap, creating a hollow sound or, worse, eventually causing the tongue-and-groove joints to snap under the weight of furniture. I always recommend using a laser in conjunction with the 3-foot level test for checking subfloor flatness like a pro to verify the laser’s findings. 
Why Moisture Meters Are Non-Negotiable
Before I even think about opening a box of planks, I pull out my pinless moisture meter. This is where professional authority is non-negotiable. According to the National Wood Flooring Association (NWFA) Technical Publication No. A100, the moisture content of the subfloor and the wood flooring must be within 2 to 4 percent of each other for planks wider than 3 inches. I’ve seen beautiful installs ruin entire houses because the installer skipped the moisture test you must do before gluing down wood. If you don’t acclimate your hardwood without taking over the whole house, you are essentially gambling with your investment.
How do I maintain my floors for the next decade?
The work doesn’t end once the last piece of trim is nailed in. True hardwood floor care secrets to longevity and shine involve a strict ‘no-steam’ policy. I have seen countless homeowners destroy their finishes because they thought a steam mop was ‘sanitary.’ In reality, you are forcing pressurized moisture into the wood fibers. Instead, stick to a microfiber mop and a pH-neutral cleaner. If you’ve just finished a project, knowing the dustless sanding secret for home renovations will save your HVAC system from being clogged with fine particulates that can settle into your new finish and ruin the luster.
The Future of Digital Floor Mapping
I predict we are moving toward a world where DIYers will use augmented reality (AR) apps on their phones to scan subfloors and generate 3D heat maps of every imperfection. We are already seeing this with professional LiDAR scanners, and it’s only a matter of time before that tech is in everyone’s pocket. It will make the process of the ultimate guide to floor leveling for a perfect finish accessible to everyone, reducing the human error that leads to cracking grout and shifting planks. Before you lay a single plank or tile, I urge you to try the laser mapping technique—it will completely change how you view your subfloor and ensure your installation stands the test of time.
What Decades of Mistakes Taught Me About Successful Installs
If there is one thing I’ve learned from countless hours on my knees, it’s that your floor doesn’t care about your schedule. It only cares about the physics of the house. Here are the lightbulb moments that finally made me a pro:
- Expansion isn’t an option, it’s a law. Every time I tried to skip a perimeter gap to make it ‘look tighter,’ the floor eventually buckled. You must respect the expansion joint secret for large tiled living areas if you want your work to last through the seasons.
- The subfloor is the foundation of your sanity. I used to rush the leveling, but now I know that a few extra hours spent mastering floor leveling pro secrets for perfect installations saves weeks of frustration later.
- Cheap tools cost more in the long run. A $20 moisture meter is the difference between a floor that stays flat and one that turns into a roller coaster.
#IMAGE_PLACEHOLDER_E#
The Toolset That Actually Makes a Difference
I don’t believe in buying every gadget at the hardware store, but these few items are non-negotiable in my kit. First, a high-quality 360-degree laser level; it turns guesswork into absolute certainty when you are following the ultimate guide to floor leveling for a perfect finish. Second, the TCNA Handbook is my bible for tile standards—it’s how I learned why certain materials fail in specific environments. Third, a pinless moisture meter to ensure I never face the heartbreak of cupping wood. Finally, a set of specialized silicone profiling tools; they are the only way to get those flawless, professional-looking joints in your kitchen and bathroom corners.
Stop Planning and Start Your Transformation
It’s easy to get paralyzed by the fear of making a mistake, but remember that even the pros started with a crooked tile or a messy grout line. By focusing on the flooring installation fundamentals leveling for a seamless look, you are already ahead of 90% of DIYers. Your home is waiting for that upgrade, and now you have the roadmap to do it right the first time. Whether you are tackling a small bathroom or a whole-house renovation, take it one plank at a time.
Have you ever had a grout line crack on you just weeks after finishing a project? Let me know in the comments how you handled it!