
I was down on all fours, pry bar in hand, ready to fix a single “pop” in my hallway, when I saw it. It wasn’t just that the wood had come loose; the adhesive underneath had transformed into a crusty, bright yellow substance that shattered like glass the moment I touched it. My heart sank. I’d spent weeks on that installation, only to find the very foundation of my floor was literally disintegrating into a pile of yellow flakes. It felt like a personal betrayal by the hardware store.
The Hidden Chemistry That’s Eating Your Adhesive
Most of us assume that once the glue cures, it’s set for life. But that “set it and forget it” mindset is exactly how I ended up with a crunchy subfloor. When your floor glue turns yellow and brittle, it’s usually a sign of chemical oxidation or thermal degradation. Basically, the polymers are breaking down because of heat, moisture, or—more often than not—poor product selection. Early in my DIY days, I made the mistake of grabbing the cheapest tub on the shelf, thinking “glue is glue.” I didn’t realize that certain adhesives can’t handle the minor shifts in a home’s environment. Before you even think about laying down a new bead, you have to verify your foundation. I’ve learned the hard way that skipping the moisture test you must do before gluing down wood is a recipe for disaster. Moisture trapped under the planks reacts with the adhesive, leading to that unsightly discoloration and loss of bond. According to the National Wood Flooring Association (NWFA), moisture imbalances are responsible for over 75% of all flooring failures, and adhesive breakdown is a primary symptom. Today, I’m going to show you how to identify the culprits—whether it’s an old radiant heat system or a lack of perimeter expansion gaps—and how to choose a bond that actually lasts.
Is the Expensive Stuff Actually Worth the Hype?
I get it. When you’re staring at a bucket of adhesive that costs three times more than the generic brand, it feels like a scam. You start wondering if you’re just paying for a fancy label and a shiny logo. But here’s the reality: high-end silane-modified polymers are engineered to stay flexible. Cheap glues dry hard, and hard glue eventually becomes brittle glue. If your floor has any “give” at all, that brittle glue is going to snap. If you’re dealing with a floor that feels a bit “bouncy,” you might even need to fix a bounce in your plywood subfloor before the glue even matters. Have you ever pulled up a board only to find a handful of yellow dust instead of a solid bond? Drop a comment and tell me what you found—I’ve seen everything from “powdered sugar” consistency to “rock candy” shards. In the next section, we’ll dive into the specific tools and prep steps you need, like the flashlight test for checking floor flatness, to ensure your next project doesn’t end up as a crunchy mess.
Scrape Every Last Bit of Yellow Dust
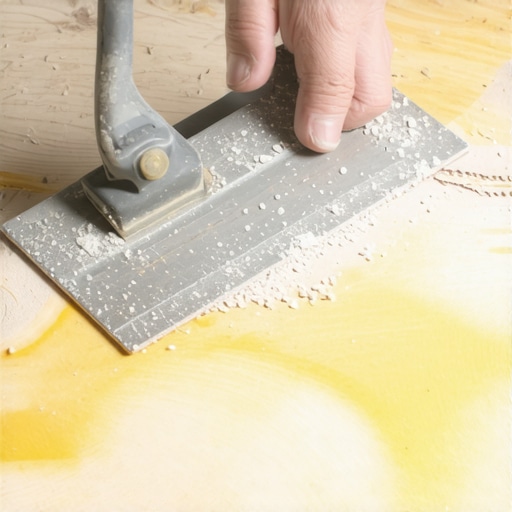
Before you even think about opening a fresh bucket of adhesive, you have to get rid of the ghosts of projects past. That yellow, brittle stuff is essentially a barrier. If you apply new glue over old, crystallized residue, you’re trying to build a house on a foundation of loose sand. I learned this the hard way during a kitchen remodel where I thought “good enough” was a real strategy. I left about 20% of the old adhesive behind, and three months later, the floor sounded like I was walking on potato chips every time I went for a midnight snack. Grab a heavy-duty long-handle scraper and get to work. If you’re dealing with old adhesive on concrete, learning how to remove carpet glue from a concrete subfloor without chemicals is a great way to avoid breathing in toxic fumes while you work. You want to see the actual wood grain or the raw concrete before moving forward.
Why a Flat Subfloor Saves Your New Planks
A subfloor that looks flat to the naked eye usually isn’t. Think of your new floor as a skin; it will conform to every dip and hump underneath it. If there’s a valley in your subfloor, the plank will bridge that gap like a tiny suspension bridge. Every time you step on it, the plank flexes, and that constant movement is what eventually snaps the bond of even the most expensive glue. I always use the 3-foot level test for checking subfloor flatness like a pro. If you find a gap larger than 3/16 of an inch, you have work to do. For those working with wood, you can often solve this by learning how to level a plywood subfloor with shims and plywood scraps, which is much cheaper than pouring gallons of leveler and wait days for it to dry.
Stop the Bubbles Before They Start
If you decide to go the self-leveling route, don’t skip the primer. This was my biggest “rookie” mistake. I poured a high-end leveling compound directly onto a thirsty, dry plywood subfloor. Within minutes, the air inside the wood started escaping, creating hundreds of tiny pinholes and bubbles in my expensive mix. It looked like a volcanic landscape rather than a smooth floor. Now I know that why your floor primer is making the leveler bubbling worse usually comes down to improper dilution or application. You need that primer to seal the “pores” of the subfloor so the leveler can flow smoothly. If you skip it, you might find why your leveling compound is cracking like a dry lake bed just a few days later. A solid, primed surface is the only way to ensure your new adhesive has a clean, stable place to live.
Ensure Your Perimeter Has Room to Breathe
Once your floor is flat and clean, you must plan for movement. Wood and even some tiles expand and contract with the seasons. If you glue your floor tight against the baseboards, that pressure has nowhere to go but up—causing the planks to pop or the glue to fail under sheer stress. This is where why you need a perimeter expansion gap for every room becomes your best friend. I usually use 1/4-inch spacers to keep that gap consistent. It’s a small detail that prevents a massive headache six months down the road when the humidity kicks in and your floor starts to grow.
I used to think that a bucket of self-leveler was a ‘fix-all’ for a sagging floor. It’s a common trap: seeing a dip and assuming that pouring five gallons of liquid stone will solve the underlying issue. But here is the contrarian truth that most big-box stores won’t tell you: self-leveling compound adds weight, not strength. If your joists are undersized, adding 100 pounds of leveler might actually make the sag worse over time. Before you pour, you need to understand the ultimate guide to floor leveling for a perfect finish, which starts with structural stability, not just surface aesthetics. Have you ever poured leveler only to see it crack a week later? Let me know in the comments—I suspect many of us have been seduced by that ‘smooth’ finish only to find it was a temporary mask.
Can self-leveling compound actually fix a structural sag?
The short answer is no. This is where the nuance of ‘deflection’ comes in. According to the Tile Council of North America (TCNA), subfloors must meet a deflection limit of L/360 for ceramic tile and L/720 for natural stone to prevent grout and tile cracking. This means the floor shouldn’t bend more than a tiny fraction under a specific load. If your subfloor is ‘bouncy,’ that expensive leveling mix will eventually delaminate or crack because it is rigid and cannot flex. You must learn how to check for subfloor flex before you lay rigid tile to ensure your foundation is actually capable of supporting the weight. I’ve seen countless flooring installation mistakes to avoid for lasting results, but ignoring deflection is the most expensive one.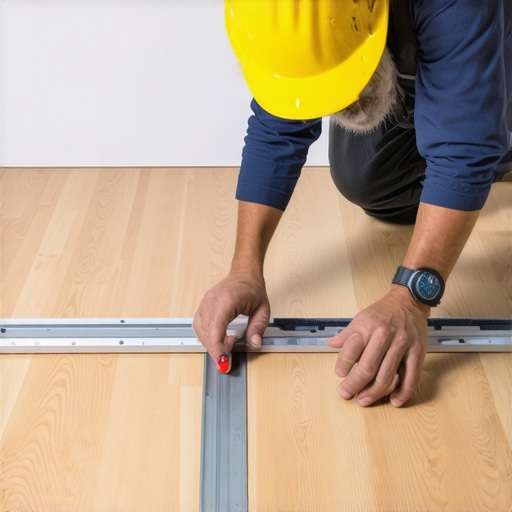 One ‘oops’ factor that haunts many DIYers is bond failure. If you don’t clean the slab perfectly, you’ll end up wondering why your self-leveler is peeling off the concrete in sheets. It’s not just about the leveler; it’s about the mechanical bond. Most people think ‘clean’ means a quick sweep, but for an advanced install, you often need to perform the simple test to see if your subfloor is strong enough for tile, which includes checking for sealers or contaminants that act as a release agent. If water beads up on your concrete during a splash test, your leveler simply won’t stick, and the whole project will fail before it even starts.
Ditch the bubble level for a 360-degree laser
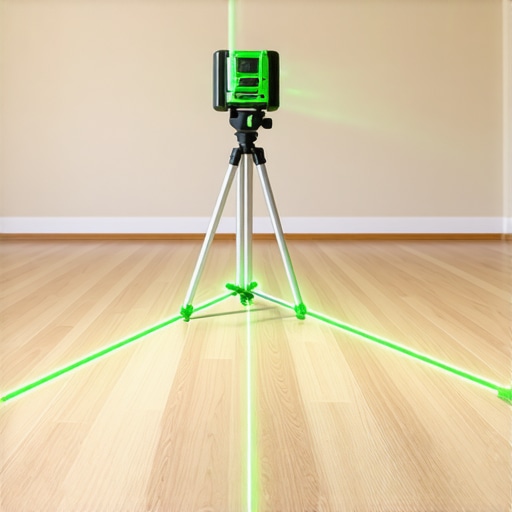
I spent years crawling around with a six-foot spirit level, thinking I was being precise. I wasn’t. The moment I switched to a 360-degree green beam laser, like the Bosch GLL3-330CG, my entire approach to layout changed. When you are trying to find the highest point in a room to establish your datum line, a traditional level is prone to cumulative error. If you’re off by just a hair every six feet, you’ll be an inch off by the time you reach the far wall. The laser doesn’t lie. It casts a perfectly level reference line across every wall simultaneously, making precise floor leveling techniques to achieve flawless surfaces actually possible for a solo installer. Beyond the laser, you should check out the 7 tools you actually need for a professional DIY hardwood install to see why a dedicated flooring nailer and a high-quality moisture meter are non-negotiable for my kit.
Stop the wild swings in your indoor humidity
Once the floor is down, the battle isn’t over; it’s just shifted to the air. Wood is a living, breathing material. According to the Wood Floor Business (WFB) technical guidelines, maintaining a consistent indoor relative humidity (RH) between 30% and 50% is the single most critical factor for floor stability. If your home drops to 15% RH in the winter, those expensive wide planks are going to shrink and gap. If it spikes to 70% in the summer, they’ll cup and crush their own edges. I personally keep a small hygrometer hidden behind a picture frame in my hallway. It’s a $10 tool that saves a $10,000 floor. Learning these hardwood floor care secrets to longevity and shine will keep you from reaching for the sander prematurely.
How do I keep my floor stable for the next decade?
The secret to a floor that looks twenty years old but feels brand new is the ‘screen and recoat.’ Most people wait until the wood is grey and scratched to do anything, which forces a full, dusty sanding. If you apply a fresh topcoat every few years, you never actually wear down to the raw wood. This is a core part of mastering hardwood floor refinishing expert tips for 2025. Also, be obsessive about your cleaning routine. I always tell my clients that the best way to clean a new hardwood floor for the first time is with a microfiber mop and a pH-neutral cleaner—never, ever a steam mop, which is essentially a pressure washer for your glue joints.
Looking ahead, I predict we are going to see a massive shift toward ‘smart subfloors.’ We are already seeing moisture sensors that can be embedded during the leveling phase to alert your phone if a leak starts under your kitchen tiles before the grout even changes color. For now, my best advice is to get a professional-grade laser and check your floor tonight—you might be surprised how much that ‘flat’ floor actually slopes. Use the 3-foot level test I mentioned earlier and see if your foundation is as solid as you think it is.
What That Crunchy Yellow Adhesive Dust is Actually Trying to Tell You
Finding crystallized glue isn’t just a sign of age; it’s a symptom of vapor pressure or a chemical mismatch. One lightbulb moment for me was realizing that many older adhesives lose their plasticizers when exposed to high alkaline levels in concrete, turning the bond into glass and causing those dreaded pops. Also, always check the ‘open time’ on your bucket; if you spread too much glue at once, it skins over, leading to a weak, brittle bond that will eventually fail. Mastering flooring installation fundamentals leveling for a seamless look starts with diagnosing these chemistry failures rather than just scraping them away and hoping for the best. Remember, if you can snap a piece of old glue like a cracker, your moisture levels were likely fluctuating wildly during the curing phase.
The Gear That Keeps My Installations From Popping and Squeaking
I’ve learned that the right tools do 80% of the work for you, and a few specific items are non-negotiable for my kit. Beyond the laser levels, I always keep a high-torque, low-RPM mixer on hand; mixing self-leveler or thinset too fast introduces micro-bubbles that weaken the entire structure of the floor. I also rely on tile installation pointers that save time and money, like using a premium stainless steel notched trowel to ensure there are no air pockets where moisture can collect. If you ever finish a job and hear a ‘click’ when you walk, don’t panic—knowing how to fix a hollow sounding tile without tearing it up using precision injection resins can save your sanity and your budget. Finally, a pinless moisture meter is the only way I sleep soundly after a job is complete.
Build a Foundation Your Future Self Will Thank You For
It’s tempting to rush toward the finish line when you have those beautiful new planks or tiles waiting in the driveway. But the secret to a floor that doesn’t just look good but stays silent for twenty years is the patience you show during the invisible prep phase. By following a step by step guide to flooring installation and leveling success, you are ensuring that your home remains a sanctuary rather than a source of maintenance stress. Your flooring installation is only as good as the work underneath it, so take the extra day to get the subfloor flat and the moisture controlled. Have you ever encountered a ‘mystery’ subfloor material that left you scratching your head? Let me know in the comments below—I’d love to hear about the weirdest things you’ve found under your old floors!