
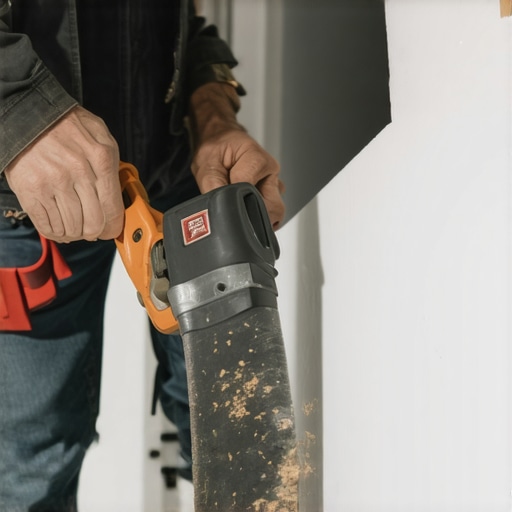
I remember the first time I attempted to install hardwood flooring myself, only to realize that my baseboards looked like they had been hit by a hurricane. The edges weren’t clean, and I learned the hard way that neglecting proper undercutting can turn a gorgeous floor into an unsightly mess. It was a lightbulb moment—there’s a right way to do this, and doing it well makes all the difference.
The Importance of a Precise Undercut for a Flawless Finish
When you’re installing new flooring, whether it’s hardwood, tile, or laminate, the way you approach the baseboard reveals your craftsmanship. A clean, tight fit where the flooring meets the wall not only looks professional but also prevents dust and debris from sneaking underneath. But here’s the catch—many DIYers overlook the significance of undercutting or do it improperly, resulting in gaps, uneven edges, or damaging the baseboard during removal.
Over the years, I’ve learned that the secret lies in a proper undercut, but it’s not just about sawing a line. It’s about understanding the nuances that ensure your flooring and baseboards work together harmoniously. Achieving this delicate balance offers a seamless look and prolongs your floor’s lifespan. Trust me, skipping this step or rushing through it can cause problems down the line, like squeaky floors or chipped paint on the baseboard.
If you’ve faced the frustration of trying to hide uneven cuts or dealing with chipped baseboards after a flooring installation, you’re not alone. Many homeowners and seasoned professionals admit that mastering the undercut can be a game-changer, making the difference between a good job and a great one. Curious how to do it right? Stick around—next, I’ll guide you through the most effective techniques and tools to get that perfect cut every time.
Is Underpinning Really Worth the Extra Effort?
Early on, I made the mistake of neglecting the undercut or using a rogue saw blade, which resulted in visible gaps and damaged baseboards. I waste time fixing those issues, and trust me, it’s far easier to do it correctly the first time. According to experts, a proper undercut ensures better airflow, prevents drafts, and enhances aesthetic appeal. For more on the foundational aspects of flooring, check out this guide on flooring installation fundamentals.
Now, with a few tips and the right tools, I’ve turned what used to be a dreaded chore into a straightforward step. Ready to elevate your flooring project? Let’s dive into the precise techniques that will help you achieve that professional, clean finish you’re after—no more awkward gaps or ruined baseboards.
.
Set Up Your Tools for Success
Start by selecting a fine-tooth saw blade, ideally a multi-tooth miter or fine crosscut blade, which cuts cleanly without tearing the wood. Secure your saw at a 45-degree angle if your baseboard requires beveling. I recall once using a basic handsaw, which resulted in jagged edges and extra sanding—you’ll want to avoid that. Mount your saw on a stable surface or use a handheld saw with a guide for better control.
Measure and Mark Precisely
Before making any cuts, measure the distance from the wall to the edge of the baseboard that will be removed, and add the thickness of your flooring; this ensures a tight fit. Use a carpenter’s square and pencil to mark your cut line, making it as straight as possible. During my first attempt, a wobbly line led to uneven gaps, so double-check your measurements and marking before proceeding.
Undercut the Baseboard Effectively
If you’re working with installed baseboards, carefully score along the marked line with a utility knife to prevent chipping. Then, position your saw along the line, keeping the blade perpendicular to the wall, and slowly cut through the baseboard. Keep the saw steady, avoiding forcing it, which can cause splintering. I once hurried this step, resulting in torn baseboard edges, emphasizing the importance of patience and precision.
Handling Corners and Edges
For inside corners or intricate moldings, use a coping saw or oscillating tool to meticulously trim and match the cut profile, ensuring a snug fit against the flooring. This extra effort creates a seamless transition that’s hard to spot. Remember, a sloppy joint not only hampers aesthetics but can also allow dust and drafts beneath the floor.
Test Your Fit Frequently
Place the flooring planks temporarily against the cut baseboard to check alignment. Use shims or scrap flooring as needed for minor adjustments. During my last project, I kept test-fitting until I was satisfied with the tightness. Don’t rely solely on visual inspection—feel for gaps with your fingers and listen for any cracks when pressing the flooring against the baseboard.
Finish with Proper Sanding and Sealing
Lightly sand any rough edges or splinters from the cut areas using fine-grit sandpaper. If your baseboard is painted or stained, touch it up after installation. This step ensures that no sharp edges remain that could damage the flooring or cause injury. I once overlooked this, and a rough edge caused a small tear in the flooring finish, reminding me of the value of attention to detail.
Embrace the Details for a Perfect Look
When finished, inspect the joints from different angles, and adjust as needed for a tight, professional appearance. Remember, patience during this technical step prevents costly errors later. To learn more about achieving perfect levels before laying tiles adjacent to your hardwood, check out this guide on floor leveling techniques. Consistent, careful undercutting transforms a good installation into a stunning one, elevating your craftsmanship and ensuring longevity for your floors.
Many DIY enthusiasts believe that flooring installation and leveling are straightforward tasks, but in reality, there are subtle pitfalls most people overlook. One prevalent misconception is that perfectly flat subfloors guarantee flawless results. However, even minor undetectable dips or humps can lead to cracked tiles, squeaky floors, or uneven surfaces over time. Experts emphasize that comprehensive floor preparation, including meticulous testing of subfloor stability—such as the three-foot level test—is critical for success.
Another common myth is that using a standard saw blade suffices for detailed cuts in baseboards or tiles. In truth, selecting the right blade, like a thin-kerf and fine-tooth saw, produces cleaner cuts and minimizes splintering. Rushing this step often results in jagged edges that require extra sanding or patching, which can compromise the entire aesthetic. Remember, precision tools save time and improve quality; learn more about mastering floor leveling to avoid these issues.
Here’s where many err—the belief that floor leveling compounds, once poured, will always self-level perfectly. This isn’t entirely accurate. External factors such as temperature, humidity, and mixing technique heavily influence the outcome. Using a leveling primer, as recommended by experts, enhances flow and adhesion, preventing cracking or peeling of the finish. For advanced insights, check out this guide on floor preparation.
Have you ever fallen into this trap? Let me know in the comments.
Swapping from basic assumptions to more nuanced understanding can dramatically improve your flooring projects. For instance, many overlook that proper edge preparation—like sealing cuts before installation—prevents moisture intrusion and tile shifting. A small step like sealing joints diligently makes a notable difference in longevity.
Furthermore, advanced practitioners recognize that the subfloor’s condition—such as underlying moisture levels—can sabotage even the best installation if ignored. Conducting moisture tests using a moisture meter before starting ensures your work lasts.
In sum, achieving professional-quality results requires more than just following basic steps. It demands understanding the hidden nuances—like the importance of subfloor stability, precise tool selection, and proper environmental conditions. These insights elevate your craftsmanship, reduce costly errors, and promote a long-lasting finish. For comprehensive strategies on correcting these hidden pitfalls, explore the ultimate guide to floor leveling.
Maintaining your hardwood, tile, or flooring installation tools is crucial for ensuring your projects stay on track and your floors remain beautiful over time. Investing in quality equipment and understanding proper upkeep can significantly extend the lifespan of your tools, saving you money and frustration in the long run.
Choosing the Right Equipment for Precision and Durability
For accurate cuts, I recommend using a high-quality **miter saw with a fine-tooth blade**. Personally, I favor models with adjustable bevels and positive stops, such as the Makita LS1018, because they provide clean, precise cuts with minimal splintering. This precision is vital when undercutting baseboards, as sloppy cuts result in gaps that compromise both aesthetics and function.
When it comes to leveling, a dependable **digital laser level** like the DeWalt DW088K offers consistent results, especially when working on large areas. These tools help detect subtle dips or humps in the subfloor, ensuring your flooring lays perfectly flat—crucial for tiles and engineered hardwoods. While traditional spirit levels are affordable, digital models reduce guesswork and provide real-time feedback, streamlining the process.
Mastering Tool Maintenance to Keep Projects on Point
Routine maintenance begins with proper cleaning. After each use, wipe down blades and saw parts with a dry cloth to remove dust and debris that can cause rust or corrosion. For saw blades specifically, I recommended using a blade cleaning solvent quarterly; this removes pitch buildup, maintaining their sharpness and preventing overheating during cuts. A dull blade not only damages your material but also puts extra strain on your saw motor—so keep those blades sharp.
Battery-powered tools require regular checks of contacts and batteries. For cordless devices, I advise storing batteries in a cool, dry place and charging them fully before each project. This avoids voltage drops that can lead to inconsistent cuts or tool failure mid-task. Also, periodically lubricate moving parts per manufacturer guidelines to prevent wear and tear. Neglecting maintenance can lead to unexpected breakdowns, delaying your project and increasing expenses.
Implementing Long-Term Routines for Consistent Results
Create a maintenance schedule that aligns with your project calendar. For example, after finishing a flooring session, clean and lubricate your saw blades and check battery health. Keeping detailed records of tool performance helps identify recurring issues before they escalate. Over time, adopting these habits ensures that your equipment remains reliable, reducing last-minute surprises.
Looking ahead, the trend points towards smarter, connected tools that monitor usage and suggest maintenance needs proactively—think of tools that sync with an app to remind you when to replace blades or calibrate levels. These innovations could drastically reduce downtime and improve precision, especially for complex projects involving extensive tiling or leveling.
How do I keep my flooring tools in top shape over time?
The key is consistent cleaning, timely blade sharpening or replacement, and proper storage. Investing in a quality blade sharpener, like the Work Sharp, allows you to restore your blades’ cutting edge without buying new ones frequently. Additionally, storing tools in a dry, organized space prevents accidental damage and corrosion. For more detailed care routines, visit this guide on flooring installation mistakes and maintenance. Pick one valuable tip from here—perhaps learning how to properly sharpen your saw blades—and see how it transforms your workflow. Remember, well-maintained tools ensure lasting beauty and durability for your floors, so don’t overlook their care.
The Most Unexpected Truths About Flooring Confidence
One of the biggest lessons I’ve learned is that even seemingly small details—like the angle of your saw or the pressure applied during sanding—can make or break your project. I once believed that double-checking measurements was enough, only to realize mid-installation that a slight misalignment caused an awkward gap that took hours to fix. That taught me to always prioritize precision over speed, especially when undercutting baseboards for a seamless finish.
Another revelation was that patience during cuts creates a ripple effect—saving time, reducing errors, and elevating the overall quality. Rushing through the undercutting or test-fitting stages might seem tempting, but I found that taking my time ensures a professional look and durability that lasts for years, not months. This insight pushed me to re-evaluate my entire approach toward flooring projects, emphasizing methodical progress over haste.
Finally, I discovered that the right tools and proper maintenance aren’t just about convenience—they’re about protecting your investment and confidence. Regularly sharpening blades, calibrating levels, and investing in high-quality gear means fewer setbacks and a smoother workflow. Over time, these habits turn a complex project into a manageable and even enjoyable task, transforming common pitfalls into opportunities for mastery.
Tools and Techniques That Elevate Your Craft
My go-to resources include the techniques for perfect floor leveling, which highlight the importance of thorough subfloor prep. For unmatched precision, I trust the pro secrets on leveling mastery. These guides have revolutionized how I approach challenging areas, reminding me that the devil is often in the detail.
To keep my tools in top shape, I lean on the maintenance routines shared by experts, emphasizing regular cleaning, blade sharpening, and proper storage. These routines prevent breakdowns and keep the workflow smooth, making me more confident with every cut and fitting. Investing in quality tools like a top-level laser or fine-tooth saw has paid dividends in both quality and efficiency.
Keep Your Passion Alive: Take Action Today
Remember, every successful flooring project begins with a mindset of continuous learning and attention to detail. Your ability to perfect undercuts, level surfaces, and select quality tools not only produces stunning results but also boosts your confidence as a craftsman. Embrace the challenge, celebrate the small victories, and keep honing your skills—each project is an opportunity to master your trade and elevate your home’s beauty.
What’s the riskiest mistake you’ve made in your flooring journey, and how did it teach you to improve? Share your story below and let’s grow together in this craft!
,