
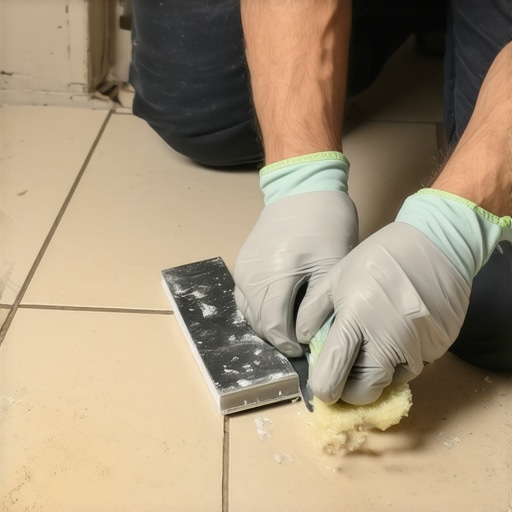
It was a typical Saturday morning when I stepped into my kitchen, only to be greeted by an unsettling hollow echo every time I walked across one corner of my tiled floor. That weird, drum-like sound wasn’t there yesterday—it appeared out of nowhere. At first, I thought I must have dropped something or perhaps I’d missed a step in the installation process, but as I examined more closely, I realized that something deeper was going on. That hollow sound was a red flag, signaling potential issues beneath the surface that, if left unaddressed, could lead to bigger problems.
Why a Hollow Sound in Your Tile Matters More Than You Think
A hollow sound isn’t just annoying; it could be a sign of underlying floor problems. In the world of tile installation and repair, that telltale echo often points to loose tiles or, more concerningly, an unstable subfloor. Ignoring it might cost you more in the long run—loose tiles can crack, water damage can creep in, and the entire surface can become unsafe to walk on. But here’s the good news: you don’t have to tear up your tiles to fix this issue. Many times, the fix is straightforward and cost-effective.
Before diving into my own experience, I want to share a crucial mistake I made early on. Instead of diagnosing the cause of that hollow sound, I initially thought I could simply glue the tile back in place. That only provided a temporary fix and made the problem worse over time. It’s essential to understand what’s really happening beneath your tiles before jumping to repair—this saves you money and preserves your beautiful floor. For a deeper dive into common flooring challenges and how to avoid costly mistakes, check out https://tiletrendshop.com/floor-leveling-challenges-common-mistakes-and-how-to-avoid-them.
Have you ever experienced that unsettling hollow noise in your tiles? If yes, then you know how pressing it is to find a proper solution—without turning your home upside down. Stick around because I’ll walk you through practical, step-by-step ways to troubleshoot and resolve a hollow tile sound, saving you time, money, and a lot of stress.
Assess the Damage Carefully
Start by pressing gently on the suspect tiles to see if they wiggle. Use a rubber mallet or your fingers to identify loose areas. I once found that a tile near my kitchen sink rattled when stepped on; it was a sign that the adhesive had failed. Carefully unstick the grout around that tile using a grout removal tool to prevent damaging adjacent tiles.
Remove and Stabilize
Lift out the loose tile using a chisel and hammer, applying even pressure. Underneath, inspect the subfloor; a sponge can be useful to clean dust and debris. If the subfloor is uneven or soft, that’s your next step. In my case, I discovered part of the plywood substrate was water-damaged, which was causing instability. To fix this, I drilled and screwed a new plywood patch, ensuring it was flush and level.
Level the Subfloor
Achieve a smooth, flat surface by applying a self-leveling compound to fill dips and cracks. Follow the manufacturer’s instructions carefully; mixing too thick or too thin can cause problems later. During my repair, I mixed a batch of self-leveler and poured it over the patched area, which created a flush surface. Use a trowel to spread and feather the edges seamlessly. For more expert techniques, check out this guide.
Prepare the Surface for New Adhesive
Once the leveling compound has cured, thoroughly clean the area. Remove any dust or residue that could weaken bond strength. I used a vacuum and damp cloth to ensure a clean surface, so the new adhesive would adhere properly. The choice of adhesive is critical; select one suitable for your tile type and substrate. Remember, using the wrong adhesive can lead to failure, as detailed in this article.
Reinstall the Tile and Secure
Apply a high-quality thinset mortar with the recommended notched trowel. Spread it evenly, then press the tile firmly into place, twisting slightly to seat it. Use tile spacers to maintain consistent grout lines. I personally used a beating block to gently tap and set the tile level with surrounding tiles, which prevented bouncing. After installation, allow the thinset to cure per manufacturer’s instructions. For precise methods, see this step-by-step guide.
Finish with Grouting and Sealing
Once the thinset is cured, remove spacers and wipe off excess mortar with a damp sponge. Mix grout to match existing lines, then apply it with a rubber float, angling to fill all gaps. Clean excess grout promptly, and once dry, seal the grout to prevent moisture ingress. During my repair, sealing prevented future water damage, extending the life of my floor. For detailed sealing techniques, visit this resource.
Many homeowners assume that flooring installation is a straightforward process, but the nuances involved can significantly impact the longevity and appearance of your floors. A common misconception is that using less adhesive or skipping proper subfloor preparation won’t affect the final outcome. However, seasoned professionals understand that shortcuts often lead to costly mistakes, such as uneven surfaces or tile cracking. For instance, improperly leveled subfloors can cause tiles to develop unevenness over time, resulting in visible lippage and potential damage. To avoid this, it’s vital to follow meticulous leveling techniques, as explained in this detailed guide.
Another myth is that all adhesives and leveling compounds are interchangeable. In reality, selecting the right products tailored to your specific flooring type and environmental conditions is crucial. Using an inappropriate adhesive can lead to tile delamination or grout cracking, issues that are often overlooked until repairs are needed. Experts recommend consulting product specifications and expert advice before sealing your installation. For a comprehensive understanding, check this ultimate guide.
When it comes to hardwood flooring, many believe that acclimating wood is unnecessary or can be done quickly. But in fact, failing to properly acclimate hardwood planks can cause post-installation issues like warping or gaps. Wood responds to humidity changes, so allowing it to adjust in your home’s environment prevents future problems. Advanced installers measure moisture content with precision tools to ensure boards are suitable for your climate—practice that differentiates amateurs from pros. I’ve seen many DIY projects fail because of neglecting this critical step, so don’t rush it. For insights on proper acclimation, visit this resource.
### Why Do Homeowners Often Overlook Floor Flatness?
One sophisticated question I hear frequently is, “How flat should my subfloor be for tile or hardwood?” The truth is, minor dips and humps might seem insignificant but can cause long-term issues such as grout cracking or uneven tile surfaces. Professional-grade flooring hinges on achieving a level, stable base—not just for aesthetics but for durability. Many underestimate the importance of thorough subfloor inspection and remediation. Skilled installers use laser levels and self-leveling compounds to ensure flawless surfaces, as outlined in this article. Failing to address these nuances often leads to preventable failures within the first few years of use.
A specific trap to avoid is solely relying on visual checks without actual measurement. Visual assessment can be deceiving, especially on large surfaces. Making this mistake can cost you hundreds in future repairs—something you can prevent with proper tools and techniques. Remember, the key to a successful installation lies in attention to detail and understanding the underlying materials and environmental factors. Want to master these skills? See this expert guide.
So, next time you start a flooring project, ask yourself: am I considering all these critical nuances? Have you ever fallen into this trap? Let me know in the comments.Maintaining your hardwood, tile, and leveled floors requires more than just routine cleaning—it involves investing in reliable tools and adopting best practices for long-term durability. I personally recommend a high-quality floor scraper for removing stubborn adhesives and grout residue; in my experience, a durable, carbide-tipped scraper minimizes damage to the surface and speeds up the process. For precise leveling, a laser level has become indispensable, ensuring that every patch and tile is perfectly flush, especially when working on uneven subfloors, as detailed in this guide.
What I Wish I Knew Before Starting My Floor Repair
One of the hardest lessons I learned was the importance of measuring and preparing thoroughly before any repairs. Rushing into fixing that hollow tile sound without understanding the cause only led to more complications and expenses down the line. Embracing patience and detailed assessment can save you headaches and money, transforming a potential disaster into a successful project.
Another insight was realizing that subfloor issues are often the root of many flooring problems. Ignoring structural stability and jumping straight to tile or hardwood installation is a mistake I made early on. Addressing underlying problems—like water-damaged plywood or uneven surfaces—not only prolongs the life of your floors but also enhances their beauty and safety.
The third revelation was the significance of proper product selection. Using the right adhesive, leveling compounds, and tools makes all the difference. Trusting reliable sources and experts, such as this guide helped me choose materials that ensured longevity. Skimping on quality or ignoring specifications can cause failures that are costly and frustrating.
Tools and Knowledge That Keep My Floors Flawless
Through my journey, I found that a laser level and self-leveling compounds are indispensable for achieving a truly flat and durable surface. These tools empower you to correct imperfections precisely, which is especially crucial when installing large-format tiles or refinishing hardwoods.
Reading expert pieces, like this comprehensive article, transformed how I approach leveling and installation. They not only provide step-by-step techniques but also highlight common pitfalls and how to avoid them. Filling my toolkit with quality not only makes the process smoother but also yields professional results.
Additionally, I advocate for thorough surface cleaning and moisture testing before any application of adhesives or leveling compounds. These small but vital steps ensure your floors will stand the test of time and foot traffic. Trust me, taking time for these details can make all the difference between a good-looking floor and one that needs frequent repairs.
Embrace Your Flooring Evolution and Take Action
The secret to durable, beautiful floors lies in respect for the materials and process. Don’t shy away from doing your homework—research, plan meticulously, and arm yourself with the right tools and knowledge. Your floors will thank you with years of lasting beauty and reliability. Whether you’re tackling tile or hardwood, keep learning, stay patient, and aim for excellence.
Now, I want to hear from you! Have you ever faced a tricky floor repair or installation challenge? What tools or techniques made a difference in your project? Share your experiences below and let’s grow together as home improvement enthusiasts!