
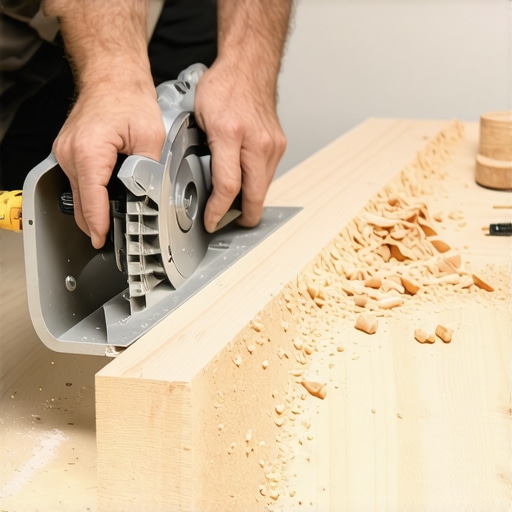
I remember the first time I tried installing quarter round molding around my hardwood floors. I had this grand vision of a seamless, professional finish, but what I got was a frustrating mosaic of jagged cuts and awkward gaps. Each attempt felt like wrestling with a stubborn puzzle that refused to fit just right. It was a lightbulb moment for me — I realized that my biggest hurdle wasn’t the tool choice or the type of wood, but the precision of my miter cuts. And let me tell you, that realization changed everything.
The Secret to Flawless Miter Cuts on Hardwood Quarter Round
When it comes to finishing hardwood floors, details matter. A perfect miter cut makes the transition smooth and almost invisible, elevating the entire look of your space. But achieving that perfect cut isn’t about luck — it’s about understanding the nuances and techniques that guarantee precision every time. Today, I’ll share my experience, a few insider tips, and proven methods to help you master this craft. By the end of this post, you’ll be able to cut and install quarter round like a seasoned pro, giving your floors that polished, professional edge.
Is a Perfect Miter Cut Really Achievable with DIY Tools?
You bet! I used to think a flawless cut required expensive, specialized equipment. But over time, I learned that with the right setup and technique, even your standard miter saw can deliver impressive results. My early mistake was setting the saw’s angle incorrectly, resulting in gaps and uneven joints. A little patience, proper measurement, and blade alignment made all the difference. If you want to avoid common pitfalls and get that crisp, exact cut, I recommend checking out some step-by-step strategies shared by experts [here](https://tiletrendshop.com/mastering-floor-leveling-pro-secrets-for-perfect-installations). Having the right knowledge transforms your project from amateurish to impressive.
Are you tired of struggling with uneven corners or gaps? Do you want to bring that crisp, clean finish to your hardwood installation? Well, you’re in the right place! Let’s dive into the secrets that will elevate your flooring game.
Measure Twice, Cut Once
Before you even pick up your saw, ensure your measurements are accurate. Use a tape measure and an angle square to mark the length and angle on your quarter round. I once tried eyeballing the cut for a quick fix, but the resulting gaps reminded me why precision matters. When I measured carefully, the cuts fit perfectly, saving time and frustration.
Set Your Saw Correctly
Adjust the Miter Angle
Most quarter rounds require a 45-degree cut. Double-check that your miter saw is set precisely at this angle. I once left my saw at 44.5°, which threw off the joint alignment. Take the time to calibrate your saw with a try cut on scrap pieces — this small step can make a huge difference in how seamless your corners look.
Align the Material for a Clean Cut
Clamp the quarter round securely. Position it with the face down against the saw fence, ensuring the back edge is flush with the fence to prevent chatter. During my first attempt, I neglected to clamp the piece, resulting in a jagged edge. Proper clamping stabilizes the cut, producing a smooth surface that fits nicely into corners.
Make the Cut with Precision
Lower the saw blade slowly, letting it cut without forcing. Avoid rushing — a steady cut produces cleaner edges. I found that pushing too hard caused uneven cuts and splintering, making it difficult to fit the molding perfectly. Take your time, and the cut will be cleaner and more accurate.
Test Fit and Fine-Tune
Place the cut piece into its position to check fit. Don’t worry if it’s slightly tight or loose; minor adjustments can be made with fine sanding or trimming. I once trimmed a sliver off with fine-grit sandpaper after the initial cut, which resulted in a flawless fit. Remember, the goal is a snug, seamless connection without gaps.
Use the Right Tools and Techniques
If your standard miter saw isn’t giving you the precision needed, consider a miter box for small projects or a chop saw with a fine-tooth blade. For intricate corners, a coping saw or jigsaw can help notch the mold to fit perfectly. I recommend reviewing detailed tips from experts here to enhance your technique.
Practice on Scrap Pieces
Before cutting your actual quarter rounds, practice on scrap pieces of the same material. This allows you to test the angle, pressure, and cut quality. I once wasted a whole piece trying to eyeball the cut, only to realize I needed a slight angle adjustment. Practice helps you get a feel for your tools and prevents costly mistakes.
Check Your Finished Work
Once installed, inspect your joints. Gaps can be filled with matching caulk or wood filler. I always run my finger along the joint to feel for unevenness, and I wait for the filler to dry before sanding lightly to achieve a seamless finish. Small imperfections can make a big difference in the professional look of your flooring.
Many DIY enthusiasts believe that selecting high-quality materials alone guarantees a flawless hardwood floor, but the reality is far more nuanced. One prevalent myth is that floor leveling can be overlooked if the subfloor looks even at a glance. However, subtle subfloor irregularities can lead to long-term problems like creaking, gaps, or uneven wear. According to flooring experts, neglecting precise leveling is a top mistake, often resulting in issues that require costly repairs later. For a comprehensive guide on achieving perfectly flat surfaces, visit our detailed article on floor leveling techniques. Many assume that as long as the hardwood planks are installed, the process is complete, but even the smallest installation error can undermine durability and aesthetics. For advanced insights, explore the common installation pitfalls to avoid. The overlooked detail is the importance of acclimating wood properly; failure to do so can cause gaps, buckling, or warping as the wood adjusts to your home’s environment. Experts emphasize that acclimation should be an integral part of preparation—not optional. Additionally, a frequent misconception involves tile installation when mixed with hardwood; many think that different materials can be seamlessly combined without proper transition planning. In reality, incompatible expansion rates and differing substrate requirements can lead to failure. Always ensure your transition strategies are well-planned, as detailed in our step-by-step tile installation guide. The key to mastery is paying close attention to these often-missed nuances, which can distinguish a professional-looking finish from an amateurish job. Remember, small technical oversights can cascade into significant issues down the line, so it’s worth investing time and effort into understanding each step thoroughly. Have you ever fallen into this trap? Let me know in the comments and share your experience.Maintaining your hardwood floors and properly installing tiles requires more than just the initial effort; it demands the right tools and ongoing care to ensure durability and aesthetic appeal. One of my favorite investments is a high-quality orbital sander with adjustable grit settings. I personally prefer models that include dust collection systems—this keeps my workspace cleaner and reduces airborne particles that can settle into the wood or tile. The orbital sander allows me to smooth out minor imperfections after sanding or refinish hardwood surfaces easily, prolonging their life. For precise measurement and cutting, I rely on a digital measuring tape coupled with a laser distance meter. These tools provide accurate readings faster than traditional tape measures, especially valuable for long runs of flooring or complex tile layouts. They help me avoid costly mistakes and ensure consistent cuts, which is crucial for professional-looking results. When it comes to maintaining hardwood floors, I regularly use a microfiber dust mop combined with a gentle wood floor cleaner. This routine keeps dirt and debris from scratching the surface over time. For tiles, a steam cleaner can be highly effective for deep cleaning and removing stubborn grout stains without harsh chemicals. Using a steam cleaner not only restores the tile’s shine but also helps extend its lifespan by preventing mold and mildew buildup in grout lines. Looking ahead, I believe the trend will lean even more toward smart tools with integrated sensors and app connectivity, allowing homeowners to monitor their floors’ condition remotely and receive maintenance alerts—think of a ‘health monitor’ for your floors. Regular maintenance questions often come up, like ‘How do I maintain hardwood floors over time?’ The key is consistent cleaning, avoiding excess water, and addressing scratches promptly with proper refinishing products. For more about preventing common issues, check out this comprehensive guide to floor leveling techniques. I encourage you to try incorporating a high-quality orbital sander into your post-installation routine—it’s a game changer for preserving that flawless, professional look over years. Remember, the right tools make all the difference in maintaining the beauty and integrity of your floors for decades to come.
Lessons That Kept Me Up at Night
One of the toughest lessons I learned was that even a small miscalculation in measurement can throw off an entire flooring project, leading to unsightly gaps or uneven surfaces. I used to think precision was just about following measurements, but I discovered it’s also about patience and trusting the process, especially when calibrating tools like saws and levelers. I once rushed a cut, thinking I could fix it later—only to find that small inaccuracies become glaring over time. Embracing meticulousness and practicing on scrap pieces before tackling the real deal saved me countless headaches.
Another insight was understanding the environmental impact on hardwood—wood isn’t static. Temperature and humidity cause it to expand and contract, which means that acclimating your materials is non-negotiable. Skipping this step led to warping and gaps after installation. Now, I always let my wood sit in the room where it will be installed for at least a week, fine-tuning my environment to prevent future issues.
Finally, I realized that the finish isn’t just about aesthetics; it’s a protective barrier. Applying the right finish and maintaining a consistent cleaning schedule extends the life of my floors and keeps them looking polished. I’ve started using specialized cleaners and pads, which make a visible difference, especially when teamed with regular maintenance routines I learned from experts here.
Tools and Resources That Elevate My Craft
The core of my success has been investing in quality tools. A reliable miter saw with fine adjustments ensures precise cuts every time, making installation smoother and more accurate. I trust my digital measuring tape for quick, error-free measurements, especially over large rooms—a game-changer compared to traditional tapes. For leveling and smoothing surfaces, my orbital sander with dust collection system has become indispensable, helping me prepare flawless substrates before tile installation. For guidance, I rely on comprehensive resources like this expert guide that demystifies complex procedures into manageable steps. Additionally, I consult industry blogs and forums, where seasoned professionals share nuanced tips that go beyond basic instructions, helping me troubleshoot unexpected issues effectively.
Books like The Complete Floor Leveling Guide have provided in-depth techniques for achieving perfectly flat surfaces—crucial for long-lasting, professional results. And I don’t underestimate the power of video tutorials, which demonstrate techniques that written instructions can’t fully capture. These resources help me stay ahead in mastering the craft and push the boundaries of my DIY projects.
Step Forward with Confidence
Your journey into perfect hardwood flooring and tile transitions starts now. Remember, the key is not just following steps, but understanding the reasoning behind each action. By honing your measurement techniques, choosing quality tools, and continuously seeking knowledge, you can elevate your DIY skills to professional standards. Don’t let fear or uncertainty hold you back—every mistake is a learning opportunity that brings you closer to mastery. Your floors deserve that care and attention, and your home will thank you for it.
What’s been your biggest challenge in flooring installation? I’d love to hear your story below!
,