
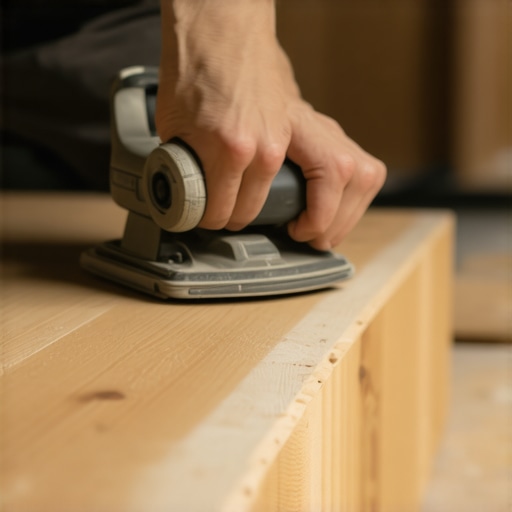
I remember the first time I thought I could save a few bucks by skipping the delicate part of sanding the risers while refinishing my staircase. I grabbed my sander, started working from the top, and halfway down, I realized I had sanded away more than I bargained for—damaging the beautiful risers that gave my staircase character. That lightbulb moment taught me a valuable lesson: patience and proper technique are essential to achieve a flawless finish without wrecking your risers.
If you’re tackling a hardwood staircase renovation, you might be feeling the same mix of excitement and apprehension. The big question? How can you sand your stairs effectively, ensuring the treads look fresh and smooth, while preserving the integrity of those delicate risers? Well, I’ve been there, and after many trial-and-error sessions, I’ve learned some tricks I want to share.
Why Sanding Hardwood Stairs Can Be Tricky and How to Avoid Common Pitfalls
Sanding stairs isn’t just about making everything look uniform; it’s about respecting the structure and ensuring a safe, durable finish. The challenge lies in the fact that risers are usually more delicate or painted, making them more prone to damage if not approached carefully. Plus, uneven sanding can lead to an unsightly transition between your treads and risers, which is the last thing you want.
One of the most frequent mistakes I saw early on was using a bulky sander that was too aggressive, which easily gouged the risers. As I learned from https://tiletrendshop.com/flooring-installation-mistakes-to-avoid-for-lasting-results, selecting the right tools and techniques is crucial to avoid these costly errors. The good news? There are simple steps and tools that can help you sand your stairs without damage, saving you time, money, and frustration.
Do you ever find yourself hesitating at this stage because you’re worried about ruining the risers? If so, you’re not alone. Many DIY enthusiasts and even seasoned pros face this dilemma. But with the right approach, you can master this task and achieve professional results.
In the next sections, I’ll walk you through the practical steps to protect your risers, choose the correct sanding equipment, and get that smooth, polished look you’re aiming for. Ready to transform your staircase without the mishap that could turn your renovation into a costly mishap? Let’s dive in.
Protect the Risers Before You Sand
Start by taping off the risers with painter’s tape to shield them from accidental scratches and gouges. Use a flexible putty knife to press the tape into corners and edges, preventing dust from settling underneath. I once neglected this step and ended up with paint splatters mixed with dust on my risers, making the cleanup more cumbersome.
Select the Right Sanding Tools for Delicate Surfaces
Choose a palm sander or a detail sander with variable speed settings, which provides more control over aggressive sanding. When I replaced my bulky orbital sander with a handheld detail sander, I gained precision and avoided gouging the wood. For tight corners or narrow spaces, a sanding block wrapped with fine-grit sandpaper offers even more finesse.
Master the Technique: Light, Even Strokes
Apply gentle pressure while moving the sander in consistent, overlapping strokes along the grain of the wood. Think of it like painting with a feather—avoid pressing down heavily, which can cause uneven spots or deep scratches. I remember starting with too much pressure and ending up with uneven patches that I had to re-sand, prolonging my project.
Manage the Sanding Grit Properly
Begin with medium grit (around 120) to remove old finish and smooth out minor surface imperfections. Progress to finer grits (180-220) for a polished finish. For my staircase, I first used 120 grit to remove the old stain, then switched to 220 grit for a smooth surface that would accept the new finish evenly. Skipping grits can result in a rough texture or visible scratches after sealing.
Focus on Flat Surfaces, Avoid Edges
While sanding, keep the sander flat on the surface for maximum control. To prevent the edges of the treads from becoming uneven, focus your sanding on the center of each step. I made the mistake of leaning the sander against the edges, which caused slight dips. Using a hand-sanding block for edges after machine sanding ensures a uniform edge profile.
Take a Break and Check Your Progress
Stop periodically to inspect your work. Wipe down the surface with a damp cloth to see the true finish and feel for any rough spots. I learned this the hard way after finishing a section and noticing uneven patches only after applying the sealant. Double-checking allows you to catch issues early and correct them promptly.
Revisit Problem Areas with Targeted Sanding
If some spots remain rough or show signs of gouging, switch to a smaller sanding pad or a detail sander for targeted touch-ups. When I encountered deep scratches near the riser edges, I used a small detail sander to carefully smooth those areas without disturbing the rest of the surface. This precision step is critical for a flawless finish.
Remove Dust Thoroughly Before Finishing
Use a vacuum with a soft brush attachment followed by a tack cloth to eliminate all dust particles. Residual dust can ruin the adhesion of paint or finish, causing bubbles or peeling. I always found that a meticulous cleaning process resulted in a glass-smooth finish with no imperfections.
By following these concrete steps, you’ll be able to sand your stair risers and treads effectively, achieving a professional look without risking damage. Remember, patience and careful technique are your best allies during this process. If you’re considering upgrading your flooring or exploring different styles, check out https://tiletrendshop.com/transform-your-living-area-with-elegant-tile-designs for inspiration and expert tips.
When it comes to flooring, there’s a common belief that following basic steps guarantees perfect results. However, as I’ve discovered through extensive experience and consulting industry experts, many homeowners overlook subtle but crucial nuances that can make or break a project. For example, novice installers often underestimate the importance of a properly prepared subfloor, assuming that a smooth surface alone is sufficient. But studies, such as those referenced by the National Wood Flooring Association, highlight that moisture content, evenness, and adhesion properties are equally vital for longevity and appearance. One prevalent myth is that using aggressive grinding tools speeds up the process without consequence. In reality, aggressive methods can create uneven surfaces, leading to cracks or uneven tiles over time. Understanding that different flooring materials demand tailored preparation is key; for instance, hardwoods require acclimation and controlled humidity, while tile installation depends heavily on precise leveling and proper substrate adhesion. A common oops I’ve seen is homeowners rushing through these preparatory steps, assuming they’re just extra chores rather than investments in quality. The advanced challenge involves recognizing subtle signs of substrate issues before installation. For example, a slight bounce or unevenness might seem superficial but can cause tiles to crack later. Detecting these issues early involves using tools like a 3-foot level for a comprehensive check—more reliable than the eye Alone. Additionally, many misunderstand that all leveling compounds are created equal. Selecting the wrong type or applying it improperly can lead to failures, such as cracking or delamination. An expert tip is to always verify the compatibility of leveling products with your specific flooring and subfloor conditions, as detailed in guides on [floor leveling challenges](https://tiletrendshop.com/floor-leveling-challenges-common-mistakes-and-how-to-avoid-them). Another critical nuance is understanding the limitations of self-leveling underlays—overconfidence in their capabilities can result in uneven surfaces, especially over subfloors with large cracks or significant moisture. Proper inspection, testing, and sometimes supplementary work like crack repair are necessary steps many overlook. For a sophisticated edge, consider how environmental factors during and after installation influence long-term performance. For instance, inadequate humidity control can cause hardwood to swell or shrink, leading to gaps or warping—issues highlighted in [hardwood floor care secrets](https://tiletrendshop.com/hardwood-floor-care-secrets-to-longevity-and-shine). Ultimately, mastering these subtle details elevates your flooring project from average to pro-quality. Remember, the devil is in the details—so do your homework and approach each phase with patience and precision. Have you ever fallen into this trap? Let me know in the comments.Maintaining your carefully installed floors is essential to keep them looking pristine and functioning smoothly over time. One of the most effective ways to ensure longevity is investing in high-quality tools designed specifically for flooring care and repair. For example, a microfiber dust mop, like the 18-inch Swiffer, is unbeatable for daily dust removal on hardwood and tile surfaces, preventing abrasive dirt from causing scratches. Additionally, a soft-bristle push broom can tackle larger debris in less accessible areas without scratching delicate finishes. When dealing with stubborn stains or residues, a pH-neutral cleaner formulated for your flooring type ensures safe and effective cleaning, as recommended by industry experts. Regular inspections are also crucial; look for signs of wear, adhesion issues, or moisture intrusion that might need prompt attention. Using a moisture meter to check humidity levels in the subfloor can prevent damage before it begins, especially in basements or areas prone to dampness. For more hands-on maintenance, a detailed cleaning kit that includes a specialized grout brush, floor buffer, and finish applicator can be invaluable for periodic deep cleaning and touch-up work. As flooring technology advances, integrated systems like automated robot floor cleaners are gaining popularity, promising consistent maintenance with minimal manual effort. Predictions indicate that these smart devices will incorporate AI-driven sensors, adapting to the specific needs of your floor type and usage patterns. To keep your floors in optimal condition, I recommend setting a routine that combines daily dust removal with monthly inspections and annual professional checkups. How do I maintain my flooring over time? Start by adopting a proactive approach with precise tools like a moisture meter and high-quality cleaners. This not only prolongs the life of your investment but also keeps your space looking stylish. Interested in elevating your flooring game? Try using the detailed cleaning tips and tools mentioned above to see immediate results. For expert advice, don’t hesitate to reach out via our contact page or explore more about flooring maintenance at Hardwood Floor Care Secrets. Remember, consistent care is your best weapon against wear and tear, so start integrating these tools into your routine today.
The Hidden Pitfalls That Nearly Knocked Me Off Track
One late-night lesson I learned was the importance of patience when working with leveling compounds. I once hurried through the mixing process, thinking speed was my friend. Turns out, rushing led to cracks and uneven surfaces—issues that haunted me during the tile installation. Now, I know that following the precise mixing instructions and allowing proper curing time are essential for a long-lasting, flawless finish.
Another revelation came from realizing that not all subfloors are created equal. A subtle bump or crack might seem minor, but it can jeopardize your entire floor’s durability. Using a reliable 3-foot level during inspection saved me from future headaches, reminding me that attention to detail upfront makes all the difference later.
Best Tools and Resources That Elevated My Flooring Game
- Pro-Level Trowel: I trust the notched trowels from trusted brands because they ensure even adhesive distribution, preventing tiles from shifting or cracking.
- High-Quality Primer: Before applying leveling compound, a good primer improves adhesion and reduces bubbles, as supported by industry experts.
- Reference Guides: The detailed Pro Secrets for Perfect Floor Leveling guide was a game-changer, helping me understand subtleties that DIY videos often overlook.
- Moisture Meter: Regularly checking for excess moisture in concrete slabs protected my floors from future water damage and warping.
Your Next Step Could Transform Your Space
Taking the plunge into floor leveling and finishing properly isn’t just about aesthetics—it’s about creating a foundation that stands the test of time. Imagine walking into your home and feeling that satisfying smoothness under your feet, knowing you’ve avoided costly mistakes and have set your project up for success. Every professional tip, from proper tool choice to patience during curing, adds up to a transformation that’s worth celebrating.
Are you ready to elevate your flooring skills and turn your renovation dreams into reality? Your ideal floor begins with sound preparation and meticulous execution. Share your biggest flooring challenge below, and let’s discuss how to overcome it together!