
I’ll be honest—I once spent an entire weekend battling a wavy, uneven floor surface after a DIY tile project. That lightbulb moment hit me hard: I had overlooked a simple yet crucial step—mixing my self-leveler correctly. Instead of a smooth, professional finish, I ended up with a lumpy, cracking mess that cost me extra time and money. Sound familiar? If you’re about to embark on flooring installation, this common mistake can sabotage your entire project. But don’t worry—I’ve learned from my blunders, and I’m here to help you avoid them.
Why Getting Your Self-Leveler Mix Right Makes All the Difference
The secret to a perfectly smooth and durable floor surface lies in how you mix your self-leveling compound. A poor mix can lead to uneven thickness, cracks, and even failure of the entire install. When I first started, I thought the product’s instructions were enough, but I quickly realized that environmental factors and measurement precision play a huge role in the outcome. According to flooring experts, improper mixing is among the top reasons for self-leveler failure—causing a ripple effect that impacts tile bonding or wood flooring stability. If you’ve faced similar frustrations, you’re not alone. By mastering the right mixing technique, you’ll set your project up for success and save yourself headaches down the line.
Is the Hype Around Self-Leveling Compound Worth It?
Early in my journey, I made the mistake of rushing through mixing, assuming that a quick stir would do. That was a costly lesson. The truth is, the benefits of using a self-leveler are immense—providing a flat, stable base that ensures the longevity of your flooring. But if you don’t get the mix right, all those advantages can quickly turn into problems. The key lies in understanding the proper mixing ratios, environmental conditions, and techniques, which I’ll share in the next sections. If you’re skeptical—like I was—you might wonder if it’s worth all the fuss. Well, check out this detailed guide to flooring installation [here](https://tiletrendshop.com/step-by-step-guide-to-flooring-installation-and-leveling-success) to see how proper prep work guarantees a lasting finish.
Mix your self-leveler with precision
During my recent redo of a warped bathroom floor, I learned the importance of thorough mixing firsthand. I used a drill with a mixing paddle to combine the self-leveler slowly, aiming for a smooth, lump-free consistency. I poured the mix onto the floor and watched it flow evenly, reminiscent of a lava lamp’s gentle movement. This technique ensured the compound settled uniformly, reducing air bubbles and preventing weak spots. Use a powerful drill and a mixing paddle—never rely on stirring by hand—as professional installers do. For more details on perfect mixing ratios and techniques, check out precise techniques to achieve flawless surfaces.
Control your environment for consistency
Temperature and humidity dramatically affect how your self-leveler sets. On my project day, I kept the room temperature steady at around 70°F (21°C) and avoided drafts that could cause rapid drying or cracking. I also mixed and poured the compound during a climate-controlled period, ensuring consistency. Think of it like baking bread—ingredients and conditions must be stable for predictable results. If the environment isn’t optimal, the mix could cure unevenly, leading to dips or cracks. Use a temperature gun or hygrometer to monitor conditions, especially in colder or more humid spaces. For specific guidelines, consult guidelines on environmental control.
Pour and spread with confidence
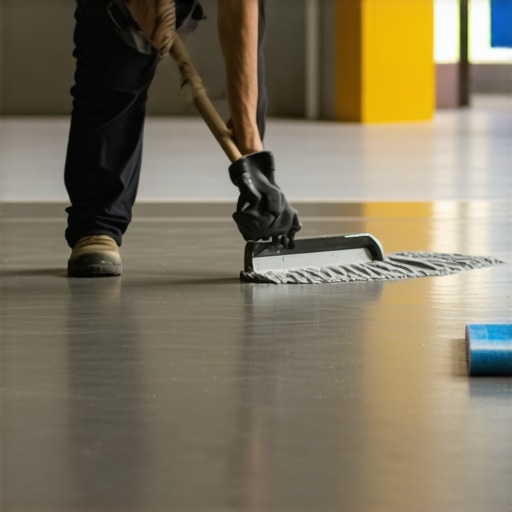
After preparing your mix, I recommend pouring in the center of the room and spreading outward, like icing a cake. Use a squeegee or gauge rake to smooth out the surface, making sure you keep the thickness consistent—aim for the recommended depth indicated on your product. I found that working in small sections prevents the compound from setting before I finish spreading. To achieve a perfectly flat surface, employ a long straightedge or a leveling board, moving it across the surface in sweeping motions. This ensures any high or low spots are evened out. For intricate tips on leveling and finishing, explore flawless leveling techniques.
Address and correct imperfections promptly
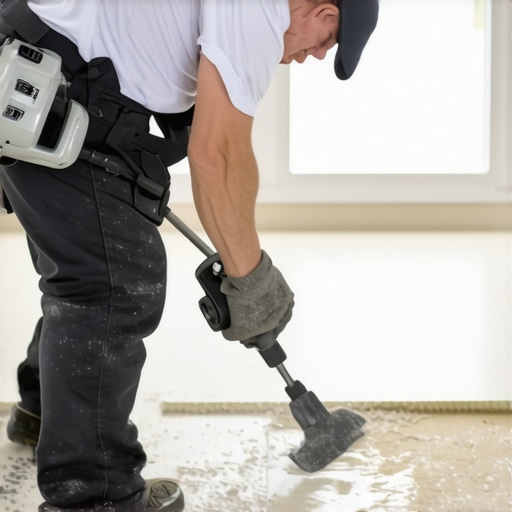
During one project, I noticed a few air bubbles forming after pouring. To fix this, I immediately used a spiked roller, rolling gently to pop bubbles and promote adhesion. This step is crucial, as trapped air can cause weak spots and cracking later. The key is to act quickly—waiting too long makes the bubbles harder to eliminate. Additionally, if you see uneven spots or dips, add a bit more mix and re-smooth, ensuring a level surface. Remember, patience during these steps pays off in the final finish. For more insider tips, review ultimate guide to floor leveling.
Allow proper curing before proceeding
After pouring and smoothing, I set a timer and kept the room free of foot traffic for at least 4-6 hours, depending on the product’s instructions. Protecting the surface from dust and vibrations helps prevent imperfections. In some cases, covering with plastic sheeting can shield the fresh compound from drafts or temperature swings. Rushing this step can lead to surface imperfections or delamination. Once fully cured, usually after 24 hours, I check for any minor irregularities and sand those down carefully before moving on to tile or flooring installation. For comprehensive curing tips, see comprehensive installation guide.
Even experienced installers can fall prey to misconceptions that compromise flooring quality. One widespread myth is that skimpy prepping will save time and money, but in reality, neglecting proper subfloor assessment and leveling often results in buckling or cracking later. Another false belief is that all self-leveling compounds are interchangeable; in truth, selecting the wrong type for your environment or subfloor material can cause peeling or uneven surfaces. Plus, many people overlook the importance of ambient conditions—high humidity or temperature swings can drastically affect curing, leading to imperfections that are easy to avoid with proper environmental control, as discussed in detailed guides like this comprehensive installation article. “What most ignore is that small nuances—such as mixing speed, pour technique, and patching air bubbles—play outsized roles in the final outcome,” according to seasoned floor installers. A common mistake is rushing the curing process; prematurely walking on or installing finishes can cause subtle shifts that manifest as cracks or unevenness, especially if you skip proper curing times recommended by experts. Don’t believe the myth that thicker layers of leveling compound will improve stability; in fact, excessive thickness can lead to cracking due to internal stresses, a point emphasized in this detailed guide. To be a true expert, you’ll need to master the finer points like environmental control, precise mixing and pouring techniques, and understanding the specific needs of your subfloor—details that make the difference between a professional finish and a DIY disaster. Have you ever fallen into this trap? Let me know in the comments.
Keep Your Flooring in Peak Condition with the Right Tools
Maintaining hardwood and tile floors requires precision and the right equipment. I personally swear by a high-quality microfiber dust mop for daily cleaning—it’s gentle enough to avoid scratches but incredibly effective at trapping dirt and dust. For deeper cleaning, I rely on a steam cleaner specifically designed for hardwood surfaces, which disinfects without harsh chemicals. When it comes to addressing stubborn stains or ingrained dirt, I use a soft-bristle scrub brush combined with a pH-neutral cleaner, ensuring the finish remains intact over time.
For tile floors, a grout cleaning brush with angled bristles is indispensable for maintaining the joints. I prefer a cordless oscillating tool with a nylon pad attachment for light sanding or buffing small areas—this helps keep tiles looking new without risking damage. Investing in a moisture meter is also wise if you’re dealing with uneven leveling or suspect underlying issues; it helps monitor the subfloor’s moisture content, preventing future problems like warping or delamination. These tools form the backbone of a proactive maintenance routine that prolongs your flooring’s aesthetic and structural integrity.
Long-Term Results Come from Consistent Care
Long-term care is about establishing a routine that addresses wear before it becomes visible. Regularly applying a recommended hardwood floor polish can restore shine and add a layer of protection. For tiles, sealing grout lines every couple of years prevents staining and deterioration—this small step is crucial for maintaining a pristine appearance. I also recommend inspecting your floors periodically using a flashlight test to spot high spots or dips that may develop over time, as outlined in this guide.
Scaling Up and Future Trends
As flooring technology advances, integration with smart home systems is on the rise. Sensors capable of detecting humidity and surface irregularities are beginning to be embedded during installation, offering real-time monitoring. For DIY enthusiasts, investing in a laser level with a digital readout helps achieve perfect leveling and alignment, reducing the need for future corrections. Looking ahead, I believe that eco-friendly and antimicrobial flooring treatments will become standard, making maintenance even easier and extending the lifespan of hardwood and tile surfaces.
How do I maintain hardwood and tile flooring over time?
Staying ahead of wear involves a mix of routine cleaning, periodic inspections, and timely interventions. Using tools like a microfiber mop and grout brush, combined with protective sealants, creates a lasting barrier against dirt, moisture, and damage. Remember, consistency is key—regular upkeep prevents small issues from escalating into costly repairs. For a comprehensive guide on achieving long-lasting results, check out this detailed tutorial. To test your floors’ stability, I recommend periodically using a moisture meter, especially in humid environments, to catch issues early before they cause de-lamination or cracking.
Don’t forget to act on advanced tips like applying a specialized hardwood floor polish or sealing grout lines proactively. These small investments in maintenance equipment and routines pay off through extended durability and beauty. For example, using a nylon pad attachment on your oscillating tool can help gently buff out minor scratches or uneven patches—making them less noticeable and preventing further damage. Embrace high-tech tools and consistent care, and your floors will thank you for decades to come.
Secrets the Pros Might Not Share About Floor Leveling
Through my journey, I’ve discovered that even seasoned DIYers sometimes fall into subtle traps, like neglecting to check environmental conditions before pouring leveling compounds. The realization that a simple temperature or humidity shift can cause uneven curing was a game-changer, emphasizing the importance of monitoring rather than assuming ideal conditions. I also learned that trusting a single mixing method without testing consistency can lead to disappointing results; testing your mix for flow and air bubbles is crucial. Lastly, patience in waiting for proper curing times, rather than rushing to the next step, safeguards against cracks and future failures—a lesson that transformed my approach from hasty to meticulous.
Tools and Reads That Drive My Flooring Confidence
For precise mixing and application, I swear by a high-powered drill with a mixing paddle and a quality gauge rake—it makes all the difference in achieving smooth, level surfaces. When it comes to understanding the nuances of flooring work, ‘The Ultimate Guide to Floor Leveling for a Perfect Finish’ is an invaluable resource that broke down complex techniques into actionable steps. I also keep a reliable moisture meter handy to monitor subfloor conditions, preventing issues down the line. These tools and guides have become my trusted companions in creating lasting, professional-quality floors.
Your Floors Count Too—Make the Next Step Count
Now that you’ve gained insights into key leveling strategies, it’s your turn to turn knowledge into real results. Whether you’re revamping an old space or starting fresh, embracing these lessons will set your project up for success. Remember, the mastery of techniques and tools isn’t just about aesthetics—it’s about building enduring foundations that elevate your entire home. Don’t hesitate to start your next flooring adventure; with patience and precision, you’ll craft surfaces that stand the test of time. What’s your biggest challenge when preparing subfloors or applying leveling compounds? Share your thoughts below and let’s learn together!