
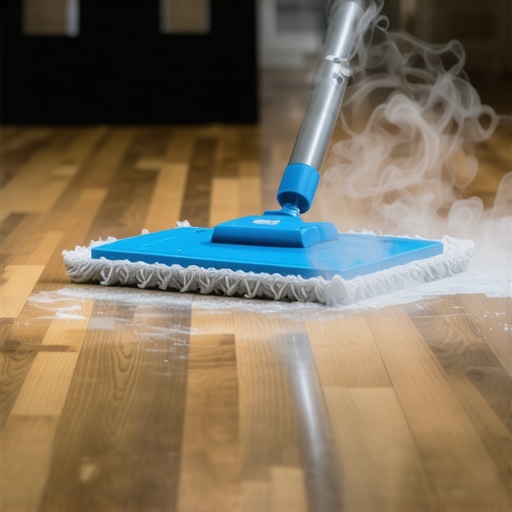
It was a typical Saturday morning when I finally decided to tackle the stubborn stain on my engineered hardwood floor. Armed with a shiny new steam mop, I thought I was doing my floors a favor—until I heard that unmistakable crack and saw a tiny chip pop up right where I had just mopped. My heart sank. That moment was a lightbulb flickering on about a common mistake many homeowners make: using a steam mop on engineered wood floors.
Why Your Favorite Cleaning Hack Could Be Sabotaging Your Floors
Engineered wood floors can look stunning and last for decades when properly cared for, but they are surprisingly sensitive. The heat and moisture from a steam mop might seem harmless, but in reality, it can cause serious damage over time. Early on, I learned this the hard way. I made the mistake of assuming that if it works on my ceramic tiles and vinyl, it should be safe for wood too. Wrong. It’s like using a sledgehammer to crack a nut—a lot more damage than you bargained for.
The problem is that steam mops generate high-temperature vapor that penetrates the surface layers. While it may seem effective at cleaning, the hidden consequence is the delamination of the multilayered structure of engineered wood, leading to warping, swelling, or even buckling. Trust me, once those damages start, they’re costly and time-consuming to repair.
So, what’s the alternative? Proper cleaning and maintenance don’t have to be complicated or tedious. With a few simple adjustments, you can preserve your flooring’s beauty and extend its lifespan. Want to learn exactly how to keep your engineered wood floors in pristine condition? Keep reading—I’ll guide you through the safe and effective ways to clean and maintain your hardwood investment.
Is All Steam Cleaning Harmful to Hardwood Floors? The Truth They Don’t Tell You
I used to think that steam cleaning was a miracle solution—that it would make my floors sparkle effortlessly. However, I didn’t realize that my early attempts were actually accelerating the deterioration. Studies have shown that excessive exposure to heat and moisture can weaken the adhesive bonds in engineered wood, leading to long-term structural issues (source: [Tile Trend Shop](https://tiletrendshop.com/hardwood-floor-care-secrets-to-longevity-and-shine)).
Have you experienced similar problems or doubts about cleaning your hardwood floors? If so, you’re not alone. The good news is that understanding the science behind best practices can save you a lot of trouble down the line.
Next, I’ll share practical tips and tricks that will help you care for your floors without risking costly damage. Let’s get started!
Choose the Right Cleaning Tools and Products
Start by selecting cleaning tools that are gentle yet effective. Use a microfiber mop that traps dust without scratching the surface. Avoid excessive water; instead, lightly dampen the mop. For cleaning solutions, opt for a pH-neutral hardwood floor cleaner or make a simple mix of water and a few drops of dish soap. Steer clear of harsh chemicals and abrasive pads that can harm the finish, as explained in hardwood floor care tips.
Prepare Your Floor Before Cleaning
Before mopping, thoroughly vacuum or sweep the floor to remove loose dirt and debris. This prevents scratching during mopping. Use a soft-bristled broom or a dust mop for this step. Particularly in high-traffic areas, this step saves your finish from unnecessary wear. Remember, particles act like sandpaper under your mop, so cleaning surfaces first is crucial to maintaining their beauty.
Use Proper Mopping Technique
Wring out your microfiber mop until it’s just damp—not wet. Mop in the direction of the wood grain to avoid forcing water into the seams. Work in small sections, rinsing and wringing the mop frequently to prevent spreading dirt and excess moisture. Avoid using steam mops altogether; the high heat and moisture can cause the layers of engineered wood to delaminate, leading to warping or swelling. This approach is similar to how I managed to clean my floors without risking damage—by being gentle and deliberate with each pass.
Monitor Humidity and Moisture Levels
Maintain indoor humidity levels between 35-55% to prevent the wood from expanding or contracting excessively. Use a hygrometer to keep track. Excess moisture can seep into the seams, causing long-term damage. It’s akin to adjusting the climate to preserve a delicate plant; consistency is key to preventing costly repairs down the line. If your floors do get wet, dry them promptly with a clean, dry cloth, focusing on seams and edges.
Schedule Regular Maintenance
Consistently remove dirt and spills as soon as they occur. Place mats at entrances to catch dirt and minimize grit tracking. Use furniture pads to prevent scratches when moving tables or chairs. Periodically, polish the floors with a product designed for engineered wood to restore luster and create a protective barrier. Following these regular routines helps extend the lifespan of your flooring, as I found out through my own experience of attentive care.
Protect Your Floor During Renovations or Heavy Traffic
If undergoing renovations or hosting guests, lay down protective coverings like moving blankets or signs to prevent accidental scratches or dents. For high-traffic zones, consider area rugs that allow for airflow but shield the surface. Think of it as giving your floors a shield to withstand unexpected impacts—because accidents happen, and being prepared saves headaches later.
Consult Professionals for Deep Cleaning and Repairs
For stubborn stains or damage, avoid DIY fixes that might worsen the problem. Instead, hire a professional to perform deep cleaning or refinishing tasks. Experts can also advise on whether your floors need re-coating or sanding, especially if wear becomes noticeable. This proactive approach preserves the integrity of your flooring and retains its beauty over time.
 Many homeowners believe that choosing the most popular flooring option or following generic instructions guarantees a flawless finish, but in practice, it’s often the nuanced details that make or break the result. For instance, a widespread myth is that any subfloor is suitable for tile installation, yet overlooking the importance of proper leveling can lead to costly cracks and uneven surfaces. As I’ve learned through experience, applying a one-size-fits-all approach, especially when it comes to floor leveling, can be a trap—without precise preparation, even the best tiles will suffer.
One advanced mistake is assuming that all leveling compounds work equally well across different substrates. The reality is that specific formulations are designed for particular conditions, and using the wrong type can cause unsightly cracks or delaminations over time. For example, cold weather complicates mixing and curing, and failure to adapt can negatively impact adhesion and stability, a point supported by industry experts in [Floor Leveling](https://tiletrendshop.com/floor-leveling-challenges-common-mistakes-and-how-to-avoid-them).”
The hidden nuance often missed involves the tiny details during installation—like the notched trowel angle or the amount of thinset used under each tile. These seemingly minor factors can drastically influence adhesion, levelness, and overall durability. Misjudging these variables becomes an advanced mistake that even experienced installers can make.
Another misconception is that more adhesive or mortar equals stronger bonding; however, excess material can create air pockets or lead to uneven drying, resulting in future cracks or tiles loosening. This is particularly true when working with large-format tiles, where even small miscalculations can cause significant issues. Knowing the optimal trowel size and technique is crucial, and detailed guides such as [Tile Installation](https://tiletrendshop.com/installing-tiles-like-a-pro-step-by-step-strategies-for-2025) help professionals avoid these pitfalls.
For those venturing into DIY tile projects, beware of the trap of rushing the curing process. A common mistake is walking on or stressing freshly laid tile too soon, which can compromise adhesion and alignment. Patience and understanding of the curing timeline are essential to achieve that seamless, professional appearance. It’s akin to giving your mortar enough time to reach maximum strength, as emphasized in expert advice on [precise floor leveling techniques](https://tiletrendshop.com/precise-floor-leveling-techniques-to-achieve-flawless-surfaces).
In summary, the real mastery lies in appreciating the subtleties of each step—from substrate evaluation to finishing touches. Addressing these hidden nuances not only ensures a stunning, durable floor but also saves money in the long run. Have you ever fallen into this trap? Let me know in the comments—and remember, paying attention to the details can elevate your project from average to extraordinary.Maintaining hardwood and tile flooring over the years requires the right equipment and precise methods. I personally recommend investing in a high-quality microfiber mop, such as the Bona Microfiber Floor Mop, because its static properties trap dust effectively without scratching delicate surfaces. For deeper cleaning, I use an ultrasonic tile and grout scrubber like the Oreck MicroSweep, which employs gentle ultrasonic vibrations—this ensures a thorough clean in hard-to-reach textured grout areas.
To ensure long-term durability, I utilize a professional-grade floor leveler like Mapeguard 150 to correct subfloor imperfections before installing new tiles or hardwood. This not only prevents cracks but provides a seamless surface, crucial for both aesthetic and structural longevity. Regularly checking moisture levels with a digital hygrometer, like the ThermoPro TP50, helps me monitor humidity, preventing expansion or contraction that can damage floors over time.
How do I maintain my floors over time?
Keeping floors looking great is an ongoing process. My key tip is to schedule routine professional inspections, especially before problems become noticeable. For example, having a tile specialist re-apply grout or a flooring expert perform a refinishing job with the Bona Precision Mop can dramatically extend your floors’ lifespan. As technology advances, I predict we’ll see more smart cleaning tools integrated with IoT capabilities, allowing real-time monitoring of floor conditions and automated adjustments in cleaning routines.
Additionally, I recommend using a floor sander like the Festool Rotex RO 150 for periodic refinishing. It allows for controlled, even sanding, preventing damage that cheap drills or manual sanding might cause. This technique is supported by industry guides such as the comprehensive [Floor Leveling Fundamentals](https://tiletrendshop.com/flooring-installation-fundamentals-leveling-for-a-seamless-look), emphasizing the importance of precision during preparation.
By combining these tools with consistent maintenance routines, you’re setting your floors up for decades of beautiful service. Start with trying out the ultrasonic scrubber method on a small grout line—you’ll be amazed at how much dirt it removes that traditional scrubbing misses. Regular maintenance isn’t just about aesthetics; it’s about protecting your investment and ensuring your floors continue to impress for years to come.
The Hardest Lesson I Learned About Hardwood and Tile Mastery
One of the most valuable lessons I discovered is that every step, from choosing the right tools to timing the curing process, deeply impacts the longevity of your floors. Cutting corners or ignoring subtle cues—like the proper moisture levels—can lead to costly repairs, a mistake I wish I avoided sooner.
My Secret Weapon for Unraveling DIY Challenges
After years of trial and error, I rely on detailed resources like floor leveling guides and expert tutorials that break down complex processes into manageable steps. These have transformed my approach and saved me from unnecessary errors.
Why Patience Beat Speed Every Time
Rushing through installation or refinishing tasks might seem tempting, but I’ve learned that giving each phase—be it grout drying or adhesive curing—its due respect ensures a finished product that lasts. Sometimes, the best investment is simply waiting a little longer.
Don’t Formalize Your Dreams Without Knowledge
Embarking on a flooring upgrade without understanding the nuances can trap you in a cycle of repairs. Educate yourself with trusted sources, practice cautious techniques, and don’t hesitate to seek professional help when needed. Doing so transforms a daunting project into a rewarding journey.