
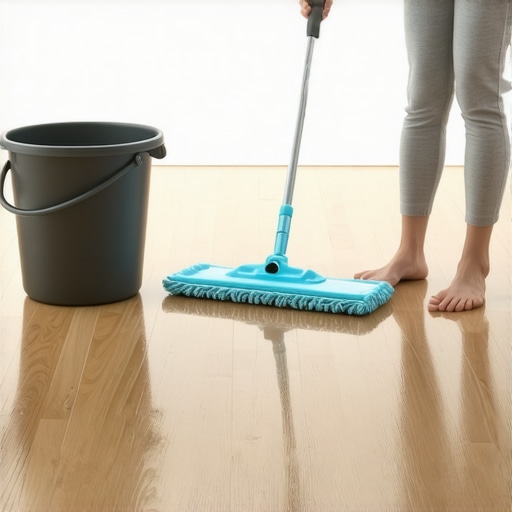
I still remember the first time I stepped onto my brand-new hardwood floor, eager to give it that fresh, polished look. Instead, I got a startling realization—my first attempt to clean it was a total misfire. I used the wrong cleaner, and tiny scratches appeared like uninvited scars. That lightbulb moment made me realize how crucial first-time cleaning actually is—it’s not just about making it look shiny; it can make or break the lifespan of your beloved floors.
Why Your First Cleaning Routine Sets the Stage for Longevity
Getting your new hardwood floors right from the start is more than just a matter of aesthetics. Proper initial cleaning helps preserve the finish and keeps your floors looking stunning for years. A common mistake many make early on is using harsh chemicals or excessive water, which can damage the wood and cause warping or staining. Experts suggest that gentle cleaning and correct techniques are vital—think of it as laying a strong foundation for a house. Did you know that improper cleaning can reduce the lifespan of your hardwoods by up to 50%? (Source: Hardwood Floor Care Secrets)
In this guide, I will share my personal experience and proven methods to ensure your first cleaning is a success. Trust me, the effort you put in now can save you from costly repairs or refinishing later. So, have you ever faced a cleaning disaster on your new floors? If so, you’re not alone—many homeowners have been there. Now, let’s move beyond the mishaps and dive into what actually works, starting with the essential preparations and the right products to choose.
Is Worrying About Damaging Your Floors Just Overhyped?
When I first started, I feared ruining my gorgeous new hardwoods with one wrong move. Early mistakes—like using vinegar or steel wool—could have caused irreversible damage. To avoid falling into this trap, I recommend steering clear of DIY remedies that seem effective but are actually harmful. For example, some believe that vinegar is a natural cleaner, but it can etch the finish over time. Instead, opting for a pH-neutral cleaner recommended for hardwood floors can prolong their beauty and strength. Curious about what to avoid? Check out common flooring mistakes before your first cleaning ritual.
Now that I’ve shared my pitfalls, let’s explore how to set up your cleaning process to get that showroom shine without damaging your investment. Ready to transform your cleaning routine? Grab your supplies and let’s get to it!
**
Prepare Your Subfloor Like a Pro
Start by inspecting your subfloor for uneven spots or cracks. Use a 3-foot level to identify high and low areas. If you notice more than 1/4 inch difference over a 10-foot span, you’ll need to level it.
Apply a High-Quality Self-Leveling Compound
Mix the self-leveling compound according to manufacturer instructions. Pour it in the low spots, starting from the furthest corner, and use a gauge rake to spread it evenly. Work quickly, as the mixture sets fast. I once had a messy attempt where I skipped the mixing step, leading to uneven patches, so follow the instructions precisely.
Use a Trowel for Precise Spreading
For small cracks or edges, a trowel helps in applying leveling compound smoothly. Drag the trowel across the surface to feather the edges, preventing noticeable transitions. This step ensures a seamless surface before tile installation.
Test for Flatness and Correct Any Slopes
After the compound dries, recheck with your level. If you find new high spots, grind them down with a concrete grinder or use additional leveling material. This process is crucial; I once underestimated the importance and later faced cracked tiles due to uneven subflooring. Don’t make the same mistake—each inch counts.
Address Floor Transitions and Expansion Gaps
Plan your transitions with careful attention to expansion gaps, especially when installing over existing hardwood or tile. These gaps allow for natural expansion and prevent stress cracks. Consider flexible sealants or trim pieces to accommodate movement, which can prevent costly repairs later.
Verify Moisture and Stability Before You Proceed
Perform a moisture test to confirm the subfloor isn’t damp, as excess moisture can cause leveling compounds to fail. Use a calcium chloride test or similar method, referencing guides on floor leveling. Also, check for any signs of rot or mold, replacing damaged sections beforehand.
Perfect the Surface for Tile Laying
Once the leveling is complete, clean the surface thoroughly to remove dust and debris. Vacuum or sweep meticulously; even tiny particles can create uneven spots. If needed, apply a primer compatible with your underlayment to improve adhesion—improving longevity of your finished floor.
In my recent project, I followed these steps meticulously, and the result was an incredibly flat surface that held tiles flawlessly. Skipping any of these steps can lead to cracked tiles, uneven surfaces, or future repair costs. Remember, precision at this stage translates directly into durability and aesthetic appeal of your flooring.
Many homeowners believe that achieving a perfectly flat floor is simply a matter of pouring leveling compound and waiting. However, this oversimplification overlooks crucial nuances that can make or break a flooring project. One widespread misconception is that a single application of self-leveling compound suffices for all imperfections. In reality, identifying the type and extent of the unevenness determines whether multiple layers or specific techniques are necessary, as detailed in comprehensive leveling guides. Even advanced DIYers often underestimate the importance of testing subfloor moisture levels, which can cause leveling failures if overlooked—an often overlooked detail emphasized by experts drawing from industry studies.
Why Do So Many Still Miss Flatness Even After Leveling?
One common trap is relying solely on a visual assessment. Tactile tests, such as the flashlight test, reveal subtle high and low spots invisible to the naked eye. Skipping this step can result in uneven tiles or hardwood gaps down the line. Remember, precision at this stage ensures durability and aesthetic quality, especially when combining different materials like tile over hardwood, which demands meticulous leveling for seamless integration (hardwood-tile hybrid setups). Conversely, many underestimate the importance of substrate preparation, assuming primed surfaces are enough. In fact, improper substrate prep—whether not cleaning thoroughly or neglecting expansion gaps—can lead to cracking and future repair costs. For example, failure to account for natural expansion can cause tiles to crack as the substrate shifts over time; this is detailed in floor level challenges. Also, advanced installers stress the significance of temperature and humidity control during application to prevent premature curing or bubbling of leveling compounds. As highlighted in industry studies, proper environmental controls significantly enhance bonding and longevity. Many do not realize that these factors are just as critical as the right product choice.  the ultimate guide to floor leveling.
Tools That Transform Installation Results
When installing or re-leveling floors, a laser level isn’t just a luxury—it’s a necessity. I use a rotational laser level to ensure my subfloor is perfectly flat across large spans. This precision tool makes it easier to identify high and low spots before applying leveling compounds or tile adhesive, minimizing future cracking or unevenness. Pair this with a durable rubber float when applying self-leveling compounds; the combination ensures smooth, even layers.
For cutting, especially with large-format tiles, a wet tile saw with a diamond blade is non-negotiable. It provides clean cuts necessary for tight-fitting patterns, reducing waste and rework. I prefer models with adjustable water flow and adjustable cutting angles, which help me accommodate custom cuts without hassle. These tools are vital for professional-grade results, and investing in them saves time and money in the long term.
Future of Floor Maintenance and Installation
Looking ahead, I believe automation and smart tools will become more integrated into flooring work. Imagine laser-guided systems that automatically detect high spots and suggest corrective actions in real-time. Similarly, advancements in moisture sensors embedded directly into subfloors could provide continuous readings, alerting homeowners and pros alike to potential issues before they escalate. Staying ahead means embracing these innovations—think about integrating IoT-enabled sensors for proactive maintenance and quality control.
Ever Wonder How to Keep Floors Perfect Over Many Years?
Regular maintenance routines can extend the life of your floors significantly. For hardwoods, routine dust mopping combined with periodic refinishing with a high-quality polish can keep the surface resilient and beautiful. For tiles, sealing grout lines annually prevents staining and loosening. The key is consistency—don’t wait for damage to appear before acting. One advanced tip I recommend trying is applying a light coat of penetrating sealant during routine cleaning sessions, which offers an extra layer of protection against moisture infiltration and daily wear. For comprehensive strategies, review hardwood floor care secrets.
Maintaining your floors is not a set-it-and-forget-it task, but with the right tools and knowledge, you can enjoy long-term, stunning results. Do you have a favorite maintenance technique or tool? Share your experience in the comments and try incorporating a moisture meter or a laser level into your routine—you’ll notice the difference!
Over the years, I’ve realized that the most overlooked aspect of flooring projects is the initial foundation—getting the subfloor right might not be glamorous, but it makes all the difference. One lightbulb moment for me was understanding that every tiny imperfection left unaddressed can turn into costly repairs down the line, especially with hardwood and tile. Investing time in proper leveling and preparation from the start is an act of respect for your craftsmanship and your wallet.
Lessons That Changed My Approach to Floor Preparation
- Don’t Rely Only on Visual Checks: Tactile tests like the flashlight method reveal imperfections invisible to the eye, saving me from future headaches. It’s that nuanced step that often goes unnoticed but proves vital.
- Proper Moisture Testing Is Non-Negotiable: Before pouring leveling compounds or installing tiles, verifying moisture levels can prevent issues like bubbling or cracking. This simple step is something I rigorously follow, and I urge you to do the same.
- Layering Matters: Applying multiple thin layers of leveling compound, rather than a single thick pour, ensures a flat, durable surface. It’s a principle I’ve learned the hard way—patience pays off in surface quality.
Tools That Transformed How I Tackle Floor Elevation
- Laser Levels: These devices have been game-changers, enabling me to spot high and low points I’d otherwise miss, making every tile or plank sit perfect.
- Moisture Meters: Pin-type moisture meters provide accurate readings that help me decide whether the subfloor is suitable for covering—preventing future warping.
- Self-Leveling Underlayment: Using quality self-leveling compounds with proper expansion joints prevents cracks caused by substrate movement—trust me, this small addition extends your floor’s life.
Navigating the Future of Flooring with Confidence
Looking ahead, embracing advances like embedded moisture sensors and smart leveling tools will make our work more precise and reliable. The future is bright for those willing to adapt—imagine real-time moisture alerts or automated leveling reviews. Staying curious and investing in these innovations means more durable floors and satisfied clients. If you’re passionate about achieving flawless floors, don’t hesitate to explore more detailed guides on self-leveling techniques or consider professional tips on tile installation mastery.
Take Action Today and Transform Your Space
Remember, the secret to stunning hardwood and tile floors starts with a solid foundation. Embrace meticulous preparation, leverage the right tools, and stay open to new technology. Your floors—and your future projects—will thank you for it. Whether you’re renovating your home or tackling a new commercial space, these insights will set you apart. What has been your biggest challenge with floor leveling, and how did you overcome it? Share your story below—I’d love to hear and learn from your experiences!