
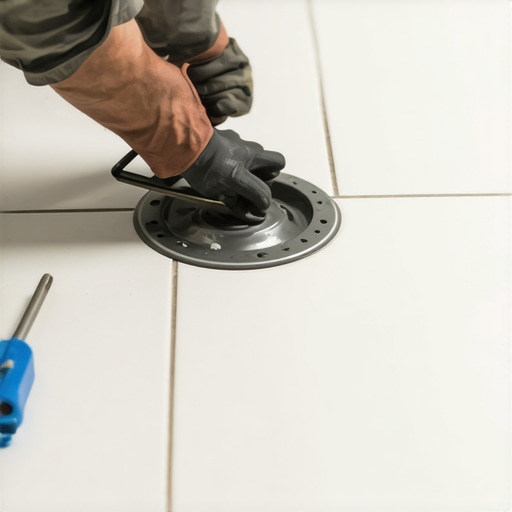
Ever had that sinking feeling when you realize your meticulously laid tile around the toilet flange is just a fraction off? I remember a project not long ago where I thought I could wing it, only to end up with a jagged edge that made the entire bathroom look sloppy. That lightbulb moment hit hard — perfect tile cuts aren’t just about fancy tools or expensiveMaterials; it’s about understanding the subtle tricks that make everything fit seamlessly, especially when space is tight.
The Hidden Challenge of Narrow Spaces
When you’re working around a narrow toilet flange, traditional cutting techniques often fall short. I used to struggle with tiny, unpredictable cracks or uneven edges that required constant patching. Frustration mounted as I chipped tiles or left gaps that made me look less of a DIYer and more of a novice. But here’s the thing: mastering those precise cuts can turn your entire project around, saving you time, money, and headaches. Today, I promise to share the tricks that I wish I knew from the start—skills that transformed my approach and can do the same for you.
Is It Really Worth the Effort or Just a Waste of Time?
Honestly, I almost gave up on perfect cuts early on because I believed it was a complicated, time-consuming process. I made a crucial mistake—assuming that a regular tile cutter or a saw would handle all the irregular angles. That setback cost me extra materials and hours of redo. But once I understood the importance of specific techniques, like using a notch cutter and fine-tuning my measurements, everything changed. For more detailed strategies on tile installation, you might find it helpful to check out this comprehensive guide. I learned that small adjustments make a huge difference—and that patience and precision trump brute force every time.
If you’ve ever faced a similar challenge, you’re not alone. Many DIY enthusiasts get stuck at this stage, feeling overwhelmed by the complexity. But trust me, with the right approach, those tiny, tricky cuts can become your secret weapon instead of your nemesis. So, let’s dive into the practical steps that will help you nail those cuts with confidence and ease, no matter how narrow or awkward the space.
Why Narrow Spaces Are the Biggest Trick
Special techniques are crucial because standard tools often lack the finesse needed for tight corners and small gaps. By learning to accurately measure, mark, and cut with precision, you can avoid those unwanted chips and irregular edges. And don’t worry—these aren’t just tips I picked up overnight. I’ve tested and refined each method, and I’m excited to share them so you can skip the trial-and-error part. Ready to transform your tile game? Let’s get started with the secrets that will elevate your DIY skills and leave you with a flawless finish every time.
Please let me know if you’ve faced this problem or if you’re eager to learn the exact steps for those perfect cuts around narrow flange areas!
Measure Twice, Mark Carefully
Begin by meticulously measuring the gap around your toilet flange with a flexible tape measure—don’t estimate. Use a pencil or a fine-tip marker to mark the tile where it needs to be cut. For small, tight spots, I prefer a carpenter’s square to extend my measurements, ensuring accuracy. Once marked, double-check your measurements; accuracy at this stage prevents headaches later.
Select the Right Cutting Tool
For intricate cuts around narrow flanges, a diagonal or variable-zoom tile cutter is ideal because it allows for more control. Alternatively, a fine-tooth angle grinder equipped with a diamond blade works well for irregular cuts. I once faced a tight corner that my standard snap cutter couldn’t handle, so I switched to an angle grinder, which allowed me to carve the tile precisely without chipping. Remember, using the correct tool minimizes damage and saves time.
Cut with Precision
Clamp the tile securely on a stable surface—this prevents slipping. Follow your marked lines and cut slowly, making multiple shallow passes instead of trying to slice through in one go. For curved or awkward edges, use a diamond blade with a steady hand, and consider wearing protective goggles. I learned this the hard way when rushing my cut, leading to a minor chip; taking time and making gentle passes yielded a clean, precise edge.
Fine-Tune Your Fit
After cutting, place the tile in the space to check the fit. Small adjustments are often necessary—use a rubbing stone or a tile file to smooth rough edges. For tight corners, gently sand the edges downward until the tile fits snugly around the flange, avoiding gaps or uneven edges. I once had to trim a tiny sliver off the side to prevent grout gaps, which made my final appearance flawless. This step ensures the tile sits flush, facilitating easier grouting and a cleaner look.
Test and Adjust
Before permanent installation, lay the tile temporarily with thinset or double-sided tape to confirm fit. Make any necessary adjustments; this pre-assembly saves you from difficult rework after adhesive is applied. Remember, patience here pays off—rushing leads to misalignment or damaging the tile. I’ve seen seasoned pros spend an extra few minutes at this stage, but it drastically reduces correction work later.
When working in narrow, tricky spaces, every millimeter counts. Mastering these steps transforms a frustrating task into a manageable one, yielding professional-quality results. For broader techniques applicable to complex flooring projects, check out this guide on floor leveling mastery.
Many DIY enthusiasts and even some professionals fall prey to misconceptions about tile, flooring installation, hardwood floors, and floor leveling. Let’s debunk some of these myths by digging into the nuances that often go unnoticed but can make or break your project’s success.
Are You Falling for These Advanced Pitfalls in Flooring Projects?
A widespread myth is that low-cost adhesives and materials will suffice for long-term durability; however, expert sources like this in-depth guide highlight that quality materials are essential, especially in challenging conditions. Skimping on quality often results in uneven surfaces or grout failure, which might seem minor initially but can cause costly repairs down the line. Another critical misconception revolves around floor leveling—many believe that simply pouring a leveling compound will fix unevenness effortlessly. In reality, improper application or neglecting surface preparation leads to cracks, as detailed in this resource. The key is mastering proper substrate prep and understanding how differences in moisture content or substrate flexibility can cause issues down the road. Moreover, a common mistake is misjudging hardwood moisture levels before installation. Rushing the process without the proper moisture testing can result in warping or buckling—an advanced mistake often overlooked by beginners. Remember, consulting experts or adhering strictly to best practices, as outlined in this guide, can save you significant headaches. The real trick lies in understanding that meticulous preparation and material choice are more critical than applying shortcuts. Don’t forget—advances in flooring technology now offer products with built-in moisture barriers or self-leveling properties tailored for tricky substrates, which many overlook. Using these innovations wisely requires a nuanced understanding of their capabilities and limitations. For example, integrating a premium self-leveling compound with proper application techniques, like those in this step-by-step guide, can dramatically improve the final appearance and durability of your floor.
Investing in the Right Tools for Durability
When it comes to maintaining and scaling your flooring projects, having the correct tools is paramount. I personally swear by a high-quality self-leveling laser level, such as the Bosch GSL2 Professional, because it provides unparalleled accuracy in ensuring your subfloor is perfectly flat before tile or hardwood installation. A laser level not only saves time but also minimizes costly mistakes by revealing high and low spots that need correction, especially in larger areas where traditional spirit levels fall short. This detailed guide emphasizes the importance of using precise leveling tools to achieve seamless results. Keep in mind that as flooring materials become more sophisticated, so do the tools needed to maintain them—think of moisture meters and advanced substrate scan devices to assess conditions over time.
How do I maintain flooring tools over time?
My top tip is to clean and calibrate your tools regularly. For example, laser levels can accumulate dust and debris which affect accuracy, so I use a soft lint-free cloth and a gentle cleaning solution after each project. Calibration is equally crucial; many equipment manufacturers recommend annual checks, which you can perform yourself or through professional calibration services. Proper storage also extends your tool’s lifespan—storing sensitive devices in padded cases in dry, temperature-controlled environments prevents damage and corrosion. Investing in quality accessories, like precision blades and durable cutting guides, ensures your tools perform reliably over many projects, saving you money and frustration down the line. As trends in flooring technology evolve, so will the tools, integrating features like smart connectivity and Bluetooth calibration—future-proof your setup now by choosing equipment compatible with these advancements. For example, using tools like precision-guided leveling systems can elevate your craftsmanship and efficiency in long-term projects. Remember, consistent maintenance and an investment in quality tools directly translate to durable, professional finishes, whether you’re leveling a concrete slab or fine-tuning hardwood installation.
Looking Ahead: Scaling without Sacrificing Quality
As your projects grow in scope, incorporating modular tools like adjustable scaffolding and extendable leveling rods becomes essential. These not only improve safety and access but also maintain consistent quality across larger spaces. I predict that in the near future, automation and smart sensors will play an even bigger role—think intelligent moisture meters that sync to your smartphone, providing real-time data. Embracing these trends early can give you a competitive edge, ensuring your flooring remains impeccable over the years. Feel free to experiment with advanced tools and maintenance routines—like taking the time to check and recalibrate your leveling devices regularly—to elevate your craftsmanship and ensure every project is a victory. Don’t forget to explore this resource for more insights on maintaining perfect surfaces over time.
Lessons I Had to Learn the Hard Way in Floor Leveling and Tile Cutting
- One of the biggest surprises for me was realizing that rushing the measurement process often leads to costly mistakes. Taking those extra minutes to double-check measurements, especially in narrow spaces, prevents the frustration of fitting issues down the line.
- Using the right tools made all the difference. I used to settle for standard cutters, but investing in a quality diagonal cutter or angle grinder with a diamond blade unlocked precision that I never achieved before.
- Patience is key when cutting tiles around tight flanges. Multiple shallow passes with controlled speed produce cleaner edges and reduce chips, saving time on repairs and re-cuts.
- Don’t underestimate the value of fine-tuning cuts after laying tiles. Small adjustments with a tile file or rubbing stone are the secret to seamless fits that truly elevate the final look.
- Pre-testing your tile placement with temporary adhesive or setting compounds can prevent a lot of headaches. Ensuring perfect fit beforehand grows confidence and accelerates the installation process.
The Secret Formula: Tools, Technique, and a Steady Hand
My trusted toolkit now includes a high-quality self-leveling laser level, which is invaluable for affirming flatness before tile installation. Combining precise measurements, proper tool choice, and controlled cutting techniques ensures flawless results even in the most challenging narrow spaces. These insights have reshaped my approach, saving time and giving me professional-looking finishes.
Embrace the Journey: Your Hard Floors Deserve It
Remember, every mistake is a stepping stone to mastery. With patience, the right tools, and a little bit of practice, you can conquer those tight corners and narrow flange areas confidently. Take pride in each step forward—your flooring project’s success hinges on your attention to detail. Keep experimenting, learning, and pushing your skills; your flawless floors will thank you! 💪
What’s been your biggest challenge when working around narrow flanges or tight spaces? Share your story below—I love hearing different experiences and tips!