
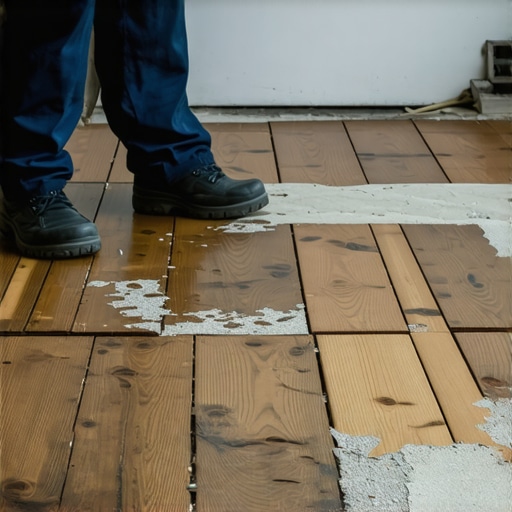
I remember the moment vividly—staring down at my old, cracked tiles, feeling both overwhelmed and a tad defeated. When I decided to upgrade my flooring, I wasn’t expecting a looming discovery beneath my brand-new hardwood. That’s when I realized I might be dealing with something far more serious than just tired old tiles. If you’ve stumbled upon a similar situation, you’re not alone, and there’s hope.
Why the Hidden Risk of Asbestos Tiles Matters More Than You Think
Many homeowners face the unexpected hurdle of asbestos tiles lurking beneath their floors. These tiles, popular from the mid-20th century through the late 1980s, pose health risks if disturbed. Handling them improperly can release dangerous fibers into the air, risking serious health issues like mesothelioma and lung diseases, as reported by the Centers for Disease Control and Prevention. I learned this the hard way early on—assuming that removing old tiles was a simple DIY task turned into a potential health hazard when I cracked one open without proper precautions.
Understanding the importance of identifying asbestos safely is critical. Not all old tiles contain asbestos, but verifying them is essential to avoid unintentional exposure. Jumping into removal or renovation without this knowledge can have serious consequences.
Is Asbestos Still a Worthwhile Concern Today?
Absolutely. While regulations have tightened, many homes still contain these hazardous tiles, especially in regions where building codes were less strict back then. Rushing to remove them without proper testing can do more harm than good. My mistake was believing I could handle it myself—trust me, professional testing and advice are your best bets. Want to learn how to safely navigate this challenge? You’re in the right place. We’ll explore step-by-step methods to deal with asbestos tiles properly, ensuring your safety and the longevity of your new floor. For a detailed guide on preparing your space and choosing the right flooring options, check out this comprehensive floor leveling guide that also touches on dealing with tricky subfloor situations.
Set a Solid Foundation by Preparing Your Subfloor
Start with a thorough inspection of your subfloor; look for cracks, dips, or moisture issues. Use a level to identify uneven spots, much like a carpenter surveys a plank before laying tiles. I once had a living room where a minor 1/4-inch dip caused substantial tile lippage later. To correct this, I applied a high-quality self-leveling compound, following the instructions meticulously, which ensured my surface was perfectly flat—crucial for a flawless tile or hardwood installation. Learn more about common leveling pitfalls and solutions.
Use Proper Tools and Materials for Leveling
Select the Right Primer and Leveler
Choose a primer compatible with your subfloor material; this promotes adhesion, preventing future bonding issues. When mixing cementitious self-levelers, follow the manufacturer’s guidelines precisely to avoid bubbles and cracks, especially in cold environments where improper mixing can cause issues—much like adding mismatched ingredients ruins a cake. My mistake was rushing the drying process, which led to a brittle surface. For detailed tips, visit floor leveler application secrets.
Master the Art of Floor Troweling
Use a trowel with the appropriate notched edge—larger tiles require a bigger notch. Hold the trowel at a consistent 45-degree angle to spread the mortar evenly, avoiding voids that can compromise your tile’s stability. I once used a small notched trowel on a large-format porcelain tile, which caused lippage. Switching to a larger notched trowel, I achieved a uniform bed and a level surface. Check out techniques for large-format tile installation.
Check Levelness as You Proceed
Use a long spirit level or a laser level to verify flatness after spreading the mortar. Regular checks prevent cumulative errors, much like fine-tuning a musical instrument. During my project, I periodically checked levels throughout the process; catching a small deviation early saved me from redoing a section. For precision tips, see precise leveling methods.
Lay Tiles or Hardwood Carefully and Sequentially
Begin from the center of the room, working your way out to ensure symmetry, just like a painter starting from the middle of a wall. Place spacers for tiles to maintain consistent grout lines—this is especially vital for large tiles to prevent lippage. When installing hardwood floors, leave expansion gaps around the perimeter to accommodate wood movement; I used painter’s tape to mask edges, resulting in cleaner seams. Reference best practices for tile and hardwood installation.
Finish and Cure Properly to Avoid Future Problems
Allow adhesives and mortar to cure fully before walking on or finishing the surface. Rushing this step can lead to uneven settling or cracking. I learned this lesson when walking on partially cured mortar, leaving indentations that marred the finish. Keep the area well-ventilated and follow manufacturer’s curing times for optimal results. For maintenance tips, see hardwood and tile care.
Many homeowners believe that flooring installation is a straightforward process, but this perception often leads to overlooked nuances and costly mistakes. One widespread myth is that leveling the subfloor isn’t critical, which isn’t true—poorly leveled surfaces can cause tiles to crack or hardwood to warp over time. In reality, meticulous floor leveling is the foundation of a successful installation; studies show that uneven subfloors significantly reduce flooring lifespan (source). A common trap is underestimating the importance of proper prep work, including cleaning and priming, which many skip, leading to adhesion failure and grout issues. This oversight isn’t just a minor detail but a pivotal step for durability and appearance. Another misconception is that hardwood flooring is forgiving of minor subfloor imperfections; however, even small dips can magnify through the finish, causing squeaking or uneven wear. The nuanced understanding here is that hardwood’s ability to accommodate subfloor imperfections is limited. When dealing with tile, many think that the same thinset works for every situation, but selecting the wrong type can lead to cracking or inadequate bonding, especially with large-format tiles. Professionals recommend specific modified thinsets for porcelain and large tiles, which enhance flexibility and strength (source). It’s also a mistake to assume that more adhesive equals better bonding; excessive thinset can create voids and weaken the bond, particularly in uneven substrates. Advanced installers consider not just the quantity but the quality and compatibility of materials used. When installing, some overlook the importance of expansion gaps, which might lead to buckling or cupping—especially in climates with varying humidity. Strategic spacing with the right materials prevents these issues, ensuring longevity. The key takeaway is that understanding these nuanced factors—like proper leveling, material compatibility, and climate considerations—distinguishes a professional installation from a amateurish job. Making informed decisions at each step can save you from future headaches and costly repairs. Interested in elevating your flooring project? Check out expert tips for flawless installation. Have you ever fallen into this trap? Let me know in the comments.Maintaining your flooring setup is essential to ensure its longevity and beauty over time. Investing in the right tools can make all the difference, both during installation and routine upkeep. One highly recommended instrument is a laser level, such as the Bosch GLL 3-330C. I personally use this model because of its precision and ease of use, especially when verifying flatness across large surfaces—a critical step to prevent tile lippage or hardwood warping. Regularly checking your floor’s levelness with such a tool helps catch uneven spots early, avoiding costly repairs later. Additionally, a high-quality grout float with adjustable tension allows for seamless application and cleanup, which I find indispensable for achieving professional-looking joints. For long-term results, adhering to a strict maintenance routine is key; this involves periodic cleaning with pH-neutral solutions to preserve the finish, and prompt attention to any cracks or shifting that may occur. In the future, I anticipate that smart flooring sensors integrated with home automation systems will become standard, providing real-time data on moisture and structural shifts, further simplifying maintenance.
How do I keep my floors in top shape over time?
Regular upkeep starts with proper cleaning—avoiding harsh chemicals that can damage the surface. Using soft-bristled brushes and microfiber mops, as recommended by industry experts, helps maintain the integrity of your flooring. Also, consider installing expansion joints or sealants in high-traffic areas to accommodate movement and prevent cracks. When planning renovations or scaling your flooring project, professional consultation can provide insights into structural adjustments and the best materials suited for your environment. For additional tips on selecting the right products, reviewing this resource on tile and hardwood selection can be very helpful. Remember, consistent maintenance not only prolongs the life of your floors but also preserves their aesthetic appeal, saving you money and effort in the long run. Trying out advanced tools like a moisture meter can help detect hidden issues before they manifest visibly, reinforcing your flooring’s durability. Prioritize regular inspections and gentle cleaning routines to keep your investment looking impeccable for years to come.
Lessons I Wish I Learned Before Starting
One of the most impactful lessons I discovered was how critical proper subfloor preparation is—skipping this step can lead to costly repairs down the line. I underestimated the importance of using the right tools, like a laser level, which transformed my installation process from guesswork to precision. Additionally, I realized that every material has nuances; for example, not all thinsets are suitable for large tiles, and choosing the wrong one can cause cracks. Trust me, investing time in understanding these details saves frustration and money later. Finally, understanding that professional advice and quality resources are invaluable—rushing in blindly can turn a rewarding project into a headache, but arming yourself with knowledge makes all the difference.