
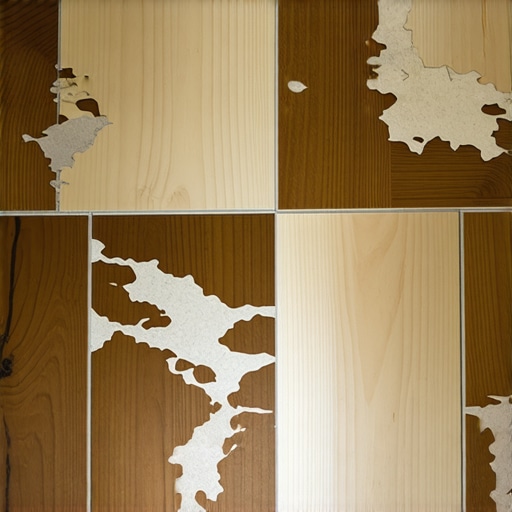
Have you ever stepped out of the shower, only to find your luxurious vinyl flooring curled up at the edges or even peeled away entirely? That sinking feeling of watching your beautiful bathroom floor gradually peel apart is more common than you might think. I remember the first time I noticed a vinyl plank lifting—my heart sank. It was almost like watching your favorite book slowly fall apart in your hands. That frustrating moment led me down a rabbit hole of research and trial, trying to figure out what I did wrong and how I could fix it.
When Your Vinyl Planks Start to Lift, You’re Not Alone
Luxury vinyl planks are beloved for their durability, affordability, and ease of installation. But the bathroom is a tricky environment—the constant presence of water, humidity variations, and temperature swings can turn this seemingly simple flooring into a battle zone. The lightbulb moment for me was realizing that improper installation, combined with high moisture levels, was likely the culprit behind my lifting planks. It’s a common mistake many make early on because we often overlook moisture management and proper preparation.
Here’s the good news: understanding the root causes of lifting vinyl and taking proactive steps can save your investment and keep your bathroom looking pristine. Today, I’ll walk you through what I learned about preventing vinyl planks from curling up or peeling in high-moisture areas, based on both my experience and expert advice.
Is Flooring Adhesive or Floating the Best Choice for Bathrooms?
Early on, I mistakenly assumed that adhesive was always the way to go, thinking it would hold everything in place forever. Turns out, that’s not the case—especially in humid bathrooms where moisture can compromise the adhesive’s grip. According to flooring experts, a floating installation often offers better moisture resilience, provided the subfloor is properly prepared. Moreover, choosing the right underlayment and ensuring your subfloor is level and dry can make or break the longevity of your vinyl flooring.
If you’ve faced similar frustrations, don’t worry. Recognizing these pitfalls early is key. For comprehensive guidance on installation fundamentals, I highly recommend checking out this resource on flooring installation fundamentals.
Next, we’ll explore how moisture issues develop and the practical steps to prevent your vinyl planks from lifting before they ruin your remodel.
Ensure a Level and Clean Subfloor
Start by inspecting your subfloor for uneven spots or debris, as imperfections can cause vinyl planks to lift. Use a self-leveling compound like premixed underlayment to smooth out low areas. Think of it as patching a pothole before laying fresh asphalt—without this, your flooring will be unstable. Personally, I had a low corner on my bathroom floor; pouring a quick layer of leveling compound transformed the surface into a perfect base, preventing future lifting issues.
Check Moisture Levels Rigorously
Moisture is your enemy in bathroom flooring. Use a moisture meter to test the subfloor; readings above 80% relative humidity indicate a need for vapor barriers or moisture mitigation. I remember detecting high moisture near a vent, which explained why my vinyl was peeling. Installing a vapor barrier like polyethylene sheeting beneath the planks acts as a shield against water vapor migration. This step is like installing a raincoat—you won’t see it but it protects your investment from hidden threats.
Select the Right Adhesive and Install Properly
If opting for glued-down vinyl, choose a high-quality adhesive suitable for bathroom environments—look for waterproof, mildew-resistant formulas. Spread the adhesive evenly with a notched trowel, matching the manufacturer’s specifications to avoid air pockets. Think of it as spreading peanut butter: too thick and it squishes out, too thin and it doesn’t hold. I once applied too much adhesive, which caused bubbles that later cracked; applying just the right amount made the planks lay flat and stick securely.
Assembly and Adjustment
Lay the planks row by row, starting from a corner. Use spacers to maintain expansion gaps—typically about 1/4 inch around edges—allowing movement as temperature changes. Gently tap each plank with a tapping block and a rubber mallet for a snug fit, much like assembling a puzzle. When I installed my flooring, I used a rubber float to ensure every piece clicked into place without damaging the surface, resulting in a flush, stable floor.
Post-Installation Practices for Longevity
Once the vinyl is in place, roll over the entire area with a 100-pound flooring roller to press the planks firmly against the adhesive. This simulates the effect of flattening a cake—uniform pressure ensures proper adhesion. Leave the floor untouched for at least 24 hours; walking on it too soon can disturb the adhesion process. I learned this the hard way when I stepped on my new floor after just a few hours, causing a small gap to form.
Regularly maintaining your vinyl flooring by cleaning with gentle, pH-neutral solutions helps preserve its adhesive properties and appearance. For expert tips on maintaining hardwood floors and ensuring they last, consider reviewing hardwood floor care secrets. Proper installation combined with diligent maintenance creates a resilient, beautiful bathroom floor that resists lifting and peels over time.
When it comes to flawless flooring, many homeowners and even some professionals make critical mistakes rooted in common myths. One widespread misconception is that selecting a quick-setting leveling compound guarantees a perfectly flat surface; in reality, improper mixing ratios or applying over incompatible substrates can lead to cracks and unevenness, undermining your entire project. According to expert flooring contractor insights, mastering the nuances of proper primer selection and environmental conditions during application is essential for lasting results.
Another prevalent error is underestimating the importance of moisture testing before installation. Many assume that if the surface looks dry, it’s safe to lay hardwood or tile, but hidden moisture pockets can cause significant issues like warping or adhesive failure over time. The National Wood Flooring Association emphasizes that moisture content differences of more than 4% between subfloor and material can lead to costly repairs—so don’t skip this vital step.
Hardwood floors often suffer from exposure to temperature fluctuations and humidity cycles, leading to cupping or gaps. A common misconception is that acclimation is optional; however, acclimating wood products in the environment they’ll be installed in for at least 72 hours helps ensure stable, gap-free floors. Expert sources recommend maintaining indoor humidity between 35-55% to prevent movement.
Let’s address a question that often puzzles advanced installers: How do you ensure perfect substrate preparation when dealing with uneven concrete slabs? The secret lies in detailed surface contouring and using slip sheets or membrane barriers where necessary. A study from the Concrete Society highlights that insufficient surface preparation accelerates failure, including cracks and delamination. The key is meticulous inspection and employing the right combination of leveling techniques, such as self-leveling overlays or grinding low spots, with a keen eye for detail.
Avoid falling for these traps by investing in quality tools, thoroughly understanding the materials involved, and following best practices outlined in comprehensive guides like [Floor Leveling Techniques](https://tiletrendshop.com/precise-floor-leveling-techniques-to-achieve-flawless-surfaces) and [Installation Fundamentals](https://tiletrendshop.com/flooring-installation-fundamentals-leveling-for-a-seamless-look). Remember, rushing or ignoring critical steps usually results in costly repairs down the line.
Have you ever fallen into this trap? Let me know in the comments and share your experiences—your insights could help someone avoid the same costly mistakes.
To achieve flawless flooring, having the right tools is essential. I personally rely on a few specific pieces of equipment that make the difference between a DIY job that looks professional and one that needs fixing down the line. First and foremost, a high-quality rubber mallet is indispensable for gently tapping planks into place without damaging the surface. paired with a dedicated tapping block, it ensures each piece fits snugly, reducing gaps and lippage. Additionally, a laser level or a long spirit level helps maintain consistent levelness across large surfaces, preventing issues down the line such as buckling or uneven tiles.
Safety gear isn’t just a recommendation—especially when working on significant restoration projects or working with heavy materials like hardwood or stone tiles. Ear protection, safety glasses, and work gloves are absolute must-haves, and I always wear knee pads when kneeling for extended periods to prevent fatigue and injury.
Measuring and marking tools are also critical. A fine-tip pencil combined with a chalk line allows precise layout and cuts, saving time and reducing waste. I highly recommend investing in a good quality tile cutter or wet saw for straight and accurate cuts—especially if you’re installing large-format tiles or custom cuts around fixtures. For adhesives, a rubber-based notched trowel ensures even distribution, which is vital for proper adhesion and long-term durability. Remember, as per this comprehensive guide, using the right notched trowel size relates directly to the material’s thickness and the tile’s size.
In recent years, digital tools like moisture meters have become more accessible and vital. Reliable moisture testing before installation can save countless headaches—high moisture levels can compromise adhesives and cause future issues like curling or cracking in hardwood floors. I use a pin-type moisture meter, which provides accurate readings and is easy to operate. These devices are moving toward even more advanced, smartphone-connected models that can log data over time, giving you a long-term view of environmental conditions.
Finally, for maintenance and long-term results, tools are just part of the equation. Regular inspections with a moisture meter can catch issues early, and a good vacuum or soft broom keeps debris from scratching surfaces. Applying specialized floor cleaners recommended for your material type helps preserve the finish, especially on hardwoods, which are sensitive to harsh chemicals. For mastering hardwood maintenance, this expert guide offers invaluable tips.
Looking ahead, I predict automation and smart tools will become more integrated into flooring projects. Imagine laser-guided installation systems or moisture sensors that communicate with your smartphone, providing real-time feedback. Embracing these innovations can streamline work and improve accuracy significantly.
How do I keep my flooring tools in top shape over time?
The key lies in regular cleaning, proper storage—preferably in a dry, climate-controlled environment—and timely replacement of worn parts, such as blades or notched trowels. Sharpening tools like chisels or blades ensures clean cuts, reducing breakage and imperfections. Investing in durable storage solutions, like sturdy toolboxes or wall-mounted racks, helps prevent damage and keeps your specialized equipment accessible. Remember, well-maintained tools not only last longer but also produce better results, making every project less stressful. For more advanced tips and equipment recommendations, check out this expert resource.
Finally, don’t overlook the importance of understanding your tools’ capabilities. Reading manufacturer manuals for calibration and maintenance schedules ensures optimal performance. Trust me—taking the time to care for your tools will pay off in perfect, durable floors that last for decades.
What I Wish I Knew About The Hidden Layers of Floor Perfection
- Minor details like moisture testing and subfloor prep might seem tedious, but skipping them is a surefire way to face lifting and cracking months later—trust me, overlooking these saved me from costly repairs.
- Investing in quality tools such as a reliable moisture meter or a sturdy tile cutter turned out to be game-changers; they elevate your work from amateur to professional-level durability and appearance.
- Best practices involve understanding your materials’ nuances—what works for vinyl might not suit hardwood—so tailoring your approach based on the specific project is essential for long-lasting results.
- Embracing patience over rushing the installation phase prevents common errors like uneven planks or tiles, saving frustration and rework in the future.
My Toolbox for Flooring Success and Why They Matter
- A high-quality rubber mallet and notched trowel—these simple tools ensure perfect fits and adhesion, reducing gaps and noise.
- A digital moisture meter, which now pairs with smartphones, keeps environmental conditions in check, avoiding surprises like warping or delamination.
- Guides like this comprehensive resource have been invaluable, providing step-by-step insights I rely on before starting any project.
- Lastly, regular maintenance tools, such as gentle cleaners and inspection devices, keep your flooring pristine and alert you to issues before they escalate.
Your Turn to Craft Flawless Floors
“The journey to perfect flooring isn’t just about tools and techniques—it’s about adopting a mindset of quality and patience. By applying these lessons and investing in the right resources, you’re well on your way to transforming your space into a durable, beautiful haven that lasts for decades.”
What’s one flooring challenge you’ve faced or are currently tackling? Share your story below, and let’s learn from each other’s experiences!