
I vividly remember the first time I attempted to finish a flooring project. I was so eager to see my new tile and hardwood come together beautifully that I skipped what I now consider a crucial step—properly taping off transitions. The result? Uneven edges, sloppy lines, and a finish that looked more amateur than professional. That lightbulb moment made me realize: if I wanted a truly polished look, I had to master this essential technique.
Why Proper Taping Off Makes All the Difference
When you’re working with different flooring materials—say, tile meeting hardwood or laminate transitions—the goal is to create a seamless, eye-catching finish. But without the right taping technique, what should be a smooth transition can turn into a jagged, distracting line. Taping off ensures clean, precise edges, prevents adhesive messes, and ultimately saves you time on cleanup and fixes down the line. Trust me, taking the time to do it right from the start is worth every effort.
Is Overthinking the Tape Really Necessary?
Early on, I was guilty of rushing through this step, thinking I didn’t need to labor over a piece of painter’s tape. Spoiler alert: I paid the price with uneven lines and extra sanding. A small mistake I made was using the wrong tape—cheap painter’s tape that didn’t stick well enough—and it caused the tape to peel off mid-work. Since then, I’ve learned that investing in quality tape and following proper taping techniques makes a huge difference. For expert tips on achieving flawless finishes, I recommend checking out this guide.
Prepare Your Materials and Workspace
Begin by gathering high-quality painter’s tape, a straightedge, a level, a pencil, and your preferred flooring adhesives. Clear the area of debris and dust to ensure proper adhesion and clean lines. Use a damp cloth to wipe the edges of existing flooring to prevent dust from compromising the tape’s grip.
Create a Precise Layout
Identify the exact transition points where different flooring materials meet. Measure and mark these points with a pencil, ensuring they follow a straight line across the space. Use a long level or straightedge to draw light guidelines, which will serve as your reference for taping and cutting.
Apply Taping with Care and Precision
Stretch the painter’s tape along the marked guideline, pressing firmly to prevent any bubbles or gaps. For a straighter edge, run the edge of a straightedge or your level along the tape to ensure alignment. When working around curves or irregularities, cut smaller pieces of tape and overlap them carefully, blending them into the overall line.
Ensure the Tape Adheres Well
Press down firmly on the edges of the tape with a roller or your finger to seal it against the floor surface. This prevents adhesives from seeping underneath and causing uneven edges or smudges. For textured surfaces, consider using a specialized sealing tool or your thumbnail to enhance adhesion.
Execute the Floor Transition
With the tape securely in place, proceed to apply your flooring adhesive or mortaring compound up to the edge of the tape. Use a notched trowel to spread the material evenly, maintaining consistent pressure to avoid ridges or thin spots. Keep a wet sponge or cloth nearby to clean excess adhesive immediately along the tape edges, preventing buildup that could ruin the neat finish.
Review and Correct Mistakes
Before the adhesive sets, check the alignment and edge sharpness. If over-application occurs or edges are uneven, carefully score along the tape with a utility knife and lift the tape gently, peeling it back to reveal a clean, crisp line. Repeat the process if necessary for perfection.
Allow Proper Curing Time
Follow the manufacturer’s instructions for curing your flooring adhesive. Avoid walking or placing heavy objects on the newly installed transition area until fully set to prevent disturbance or misalignment.
Finish and Clean Up
Once cured, remove the tape slowly at a 45-degree angle to avoid lifting any cured adhesive with it. Clean the edges with a soft cloth and your preferred floor cleaner. Regularly inspect the transition line for any settling or cracking over time and address issues promptly to maintain a seamless look.
Many DIY enthusiasts and even seasoned contractors often fall prey to misconceptions about floor leveling and tiling, thinking they’ve mastered the basics but overlooking finer nuances that impact long-term results. A prevalent myth is that achieving a flat surface is merely about pouring self-leveling compound and expecting perfect results. However, the reality is more complex, involving substrate preparation, moisture control, and understanding how different materials behave under varying conditions.
Why Most People Get Floor Leveling Wrong
One common mistake is neglecting the substrate’s condition before applying leveling compounds. For instance, using self-leveler over a dusty or damp subfloor can lead to cracking and sinking, compromising the entire installation. While many believe that skim coating or leveling is a quick fix, expert sources highlight that preparation is crucial. According to this detailed guide, priming the surface and ensuring it’s dry and clean prevents these issues, saving time and materials later.
Advanced Tip: How to Avoid Self-Leveler Cracks
Cracking often results from rapid setting in thick layers or application over moving substrates. Incorporating a bonding primer designed for the specific subfloor material improves adhesion, and layering thinner pours allows better curing. For complex projects, using a crack isolation membrane under the leveling compound can provide extra durability, especially in high-traffic or load-bearing areas. Studies confirm that proper substrate prep and layering techniques significantly reduce cracking risk, as emphasized by flooring experts.
Myth Bust: All Tiling Adhesives Are the Same
Many assume that choosing a standard thinset is sufficient regardless of tile or substrate. In truth, the nuances of different adhesives matter greatly—particularly with large-format tiles or delicate materials like natural stone. Using the wrong adhesive can cause tiles to loosen, crack, or develop unsightly lippage over time. I always recommend consulting the manufacturer’s specifications and considering modified or unmodified thinset based on application—like this article discusses in detail. Paying attention to these details can prevent costly repairs down the line.
What Are The Most Overlooked Advanced Mistakes?
One trap is neglecting the environmental conditions during installation, especially humidity and temperature. Installing tiles or flooring when conditions are not optimal can lead to adhesive failure or warping. For example, high humidity can prevent adhesives from curing properly, leading to future delamination. Expert advice from this resource recommends monitoring environmental factors and scheduling works when conditions are stable to ensure longevity.
Have you ever fallen into this trap? Let me know in the comments. Mastering these nuances not only elevates the quality of your project but also ensures it stands the test of time. Dive deeper into professional techniques by exploring our comprehensive guide and stay ahead of common pitfalls.
Keeping It Working: Essential Tools for Flooring Longevity
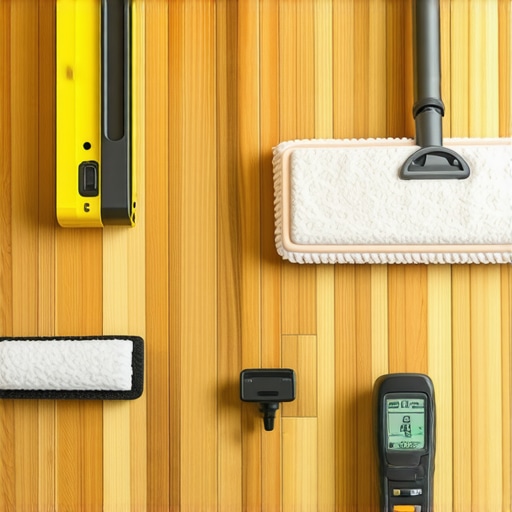
Maintaining beautiful, durable floors over time requires more than just initial installation skills; it demands the right tools and a proactive upkeep routine. Personally, I swear by a high-grade microfiber mop combined with a pH-neutral cleaner, like hardwood floor-specific solutions, to preserve the finish and prevent buildup. Regular sweeping with a soft-bristled broom keeps debris from scratching surfaces, especially in high-traffic zones. For deeper cleaning, I recommend using a steam mop cautiously, ensuring it’s compatible with your flooring type—many engineered hardwoods and tiles respond well, but always check manufacturer guidelines.
Investing in quality equipment isn’t just about ease; it’s about preventing long-term damage. For example, a weighted roller can be invaluable for re-adhesion of loose tiles or vinyl planks, often extending their lifespan considerably. When it comes to leveling, using a laser level ensures your subfloor remains flat, which minimizes the risk of uneven wear or future cracking—an issue highlighted in expert-recommended methods for perfect installations (see here).
The Power of Proper Maintenance Routines
Long-term results hinge on consistent care. I recommend establishing a weekly cleaning regimen that incorporates sweeping, careful mopping, and periodic inspection for signs of wear or damage. Addressing issues early—like loose tiles or minor cracks—can save significant repair costs later. For hardwood floors, applying a rejuvenating finish or touch-up every few years helps maintain their luster and resistance to scratches, while for tiles, sealing grout lines periodically ensures stain resistance and structural integrity.
Tools go hand-in-hand with these routines. I suggest keeping a tile repair kit with epoxy filler for quick fixes, and a calibrated moisture meter to monitor subfloor dryness, especially after dramatic weather changes. As trends evolve, so do tools—smart cleaning devices equipped with sensors can now detect dirt or dampness levels, optimizing upkeep efforts and preventing moisture-related issues in sensitive flooring types.
How do I maintain my flooring over time?
Stay ahead of wear and tear by schedule-checking your floors. Regularly inspect for loose tiles or boards, and address minor problems with targeted repairs—don’t let small issues fester into costly replacements. Keep an eye on moisture levels, especially in basements or bathrooms, as excess humidity can cause warping or mold growth. Consider using a dehumidifier if moisture poses a recurring challenge. Additionally, employing protective pads on furniture helps prevent scratches, and using rugs in high-traffic areas reduces surface stress, preserving your investment for years to come.
Predictably, the future of flooring maintenance leans toward automation and smart technology. Connected sensors and IoT devices are being developed to monitor environmental conditions and alert homeowners to potential issues before visible damage occurs. Incorporating these advances now can establish a proactive maintenance system, ensuring your floors continue to shine and perform well well into the future. Don’t hesitate to try out a laser level for your next floor check—precision tools like this are game-changers in upkeep routines. For more expert insights, explore our comprehensive guide.
Reflecting on my journey through flooring projects, I realize that the tiniest details—like tape placement or substrate prep—often translate into the biggest improvements in the final look. Often, I see seasoned DIYers overlook these nuances, only to face costly corrections later. Every flawless floor I admire was once a lesson learned from mistakes, underscoring that mastery lies in attention to the small but vital steps. For those committed to elevating their craft, embracing the complexities of floor leveling and transitions transforms a good job into a work of art.
Lessons the Hard Way That Could Save You Forever
- The myth of quick fixes: I once hurried to apply leveling compounds over a dusty subfloor, only to refinish and see cracks develop within months. The revelation? Proper substrate preparation—priming and thorough cleaning—is non-negotiable, as highlighted in this comprehensive guide. Don’t skip the prep, or you’ll redo the entire project.
- Proper tape is your secret weapon: I learned this lesson the painful way when cheap painter’s tape let adhesive seep underneath, ruining my sharp lines. Upgrading to quality painter’s tape combined with precise application ensured crisp edges that wowed my clients. It’s small investments like these that elevate your craftsmanship beyond the amateur level.
- The importance of environmental control: During a recent install, unseasonably high humidity caused my adhesive to set unevenly, leading to future tile lifting. Monitoring conditions with a moisture meter made all the difference. Recognizing that environmental factors directly impact adhesion and curing can save you from preventable failures, as discussed in this article.
Tools and Sources That Have Changed My Approach
- Laser levels for precision: Using a laser leveling tool transformed my capacity to maintain flatness across large surfaces, saving time and boosting quality. Invest in reliable equipment; it’s worth every penny in the long run.
- High-quality primers and adhesives: Trustworthy brands and correct product selection—guided by manufacturer specs—have drastically reduced issues like cracking or lippage. When it comes to adhesives, understanding the nuances makes all the difference, which you can explore further in this detailed resource.
- Expert advice and community insights: Joining forums and reading cornerstone articles, such as our ultimate guide to floor leveling, accelerates learning. Sharing experiences with others prevents common pitfalls and fosters continuous growth.
Embrace the Challenge and Reap the Rewards
Taking on the intricacies of flooring—be it leveler application or seamless transitions—may seem daunting at first. But remember, every professional started as a beginner. The satisfaction of walking into a room and knowing your work stands up to scrutiny is unmatched. Keep learning, stay curious, and don’t shy away from trying new techniques. Your floors, and your confidence, will thank you.
What’s been your most unexpected challenge in floor leveling or transition work? Share your story below and inspire others on their journey toward flooring mastery.
**[Internal link to comprehensive guide:](https://tiletrendshop.com/step-by-step-guide-to-flooring-installation-and-leveling-success)**