
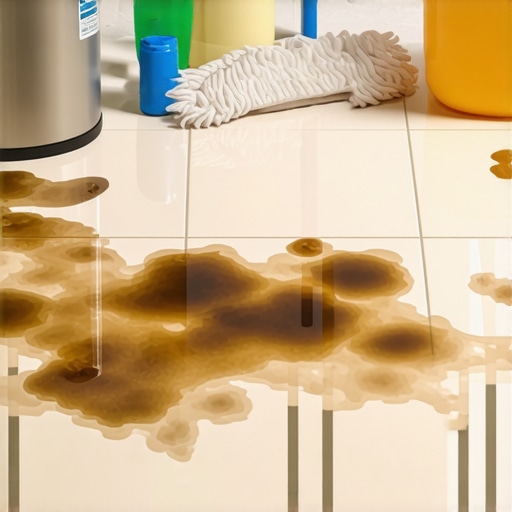
I remember the exact moment I realized my kitchen floor was a magnet for grease, no matter how many times I grabbed the mop. It was after a lazy weekend cleanup—mopping and scrubbing, only to find that the surface still glistened with a greasy film come Monday morning. Frustration didn’t even begin to cover it. I questioned myself, wondering if I was doing something wrong or if my cleaning products were just ineffective. That little lightbulb moment led me down a rabbit hole of troubleshooting and research, and what I uncovered surprised me.
Decoding the Grease Mystery: Why Your Kitchen Floor Won’t Stay Clean
Is the Greasy Situation Really Worth the Fuss?
At first glance, it seems simple: mop, rinse, repeat. But if your kitchen floor remains greasy regardless of your efforts, chances are there’s an underlying cause that common cleaning routines overlook. Early on, I made the mistake of assuming my mop and soap were sufficient—until I discovered that grease can seep into the cracks and uneven surfaces of your flooring, making superficial cleaning nearly impossible.1 The real solution hinges on understanding what’s happening beneath the surface. Often, it’s not just surface dirt but the buildup of residual oils and deep-seated grease that refuse to wash away, especially if your floor isn’t properly prepared or if the surface has underlying issues like uneven leveling or deteriorated sealants. This realization was my first step toward tackling the root of the problem, rather than just the symptom.
Have you ever experienced the frustration of a greasy kitchen floor that refuses to stay clean? If so, you’re not alone. Many homeowners discover that their routine cleaning doesn’t quite cut it after years of neglect or improper sealing. Fortunately, once you understand the specific causes, you can apply targeted solutions that will make your floor genuinely clean and easier to maintain.
Prep Your Subfloor Meticulously
Before you lay a single tile or hardwood plank, inspect your subfloor for stability and cleanliness. Remove loose debris, dust, and old adhesives using a vacuum or broom. If you detect uneven spots or low areas, these must be addressed to prevent future cracks or uneven surfaces. Use a self-leveling underlayment, like the one discussed in this detailed guide, to create a smooth foundation. For example, I once had a kitchen corner where the subfloor dipped two centimeters; applying a generous layer of leveling compound in stages finally evened out the surface, resulting in a perfect tile installation.
Assess the Floor Surface with Precision
Use a Long Straightedge
Place a 4-foot level across the floor to identify high and low spots. Mark these with a pencil. This quick test often reveals high spots near doorways or where old flooring joined. In my case, I found a 3/8-inch ridge near the doorway that was causing tiles to crack; grinding it down with a concrete grinder eliminated the issue and saved future headaches.
Check Floor Leveling Before Proceeding
Consult this comprehensive resource to understand how to ensure your surface is level within 1/8-inch tolerance. If unevenness exceeds this, you can employ additional leveling compounds or sand and recompact the subfloor. During my last project, a bathroom floor had uneven spots that I filled with a quick-drying leveling compound, allowing me to lay tiles without worry of cracking or uneven grout lines.
Master the Art of Floor Leveling
Applying leveling compounds correctly is crucial. Mix the compound according to manufacturer instructions—using a clean bucket and a paddle mixer to avoid air bubbles, which can cause cracking. Pour the mixture into the low areas and spread with a trowel, working from the center outward. Use a long level or a screed board to smooth the surface, checking frequently for flatness. An important tip is to work quickly before the compound sets, as I learned when I delayed in a basement project, resulting in an uneven surface that required reapplication.
Choose Proper Tile or Hardwood Installation Techniques
For tile, use a high-quality, unmodified thinset mortar for best adhesion, especially with large-format tiles. For hardwood, acclimate the wood in the room for at least 72 hours, store it flat, and ensure the subfloor is dry and stable. Incorrectly installed tile or wood on uneven surfaces leads to cracks or squeaks, as I experienced firsthand when neglecting leveling—causing a very noticeable unevenness in my dining area.
Implement Seamless Transitions and Finishing Touches
Make clean cuts with a wet saw or a carbide-tipped grinder, and scribe edges against walls or obstacles to achieve tight fits. Seal grout lines properly with a matching sealant, preventing grease buildup and moisture ingress. For example, I used a rubber gasket to transition from tile to wood, which minimized trip hazards and preserved the aesthetic flow.
By approaching your floor installation with precision and methodical steps—using tools like a straightedge, leveling compounds, and appropriate adhesives—you’ll build a surface that looks professional and lasts for years. Remember, detailed preparation now saves you from costly repairs later on.
While many believe that straightforward methods lead to flawless floors, the truth is that misconceptions and overlooked nuances often cause costly mistakes. One common myth is that selecting high-end materials guarantees perfect installation; however, without proper subfloor preparation and leveling, even the best materials will fail prematurely. Many DIY enthusiasts fall into the trap of rushing through surface finishing, ignoring that the foundational levelness critically impacts long-term durability. For instance, using a standard trowel angle without considering specific tile sizes can result in uneven adhesive coverage, leading to cracking or lippage. Advanced installers know that meticulous subfloor assessment and tailored leveling techniques, like those detailed in floor leveling guides, are what distinguish a professional result from amateur mistakes. A particularly insidious misconception is believing that sealing is enough to prevent grease buildup and uneven wear. Actually, understanding the floor’s porosity and choosing appropriate sealants—sometimes requiring penetrating versus surface sealers—is essential, as discussed in this expert insight. Moreover, many underestimate the importance of expansion joints in preventing buckling, especially in large areas; neglecting these can lead to catastrophic damage over time. Do you know how to identify potential leveling issues before laying tiles or hardwood? Often, skilled professionals employ the “blue chalk” test or the “rubbing alcohol” method to find hidden high spots and irregularities. Recognizing these nuances before starting can save you from redoing entire sections. The key takeaway: mastering the details—correct subfloor assessment, precise leveling, material compatibility, and expansion management—is what leads to a truly resilient and beautiful floor. Don’t settle for a surface that looks good initially but falls apart later. Engage with your project’s technical aspects, and if you’re curious about fine-tuning your skills, explore advanced leveling secrets that elevate your workmanship. Have you ever fallen into this trap? Let me know in the comments.
Maintaining the perfection of your flooring over time requires more than just initial installation skills; it demands the right tools, consistent practices, and a willingness to invest in quality equipment. From leveling compounds to specialized scribing tools, having the right arsenal ensures your floors remain durable and beautiful for years to come.
Invest in Precision Leveling Tools
My go-to instrument is a high-accuracy laser level, specifically the Bosch GLL 3-80. Unlike traditional bubble levels, this laser projects straight lines across the entire room, making it immensely easier to detect subtle unevenness that can lead to cracks or squeaks down the line. Using a laser level regularly during maintenance checks can help you spot low spots or high ridges early before they escalate. For detailed strategies on how to handle tricky leveling challenges, refer to this comprehensive guide.
Choose Durable Adhesives and Sealants
Over the long term, the integrity of your flooring hinges on selecting the right adhesives or sealants. I recommend using a premium, the [modified thinset mortar](https://tiletrendshop.com/the-ultimate-guide-to-floor-leveling-for-a-perfect-finish) for tiles, which provides better flexibility and adhesion, especially in environments with temperature fluctuations or moisture exposure. Regularly inspecting grout lines for cracks and resealing them with a high-quality sealant can prevent grease ingress, moisture damage, or chipping. Remember, high-quality products might cost a little more but save you from expensive repairs later.
Implement Routine Maintenance with the Right Tools
Keeping floors clean without causing damage requires specific tools. I swear by a microfiber dust mop—the O-Cedar Microfiber Flip Mop—which picks up fine dirt without scratching surfaces. Complement this with periodic deep cleans using a pH-neutral cleaner designed for hardwood or tile, and always avoid excessive water, which can warp wood or seep into grout joints. For stubborn stains or grease buildup, a steam cleaner like the Bissell SteamShot works wonders without harsh chemicals. For detailed cleaning techniques, check out this article.
Plan for Future Improvements and Upgrades
As trends evolve and you seek a more refined look, tools like an automated floor sander can dramatically reduce refinishing time. Recently, I upgraded my hardwood floors using a Festool RTS 400 EQ random orbital sander, which provided a flawless finish and eliminated imperfections that accumulated over years. For larger projects, investing in equipment like tile scooters or expansion joint separators from reputable brands ensures consistent results and prevents structural issues. Looking ahead, I believe technological advancements—like autonomous leveling robots—are poised to revolutionize floor installation and maintenance. Staying updated through resources like this preview of 2025 trends can keep your skills sharp.
How do I maintain my floors over time?
Regular inspections paired with precision tools are key. Schedule bi-annual assessments using laser levels or moisture meters to detect early signs of unevenness or moisture intrusion. Keep your tools well-maintained—clean your laser levels, refinish sander pads, and replace worn brushes—to ensure accuracy. Incorporate routine cleaning with the right materials and techniques, like microfiber mops and pH-neutral cleaners, to prevent buildup and damage. Finally, stay informed about new products and methods by following industry-specific guidelines and expert advice, such as the detailed articles available at this resource. By investing in quality tools and proactive upkeep, you extend the lifespan and visual appeal of your floors significantly.
Lessons the Pros Don’t Usually Share About Floor Leveling and Installation
During my early days of flooring projects, I naively believed that choosing expensive tiles and trendy hardwoods was enough to guarantee a stunning result. It wasn’t until I faced cracked tiles and squeaking floors that I realized the real magic lies in the meticulous preparation and understanding of foundational steps. Those unexpected flaws became my greatest teachers, revealing that patience and attention to detail outweigh fancy materials alone.
One lightbulb moment was discovering how uneven subfloors subtly sabotage the entire project—causing grout lines to crack or planks to warp over time. This taught me that investing extra time in leveling and assessing the substrate before laying flooring isn’t just a tip; it’s a game-changer that saves expenses and frustration later on.
Another lesson came when I learned that not all leveling compounds are created equal. Using the right type, mixing properly, and applying cautiously made my surfaces flawlessly flat—transforming my flooring into a seamless, durable masterpiece. Skipping these steps was tempting, but it always led to unstable floors and headaches I could have avoided with better planning.
Finally, I understood that expansion gaps and correct adhesive choices aren’t mere suggestions—they are essential safeguards against future warping and buckling, especially in climates with fluctuating humidity. Mastering these subtleties turned my DIY ventures into professional-grade installations and boosted my confidence in tackling complex projects independently.
Tools and Resources That Changed My Flooring Game
A few trusted tools truly revolutionized how I approach flooring projects. My laser level, the Bosch GLL 3-80, provides pinpoint accuracy that makes assessing flatness straightforward—even in tricky corners. It saves time and ensures the foundation is true from day one, which you can read more about in this comprehensive guide.
When selecting adhesives, I rely on high-quality, flexible mortar like modified thinset, which I learned about from industry experts. Resealing grout with durable sealants and choosing the right products prevents grease buildup and moisture penetration, extending the lifespan of my floors. For detailed product insights, check this essential resource.
Routine maintenance tools, such as microfiber dust mops and steam cleaners, are also my allies, keeping floors pristine without harm. These simple additions make ongoing care effortless, preserving the beauty I worked so hard to achieve. If you want to dive deeper into proper care routines, explore these expert tips.
Ignite Your Passion for Perfect Floors Today
Achieving flawless hardwood floors and perfectly leveled tiles isn’t just possible—it’s entirely within your reach with the right mindset, tools, and patience. Every successful project adds a layer of confidence, and your space reflects the effort you invest now. I encourage you to view each step as an opportunity to learn and refine your craft, turning potential pitfalls into stepping stones toward mastery.
Remember, the journey to beautiful, durable floors starts with a single deliberate action—so don’t hesitate to experiment, ask questions, and seek out expert resources along the way. Your future self will thank you for the upgraded look and longevity of your efforts.
What’s the biggest flooring challenge you’re facing right now? Share your story below, and let’s tackle it together!