
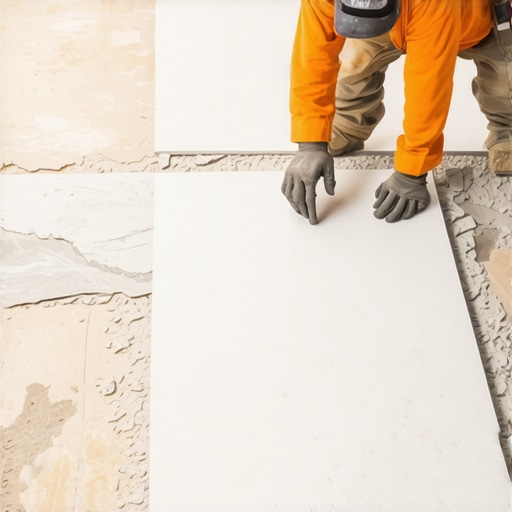
I remember the moment quite vividly—after spending hours prepping, I finally laid that first large tile only to see it wobble like a boat on choppy waters. Frustration bubbled up because I was certain I had followed all the rules, but the floor was just too unforgiving. That lightbulb realization hit me like a ton of bricks: a shaky subfloor can sabotage even the best tile installation.
Why A Shaky Floor Can Ruin Your Tile Project—And Why You Should Care
If you’re anything like I was, the thought of installing large tiles on a less-than-solid foundation seemed overwhelming. But here’s the truth: a wobbly floor not only compromises the visual appeal of your new tile but can also lead to cracks, unevenness, or worse—complete failure. And trust me, I learned this the hard way. When I first started, I ignored the signs of an uneven subfloor, thinking a bit of thinset would do the trick. Big mistake. That early misstep taught me that ignoring floor stability is a recipe for disaster, something I wouldn’t wish on anyone tackling this project.
Today, I’m here to share a solution that turned my shaky floors into a solid canvas for stunning tile work. Whether you’re a weekend warrior or a seasoned DIYer, the techniques I’ll walk you through will save you time, money, and frustration. Plus, I’ll debunk some common myths, so you’re armed with the right knowledge from the start. Ready to transform your uneven subfloor into a stable, sleek surface? Let’s get into it.
What About the Skepticism? Is It Really Worth the Effort?
Honestly, I was skeptical at first. After doing some research, I stumbled upon this insightful guide on precise floor leveling techniques. It confirmed what I was slowly realizing: proper leveling is crucial. Early on, I made the mistake of thinking a layer of thinset alone could fix my uneven floor—that’s a common error. But the reality is, investing in floor prep pays off many times over, especially when installing large tiles that demand a stable base.
So, if you’ve faced the dilemma of a wobbly subfloor or are anxious about whether your efforts will be worth it, rest assured. With the right approach, you can achieve professional-looking results and avoid costly mistakes.
Assessing and Repairing the Subfloor
Start by inspecting your subfloor for weak spots or movement. Walk across the surface and press down to detect any wobbling. Use a level to identify high and low spots. I once found a soft corner in my plywood subfloor that caused tiles to crack later. To fix this, remove the existing subfloor in that area, apply a concrete patch or plywood shim, and reinforce with additional screws or nails. This is crucial because a stable base is like building a house on solid ground—it prevents future issues. For detailed techniques, check out this guide on subfloor repair.
Choosing the Right Leveling Method
Self-Leveling Compound or Shims
If your unevenness is minor (less than 1/4 inch), a self-leveling compound is efficient. Pour it over the surface and spread with a gauge rake, ensuring an even thickness. I once poured a 50-pound bag in my hallway, which settled perfectly after 30 minutes, creating a flat surface for tile. For significant dips or humps, shimming with wooden or cementboard strips is more effective. Think of it as filling the valleys and filling the peaks—like smoothing a wrinkled sheet before placing a mattress. For the best results, review precise floor leveling techniques.
Preparing the Surface
Clean your subfloor thoroughly, removing dust, debris, or old adhesive. Use a vacuum and a damp cloth to ensure a dry, dust-free surface. Remember, dirt is like sandpaper for your tiles—it causes bonding issues. I spent extra time cleaning my concrete slab with a wire brush and a vacuum, which made the thinset adhere better. For proper cleaning methods, consult flooring installation fundamentals.
Applying the Underlayment or Primer
Depending on your subfloor type, apply a bonding primer or underlayment to enhance adhesion. For plywood, a primer reduces off-gassing and improves thinset bonding. I used a polyethylene sheet to seal the area, preventing moisture issues down the line. Think of this as laying a foundation for your tiles—without it, everything could settle unevenly. For detailed steps, see step-by-step flooring installation.
Implementing Real-World Experience
Once I applied my shims and leveled the floor, I waited 24 hours for everything to settle before tiling. The result was a perfectly flat surface, and my large-format tiles laid with minimal grout lines. That project taught me patience and precision—success depends on solid prep. Remember, your efforts in the beginning ensure your tile work remains flawless for years. For more insights, explore expert-level secrets.
Many DIY enthusiasts and even some professionals often fall into the trap of oversimplifying certain aspects of flooring installation, leading to costly mistakes down the line. One prevalent myth is the belief that a flat subfloor isn’t always necessary—many assume that applying a leveling compound afterwards can mask unevenness. However, experienced installers understand that even minor deviations can cause significant issues, especially when working with large tiles or hardwood flooring. This misconception can lead to cracked tiles or squeaky, uneven hardwood planks over time. Instead, thorough inspection and proper subfloor repair or reinforcement are essential steps that shouldn’t be skipped, as highlighted in comprehensive guides on floor leveling techniques. Another common mistake is relying solely on underlayment or foam padding to compensate for surface imperfections, thinking it will create a seamless finish. In reality, these materials are meant to provide soundproofing and a bit of cushioning—not to correct unevenness. Advanced professionals always verify the subfloor’s flatness before installing and address any imperfections directly, avoiding the trap of “patchwork” leveling that can lead to sagging or cracking. Many get caught up in the idea that all tiles or hardwoods are equally forgiving. The truth is, certain materials and installation methods demand meticulous preparation. For example, proper floor leveling is critical for large-format tiles, which are particularly sensitive to substrate irregularities. Moreover, a widespread misconception revolves around the notion that moisture barriers are a one-time measure—many overlook that moisture levels can fluctuate, especially in concrete slabs, leading to future issues like warping or mold. Consulting with experts and understanding the nuances of subfloor moisture management can save you from headaches later. Advanced practitioners also recognize that the key isn’t just in initial installation but in maintaining the integrity of the flooring over years—regular inspections, moisture checks, and timely repairs are crucial. To avoid these pitfalls, always prioritize accurate assessment and preparation, as demonstrated by installation fundamentals. Remember, perfect flooring begins with a solid foundation. Have you ever fallen into this trap? Let me know in the comments.
Investing in high-quality tools and establishing proper maintenance routines can dramatically extend the life of your flooring, whether you’re working with tile, hardwood, or engineered wood. From precise leveling to routine cleaning, the right equipment ensures your project not only looks great at installation but continues to perform over the years.
Choosing the Right Equipment for Flooring Mastery
The Power of a Good Laser Level
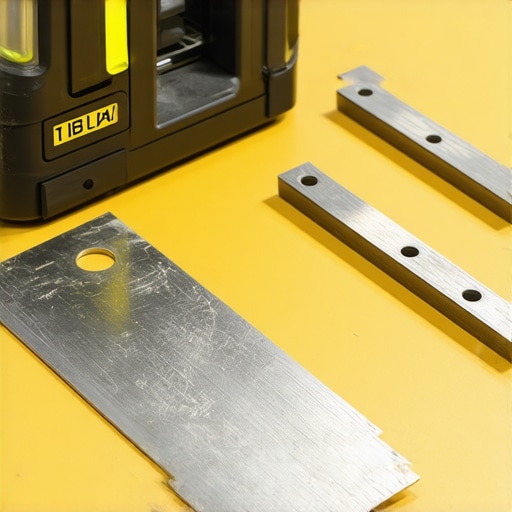
As I’ve learned through hands-on experience, a reliable laser level is indispensable. Unlike traditional bubble levels, laser levels project a consistent, straight line across large surfaces, making it easier to detect unevenness and maintain perfect alignment during tile installation or hardwood plank placement. My personal favorite is the Carlon Laser Level, which provides self-leveling features and long battery life, reducing frustration and increasing precision. For more advanced results, consider models with cross-line capabilities and remote controls to fine-tune positioning from a distance.
Why a Quality Trowel Makes All the Difference
The trowel is your primary tool for applying thinset and adhesive. I recommend using a notched trowel with the correct notch size for your tiles or hardwood adhesives. For large-format tiles, a 1/4-inch notched trowel provides optimal coverage, minimizing voids that can cause uneven or weak bonding. Investing in a stainless steel trowel with a comfortable grip reduces fatigue and improves consistency, which is vital for achieving a flat, durable surface. For detailed guidance, explore this resource on proper trowel selection.
Efficient Floor Leveling with Advanced Accessories
Accurate leveling is the backbone of a flawless finish. Beyond using self-leveling compounds, employing tools like a flooring squeegee helps spread the compound evenly, especially in hard-to-reach corners. For shimming, a plastic shim kit allows for quick adjustments under panels or tiles, ensuring a perfectly flat surface. Remember, proper preparation—like surface cleaning and moisture barrier application—is crucial for success. For technique mastery, check out this guide on floor leveling.
Keep It Running: Routine Maintenance Matters
Once your flooring is installed, maintenance becomes key to preserving its appearance and functionality. Regularly sweeping or vacuuming removes debris that can scratch surfaces, especially on hardwood and engineered floors. For deep cleaning, use pH-balanced cleaners designed specifically for your flooring type—avoid harsh chemicals that can degrade finishes over time.
In high-moisture areas, checking for signs of water damage or mold ensures longevity. Moisture barriers should be inspected annually, particularly in basements or bathrooms. If you notice any warping or squeaking, address it immediately—delaying repairs can lead to costly replacements. Adopting a vigilant maintenance routine, coupled with periodic refinishing for hardwoods, keeps your floors looking pristine and performs reliably for decades.
What About Future Trends in Flooring Tools?
Looking ahead, technological advancements like smart sensors and AI-driven diagnostics are poised to revolutionize flooring maintenance. Imagine self-monitoring floors that alert you via an app when moisture levels rise or when the underlying subfloor shifts. Staying updated with equipment innovations will not only make your projects smoother but also extend the lifespan of your investment.
How do I maintain my flooring over time?
Consistent cleaning, prompt repairs, and periodic refinishing are vital. For hardwood floors, I recommend refinishing every 7-10 years, depending on wear. Using protective pads on furniture and area rugs can mitigate scratches and dents. For tile and vinyl, sealing grout lines annually prevents moisture infiltration and staining. Regular inspections and timely intervention will keep your floors looking professional and performing flawlessly over the long haul.
Ready to elevate your flooring projects? Implementing these specific tools and maintenance tips will set a solid foundation for lasting beauty and durability. For a more comprehensive approach to perfecting your floor, refer to this detailed guide on floor leveling.
Lessons That Changed My Approach to Flooring
- One of the biggest surprises was realizing that proper subfloor repair isn’t just about fixing visible cracks but about assessing movement and stability first. I learned that a few loose screws or soft spots can lead to cracks years down the line, and neglecting them was a costly mistake.
- Another insight was how crucial it is to embrace patience during the leveling process. Rushing through shimming or applying leveling compounds without thorough surface prep can undermine the entire project, regardless of how perfect your tile pattern looks.
- I’ve also discovered that there’s no one-size-fits-all solution. Each subfloor type and room condition demands a tailored approach—be it the choice between self-leveling compounds or shims. Listening to this nuance often saves me time and materials.
- Lastly, I found that investing in quality tools like a laser level dramatically improves accuracy. Skimping on these tools may seem tempting but ends up costing more in rework and frustration over uneven surfaces.
Tools and Resources That Elevated My Craft
- The precise floor leveling techniques guide became my go-to resource; it taught me that preparation sets the foundation for flawless results. Exploring expert tips on flooring fundamentals helped me avoid common pitfalls and understand the importance of flatness.
- My reliable laser level from the top brands recommended in the industry ensured that my lines were straight and my tiles aligned perfectly, saving me hours of rework.
- For selecting tools that truly make a difference, I depended on reviews and tutorials from seasoned pros found in dedicated expert walkthroughs, which clarified which notched trowels and shims are worth every penny.
- And finally, ongoing maintenance tips from trusted sources like the hardwood care guides extended the life of my investments long after installation.
Ignite Your Flooring Confidence Today
Transforming a space with beautiful tile or hardwood starts with laying a foundation you can trust. The insights I’ve shared come from hands-on experience and a desire to pass on what I wish I knew when I first started. Now, armed with proper subfloor prep, the right tools, and a patient mindset, I feel confident tackling even the most challenging projects. Remember, every perfectly finished floor is a story of dedication and precision—yours can be next.
What has been the biggest barrier in your flooring projects? Share your story below and let’s learn from each other’s journeys!
,