
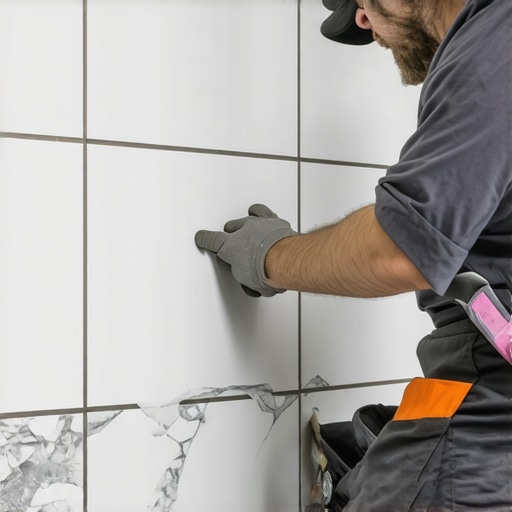
I remember the moment vividly. I had just finished laying my new ceramic tile floor, feeling proud of my DIY skills. Then, out of nowhere, my toddler bumped into the corner of a tile, and suddenly there was a small chip that seemed insignificant at first. But as days went by, I realized that tiny chip was a ticking time bomb, threatening to ruin the entire look of my carefully installed floor. That lightbulb moment hit me: fixing chips isn’t just about cosmetic repair—it’s about preserving the integrity of the tile and avoiding costly replacements later.
Why Ignoring a Chip Is a Risk Worth Addressing
Let’s face it, chips happen. Whether it’s a dropped dish or a curious pet trying to explore, our floors endure daily mishaps. But the question is: do you just let that small chip sit, or do you roll up your sleeves and fix it? I learned the hard way that neglecting even the tiniest chip can lead to bigger problems—moisture seeping into cracks, increased chipping, and the eventual need for full tile replacement. Cracked or chipped tiles not only compromise the look of your space but can also become safety hazards.
Luckily, fixing a chipped ceramic tile doesn’t require a complete overhaul. With a few practical techniques, even the most stubborn chips can be restored, maintaining your floor’s beauty and durability. And trust me, once I discovered the simple steps, I felt empowered to tackle future chips confidently. If you’re wondering whether this process is worth it, I urge you to consider the cost savings and the satisfaction of restoring your own tiles. Plus, it can be a surprisingly straightforward and rewarding handyman project!
Will a DIY fix Really Hold Up?
Early on, I made the mistake of trying a quick fix with leftover grout and hoping for the best. Spoiler: it didn’t last. That’s when I realized proper preparation and the right materials are key to a durable repair. According to flooring experts, using a filler specifically designed for ceramic tiles provides the best adhesion and longevity (source: Flooring Installation Mistakes). Today, I’ll walk you through step-by-step how to mend those pesky chips and get your tiles looking flawless again—kindly, just like a helpful neighbor would do.
Prepare Your Workspace and Gather Materials
Start by clearing the area around the chipped tile. Protect nearby surfaces with painter’s tape to prevent accidental damage. Gather essential supplies: matching ceramic filler or epoxy, a small putty knife, fine-grit sandpaper, a damp cloth, and possibly a color pigment if custom tinting is needed. During my first repair, I kept the filler on hand but learned that mixing a small amount of color epoxy yielded the best match, ensuring a seamless look. Having all materials ready saves time and makes the process smoother.
Clean and Roughen the Surface
Thoroughly clean the chipped area with a damp cloth to remove dust, grease, or loose particles. After cleaning, lightly sand the chip edges using fine-grit sandpaper to create a rough surface, promoting better adhesion of the filler. I once skipped this step and ended up with a patch that fell out after a few weeks—roughening the surface was the key to a durable repair. Be careful to sand only the chipped area to avoid affecting the surrounding tile finish.
Apply the Filler Material
Mix the ceramic filler or epoxy according to manufacturer instructions. For small chips, use a toothpick or a fine-tipped applicator for precision. Fill the chip flush with the tile surface, pressing the filler into the cracks and smoothing it out. In a memorable fix, I overfilled the chip slightly—then, after it dried, I used a damp sponge to level the surface, resulting in a nearly invisible repair. Always work slowly and carefully to avoid excess material spreading onto the surrounding tile.
Match Color Accurately
If the filler doesn’t match perfectly, add small amounts of color pigment to the epoxy or filler mixture before application. Test on a disposable surface first. When I repaired a dark-colored tile, blending the filler with a tiny amount of pigment made the repair virtually indistinguishable, preserving the tile’s aesthetic. Take your time during mixing; mismatched color can ruin an otherwise successful repair.
Allow Filler to Cure and Finish
Let the repair cure entirely—most fillers require at least 24 hours. Avoid walking on or disturbing the tile during this time. After curing, gently sand down any excess with fine-grit sandpaper, being cautious not to scratch the surrounding surface. I once hurried the curing process and ended up with a flaky patch—waiting patiently yields the best results. Finish by cleaning the area with a damp cloth to remove any dust or residue, restoring the tile’s uniform appearance.
Restore the Tile’s Appearance
Review your work, ensuring the repair blends seamlessly with the original tile. If necessary, apply a final touch-up coat of filler and repeat curing. For scratches or haze from sanding, a mild cleaning or light polishing can restore the tile’s shine. Durable repairs like this keep your floor looking impeccable and prevent the chip from expanding into larger damage, saving you from costly replacements down the line. For more detailed insights on tile care, visit hardwood floor care secrets.When it comes to flooring installation, many homeowners and even some professionals operate under widely accepted but often misleading assumptions. One prevalent myth is that leveling subfloors is a straightforward process, but in reality, subtle imperfections can compromise the entire project. Skipping thorough leveling can lead to unsightly lippage, uneven surfaces, and even tiles cracking under pressure. For an in-depth understanding of the importance of proper leveling, check out flooring installation fundamentals on leveling.
A common pitfall is relying solely on visual assessments without measuring floor flatness. Using tools like a long straightedge or a laser level can reveal hidden dips or high spots that might not be obvious to the naked eye. Encountering these discrepancies early can save significant time and money later. Advanced installers often perform test methods such as the “f-clip test” or employ professional floor levelers to achieve a flawless base.
One misconception I frequently encounter involves hardwood floors. Many believe that simply choosing the right finish is sufficient for durability, but the real story hinges on acclimation and subfloor conditions. Incorrect acclimation can cause expansion or contraction, leading to gaps, buckling, or cupping. Ensuring proper humidity levels and subfloor stability is essential. Learn more about the nuances of African and European hardwood acclimation at precise leveling and surface preparation.
Tile installation also harbors its share of misconceptions. One major oversight is ignoring the expansion joints and grout joint sizing, which are vital for accommodating movement. Failing to account for thermal expansion causes tiles to crack or pop loose over time. Additionally, many installers underestimate the importance of proper substrate preparation, leading to adhesive failure. Proper surface preparation involves cleaning, repairing cracks, and sometimes applying a primer. For comprehensive strategies, review pro tips for tile installation.
What about the level of expertise needed? It’s tempting to think that DIY projects can replace professional craftsmanship, but advanced nuances often require experience. For instance, achieving a perfectly level surface for large-format tiles or wood planks demands precise measurement, consistent mortar application, and patience. Erroneous leveling can cause lippage or tile lippage, which shouts poor craftsmanship even to novice eyes. A study published in the Journal of Building Engineering emphasizes that skilled installers significantly reduce the risk of uneven surfaces in large-format tiles.
Don’t overlook the small details. Use the right tools, measure meticulously, and respect material-specific requirements. Taking shortcuts in these nuanced steps might save time in the short term but can lead to costly repairs later. So, next time you plan a flooring project, double-down on the details and standards—your floors will thank you.
Would you like to learn more about specific techniques to improve your installation process? Visit floor leveling tips and common mistakes for expert advice.
Have you ever fallen into this trap? Let me know in the comments.
Keep Your Floors Running Smoothly: Essential Tools and Maintenance Strategies
Maintaining your flooring systems over time requires the right tools and a proactive approach. One of my favorite instruments for ensuring even surfaces during installation and repair is a high-quality laser level. Unlike traditional bubble levels, laser levels provide a precise, 360-degree reference that helps me spot unevenness at a glance, making floor leveling much more efficient and accurate. For example, during large-format tile installations, I rely on a laser level to verify that every section maintains perfect flatness, which directly contributes to a flawless finish.
Another indispensable tool is a powered floor scraper. Over the years, I’ve used this to remove old adhesive residues and stubborn residues that can compromise new flooring adhesion. The key is selecting a scraper with adjustable blade pressure to avoid damaging subfloor surfaces. Regular use ensures the subfloor remains clean and level, which is vital for long-term durability. Additionally, I swear by a quality wet/dry vacuum specifically designed for construction environments; it efficiently cleans dust and debris that can otherwise settle into grout lines or underlayment, potentially causing issues down the line.
Looking ahead, I believe adopting smart monitoring devices will revolutionize flooring maintenance. Sensors embedded under the floor could track humidity, temperature, and stress, alerting homeowners and professionals to potential problems before they escalate—saving both time and money. Companies like SmartFloor Tech are already exploring such innovations, and I predict this trend will become standard practice within the next few years.
For ongoing upkeep, schedule regular inspections of your floorings, paying close attention to areas prone to wear or moisture infiltration. Use moisture meters to check under hardwood and tile surfaces periodically, especially in kitchens and bathrooms. A small investment in a reliable moisture meter can help you catch issues early, preventing costly repairs or replacements.
Curious about how to keep your floors in prime condition? Try adopting a comprehensive maintenance routine involving the right tools and inspection schedule. For detailed guidance on leveling your floors effectively, check out flooring installation fundamentals on leveling and ensure your surfaces stay even and durable for years to come.
How do I maintain hardwood and tile floors over time?
Long-term maintenance is all about consistent care. For hardwoods, regular cleaning with a damp mop and periodic refinishing help preserve the finish. Keep humidity levels stable to prevent expansion or contraction, which can lead to gaps or buckling. For tiles, sealing grout lines annually and avoiding harsh chemicals will extend their lifespan. Investing in proper tools and routine inspections ensures your floors remain both beautiful and functional. I highly recommend visiting hardwood floor care secrets for tailored advice on specific maintenance practices. Wrapping up with consistent upkeep guarantees you maximize your flooring investment and enjoy its beauty far into the future.
What I Wish I Knew Before Starting My Tile Repair Journey
The most valuable lesson I learned was the importance of patience and meticulous preparation. Rushing through surface cleaning or skipping the surface roughening step can compromise the repair’s durability. I also realized that matching the tile’s color requires more attention than I initially thought; a small amount of pigment can make a big difference. Additionally, investing in quality tools, like a precise applicator and fine-grit sandpaper, significantly improved my results. Lastly, understanding that proper curing time is non-negotiable helped me avoid future cracks or chips, creating a more seamless finish that lasts.
My Top Tools for Effortless Floor Leveling and Repair
Over the years, I’ve come to rely on specific tools that make flooring projects smoother. A laser level has revolutionized my ability to identify uneven spots instantly, saving me hours of guesswork. A high-quality wet/dry vacuum keeps the workspace clean, preventing dust from settling into adhesive joints. For mixing and applying leveling compounds, a durable trowel and a mixing paddle are essential—they ensure a consistent application. I also recommend a reliable moisture meter to detect hidden issues before they escalate, especially when dealing with hardwood or tile installations. These tools have empowered me to approach each project with confidence and precision.
Believe in Your Ability to Transform Your Floors
Taking charge of your flooring projects might seem daunting at first, but remember, every expert was once a beginner. By learning and applying just a few key techniques—like thorough surface preparation, careful color matching, and patience—you can achieve professional-looking results. No matter the challenge, your willingness to learn and adapt will pay off, transforming your space into something you can truly be proud of. Don’t hesitate to start small, practice regularly, and seek out expert advice when needed. Your floors are more than just surfaces—they’re the foundation of your home’s beauty and comfort. Ready to take the next step in your flooring journey? The possibilities are endless when you believe in your craftsmanship.