
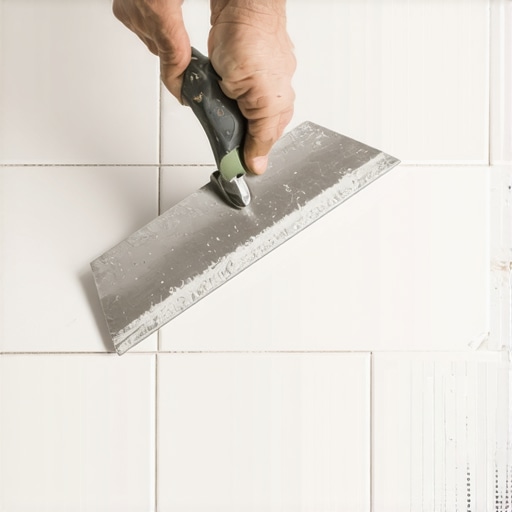
Walking into a home improvement store, I remember feeling overwhelmed by the array of tile trowels staring back at me. I had my measurement tape in hand, ready to tackle laying large format tiles, but one thing I nearly overlooked was the type of notched trowel I needed. It was only after a frustrating redo—where the thinset wasn’t holding evenly—that I realized my mistake. That moment was my awakening. Discovering the right notched trowel isn’t just a minor detail; it’s the secret to a flawless installation with large format tiles. Today, I’m here to share my journey from beginner blunders to expert tips, especially focusing on how selecting the correct notched trowel can make or break your project.
The Unique Challenge of Large Format Tiles
Large format tiles, often considered the future of modern flooring, offer a sleek and seamless aesthetic. However, their size introduces a set of unique challenges during installation. Unlike traditional tiles, these expansive surfaces demand a higher level of precision to prevent lippage—unevenness where tiles sit at different heights—and to ensure the adhesive completely bonds beneath each tile. A common mistake I made early on was using a standard trowel size, which caused thinset gaps and resulted in tiles that looked uneven or developed cracks over time. This experience taught me the importance of understanding the specific tools required—especially a necessarily tailored notched trowel—to succeed with large format tiles.
If you’re planning on upgrading your floors, mastering the correct trowel selection can save you time, money, and headaches. And truthfully, it’s the backbone of profressional-looking results. Proper trowel selection helps in achieving optimal coverage—crucial for large tiles—and prevents those pesky air pockets that compromise adhesion and durability. Curious about choosing the best tools for your next project? Check out my detailed guide on tile installation tips that save both time and money. It’s a must-read for anyone serious about quality work.
Is the hype around specific notched trowels overblown?
Early in my career, I bought into the idea that any trowel would do the job. I thought, “It’s just a bit of adhesive.” But I soon realized that this belief was costing me in effort and final quality. Using the wrong notched trowel—even by a small margin—can lead to thinset failures and uneven surfaces. According to industry experts, choosing the right trowel improves coverage and ensures a consistent bond, which is crucial for large-format tiles. For instance, mastering floor leveling techniques hinges on understanding your tools—something I wish I had known from the start.
So, what’s the takeaway? Don’t take your tools lightly, especially with large format tiles. The investment in a proper notched trowel tailored for these tiles can be the difference between a professional finish and a sloppy job. Ready to dive into how to select the perfect trowel for your project? Let’s get started on understanding what makes the ideal notched trowel—and how it can turn your DIY project into a showstopper.
Selecting the Proper Trowel Size for Large Tiles
Remember the time I attempted to install oversized porcelain tiles with a small, standard trowel. The thinset coverage was uneven, causing lippage and a wavy surface. The fix? Switching to a larger, more appropriate notched trowel, specifically a 1/4″ x 3/8″ V-notch for these tiles. This adjustment improved the thinset spread, giving a consistent bed and significantly reducing lippage. When choosing your trowel, consider the tile size and manufacturer recommendations, which often specify the notch size for optimal coverage. For comprehensive guidance, visit precise leveling techniques.When it comes to flooring, many DIY enthusiasts believe that following step-by-step tutorials and using standard tools is enough to achieve professional results. However, seasoned installers understand that certain myths and overlooked details can sabotage even the most carefully planned projects. For instance, a common misconception is that all adhesives and underlayments perform well across different subfloors. In reality, the choice of thinset or leveling compounds should be tailored to specific materials and conditions. Using a generic product without considering factors like moisture levels or subfloor composition can lead to cracks, warping, or premature failure. To avoid such pitfalls, it’s crucial to understand the nuances behind material compatibility and application techniques. As experts suggest, consulting comprehensive resources like the ultimate guide to floor leveling can save time and money by highlighting these critical details. Moreover, many overlook the importance of proper acclimation of wood or tile materials before installation. Forgetting to allow materials to reach ambient conditions can result in expansion or contraction post-installation, causing gaps or buckling. Another often-missed aspect is the precision of floor leveling. Even minor dips or humps can become glaring flaws once the surface is finished, especially with large-format tiles or glossy hardwoods. Advanced installers use laser levels and moisture meters—tools that many avoid due to perceived complexity—to ensure an impeccably flat surface. One mistake I see frequently is neglecting to verify the subfloor’s stability before beginning work. Loose or uneven subfloors require correction; otherwise, the entire floor may develop squeaks or cracks over time. In fact, as documented by flooring experts, poor subfloor preparation is a leading cause of long-term failure. Your goal should be not just to lay tiles or hardwood but to create a durable, lasting foundation. Don’t overlook the importance of proper surface preparation, material selection, and tool usage. These details, often dismissed as minor, are actually the secrets that separate a professional finish from a costly mistake. Want to dive deeper into the technicalities? Check out mastering floor leveling secrets for insider tips.
Why do seemingly small installation errors snowball into major issues over time?
Because flooring is a long-term investment, small mistakes—like uneven subfloors or improper material choices—compound, leading to significant repair expenses down the line. Ensuring each step is executed with precision and knowledge is essential for lasting beauty and functionality. Have you ever fallen into this trap? Let me know in the comments.Maintaining hardwood floors, tile, and properly leveled surfaces requires more than just initial installation skills; it demands a strategic approach to tools and ongoing upkeep. One of my favorite investments is a high-quality moisture meter like the Protimeter Surveymaster, which I use consistently before applying adhesives or finishing coats to ensure optimal conditions. This device helps me detect hidden moisture issues that could compromise the longevity of the flooring. Regular inspections prevent minor problems from escalating into costly repairs and allow for timely interventions, especially in areas prone to humidity fluctuations. Additionally, a precision-level laser such as the Bosch GLL 3-80 provides accurate readings to monitor floor flatness over time, ensuring the surface remains even and safe for use. In my experience, routine maintenance including gentle cleaning with pH-balanced solutions and avoiding abrasive materials significantly extends the life of both hardwood and tile surfaces. For hardwood floors, applying a specialized polish like Bona Hardwood Floor Restorer periodically helps restore shine and protect against scratches. Meanwhile, sealing grout lines with a high-quality, breathable sealant prevents staining and moisture ingress. As trends evolve, so do the tools—advanced vapor barriers and self-leveling compounds are now becoming standard for long-term results. Understanding these innovations enables you to scale your flooring projects confidently, knowing they will stand the test of time. How do I maintain my floors over time? Consistent inspections, timely repairs, and the right tools are crucial. For example, using a specialized sander equipped with dust collection like the Festool ETS EC 150 helps smooth out small imperfections or reseal areas without creating a mess—saving time and maintaining a pristine appearance. I encourage homeowners and DIY enthusiasts to experiment with these advanced tools; they make a tangible difference. For those interested in elevating their skills, I recommend exploring detailed guides on floor leveling methods and material compatibility to ensure flawless, durable results here. Incorporating these tools and strategies into your maintenance routine will keep your floors beautiful, safe, and resilient for years to come. Don’t forget to check out the latest innovations in tile and hardwood design to continually inspire your projects.
The Hardest Lessons I Learned About Floor Installs
One of the most valuable lessons I discovered was never to underestimate the importance of the right notched trowel. Using a smaller or inappropriate size resulted in uneven thinset coverage, leading to lippage and compromised durability. Investing in a quality, properly chosen trowel tailored for large format tiles made an immediate difference, saving me time and costly rework in the long run.
What’s Hidden in Simple Tools That Can Make or Break Your Floor
Early on, I believed that any trowel would do the job, but I realized that even minor differences in notch size or shape could cause major issues. Industry experts emphasize selecting tools suited specifically for your tile size and setting method. An overlooked detail like this can lead to cracks or uneven surfaces, so experience has shown me to always consult manufacturer recommendations or trusted installation guides.
The Unexpected Power of Proper Surface Prep
My biggest revelation came when I ignored subfloor preparation, leading to cracks and squeaks down the line. Using advanced tools like laser levels and moisture meters—even though initially daunting—helped me create a rock-solid foundation. This lesson underscored that flawless results rely not just on the visible finish, but on the quality of prep work, which is often dismissed as mundane but essential.
Curated Tools That Changed My Approach
Throughout my journey, certain tools have been game-changers. The leveling laser ensured my floors were perfectly flat, preventing future cracks. The moisture meter alerted me to hidden moisture issues that could have sabotaged my project. These resources are trusted because they give me confidence—no guesswork involved.
Your Next Step Could Transform Your Floors
Finally, I want to remind you that mastery in flooring isn’t just about tools and techniques—it’s about adopting a mindset of precision and care. Use your newfound knowledge to elevate your projects, whether you’re a DIY enthusiast or a seasoned pro. Every mistake I made taught me that paying attention to small details delivers big results. Now’s the time for you to bring that same dedication to your home improvement journey. Ready to elevate your floors and create a space that lasts? Share your experience below—have you ever struggled with selecting the right trowel or preparing your subfloor? Let’s learn from each other and build better, more beautiful floors together.