
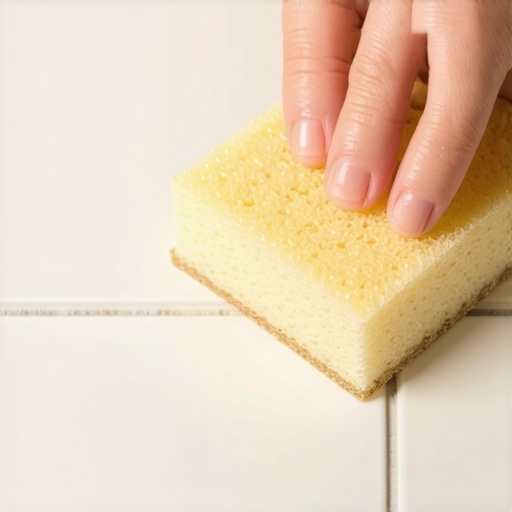
I remember the exact moment I realized I’d been sabotaging my own tile projects—standing there with a damp sponge in hand, trying to wipe away excess grout, only to end up smudging that perfect line of grout instead. It was one of those lightbulb moments where I finally understood that the key to stunning grout joints isn’t just the grout mix or the tools, but a simple trick I wish I’d known earlier: the Damp Sponge Hack.
Why Small Tricks Can Make or Break Your Tile Finish
Have You Faced the Frustration of Uneven or Cracked Grout Joints?
When I first started experimenting with tiling, I dove into all the tutorials and tips, but my grout joints always looked amateurish—cracked, uneven, and rough around the edges. The fix? A straightforward technique: slightly dampen your sponge and clean the grout lines immediately after application. This simple step smooths out the surface, removes excess grout, and helps achieve that professional, seamless look that makes a room pop.
Research shows that proper curing and finishing of grout can significantly extend its lifespan and aesthetic appeal. According to experts, controlling moisture during grout curing affects the joint’s durability and appearance, making the Damp Sponge Hack worth its weight in gold (source: The Ultimate Guide to Floor Leveling for a Perfect Finish).
But here’s the catch—early on, I made a critical mistake: I used a soaking wet sponge, which washed away my freshly applied grout. The secret is finding that perfect dampness; not too wet, not too dry. Perfecting this balance took trial and error, but once I did, the results spoke for themselves.
In this post, I’ll walk you through how to master the Damp Sponge Hack to ensure your grout lines are crisp, clean, and durable—no more cracked or inconsistent joints. Ready to take your tiling game to the next level? Let’s begin—your flawless grout joints are just a few simple steps away.
Prep Your Workspace and Gather Supplies
Before you start, ensure your workspace is clean and free of dust. Gather your supplies: a clean, soft sponge, a bucket with clean water, and your grout float. Having everything ready prevents interruptions and helps maintain a steady workflow. Remember, a good foundation makes your finish easier to achieve.
Apply the Grout Correctly and Allow Initial Curing
Spread the grout evenly into the joints using a trowel, pressing firmly to fill the gaps completely. Let the grout set for about 15-30 minutes, depending on the product instructions. During this time, the grout begins to firm up but remains workable, which is crucial for the next step. Rushing this stage can lead to uneven joints or cracking.
Dampening the Sponge to Curse Away Imperfections
Once the grout has set but is still soft, dampen your sponge slightly. The trick is to achieve a sponge moisture level akin to a wrung-out dishcloth—moist enough to clean but not so wet that it washes away the grout or leaves puddles. Lightly drag the sponge diagonally across the joints, applying gentle pressure. This step smooths the surface and removes excess grout—many DIYers make the mistake of soaking the sponge or pressing too hard, which can ruin their work. During a project, I once dipped my sponge into water multiple times, resulting in streaks and uneven joints; adjusting to a lightly damp sponge made all the difference. <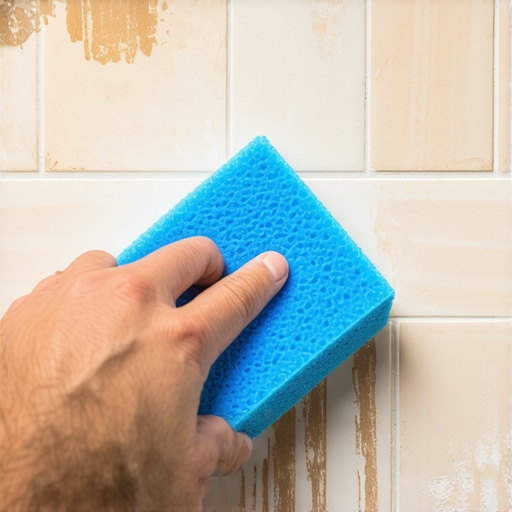 >
>
Technique: Sliding, Not Scrubbing
Use a sliding motion rather than scrubbing back and forth. Think of your sponge as a squeegee—you’re guiding it smoothly along the grout lines to polish and shape them. Consistency is key: go over all joints in the same manner. This approach ensures uniformity and sharp, professional-looking lines.
Rinse and Wipe for a Brighter Finish
After the initial smoothing, rinse your sponge frequently in clean water to prevent debris from smudging your grout. wipedown, make another pass with a clean, damp sponge to remove any remaining residue. This final wipe helps achieve a crisp, clean appearance and reduces haze—residual grout film that can dull your finish. Properly done, this step enhances both the aesthetics and longevity of your grout joints.
Final Touches and Curing
Once satisfied, let the grout cure undisturbed for the recommended time, typically 24-72 hours. Avoid foot traffic or water exposure during this period. Moisture retention during curing is vital; if you’re in a dry climate, lightly mist the grout periodically with water to prevent it from cracking or shrinking. After curing, seal the grout if necessary to protect against spills and stains, ensuring your work looks pristine for years.
Mastering the Damp Sponge Hack is all about timing, moisture control, and gentle technique. When executed correctly, it transforms a rough, amateurish job into a sleek, professional finish, elevating your entire tiling project to the next level. For more detailed tips on tile installation essentials, check out this guide for money-saving tricks or explore hardwood and tile combinations to perfect your space.While many DIY enthusiasts think surface prep and straightforward application techniques are enough, the real secret to flawless flooring lies in understanding the subtle complexities many overlook. A common myth is that leveling compounds and adhesives do all the work, but in my experience, the most consistent results come from mastering proper subfloor assessment and moisture management—areas often dismissed as too technical or tedious.
One prevalent misconception is that once the leveling is done, the floor will be perfectly flat and ready for tiles or hardwood. However, this ignores the critical nuances in moisture content, material compatibility, and substrate stability, which can lead to cracking, delamination, or uneven wear down the line. For instance, improper moisture testing with a hygrometer can cause significant issues, especially over concrete slabs. Experts emphasize that understanding these variables is crucial for long-lasting results (source).
Delivering a perfect finish isn’t just about the end look; it involves a holistic approach, including accurate substrate preparation, selecting the right materials, and environmental controls. For example, I frequently see installers rush the primer or ignore climate conditions, leading to adhesive failure or tile curling. The key is meticulous preparation and patience—skipping these steps often results in expensive rework and compromised aesthetics.
Why do so many installers get the moisture levels wrong, and what pitfalls does that create?
Moisture control is perhaps the most critical but least understood aspect among many DIYers and even some professionals. Excess moisture causes adhesive bond failure, warping, and mold growth—all invisible threats until it’s too late. Studies have shown that proper moisture testing can reduce failure rates by up to 30%, which translates to significant savings and durability (source). An advanced move is using calcium chloride or in-situ probes to get accurate readings, but many rely solely on surface tests, which miss hidden moisture trapped beneath the slab.
Another often-neglected aspect is the importance of material compatibility. Using a thinset mortar that isn’t suited for the specific tile type or substrate can cause long-term issues. For example, epoxy thinsets work well over heated floors but are unnecessary and overly complex for standard applications, leading some to make the mistake of overengineering their projects. Understanding these nuances elevates your craftsmanship and prevents costly mistakes down the road.
Finally, I caution against rushing the curing process—premature traffic or sealing can trap moisture and lead to future failures. Recognizing the signs of proper curing and knowing when to proceed with sealing or grouting is essential. For a thorough understanding of these practices and to avoid common pitfalls, check out detailed guides on flooring moisture management.
Have you ever fallen into this trap? Let me know in the comments, and remember, paying attention to these hidden details can make all the difference between a beautiful, durable floor and a costly disaster.
Investing in the Right Equipment for Durability and Precision
To ensure your tile and flooring projects stand the test of time, the quality of your tools matters just as much as your technique. I personally rely on a high-quality laser level, such as the Bosch GLL3-330C, which provides pinpoint accuracy over large areas—crucial when leveling uneven subfloors or aligning tiles with perfection. Unlike traditional bubble levels, laser levels offer real-time, comprehensive guidance, drastically reducing guesswork and rework.
For surface preparation, a premium concrete grinder paired with diamond cup wheels lets me smooth out rough patches efficiently. This step is vital when dealing with imperfect substrates, as a flat foundation directly influences long-term durability and ease of installation. Using a cordless angle grinder with a dust shroud minimizes clean-up, keeping my workspace safe and tidy.
Tools That Save Time and Improve Outcomes
When it comes to mixing, I swear by a paddle attachment on a heavy-duty variable-speed drill. It ensures consistent, lump-free thinset or leveling compounds, reducing curing issues like cracking or uneven settling. Choosing a mixing paddle with a wide, paddle-shaped blade helps move the material thoroughly without spattering, especially important when mixing large batches for expansive areas.
My secret weapon for precise grout lines is a grout float with beveled edges. It allows me to press the grout into tight joints and scrape off excess without damaging the edges, leading to cleaner finishes. After grouting, I use a specialized damp sponge—lightly dampened, not soaked—as mentioned earlier—to achieve smooth, professional-looking joints without smudging or removal of the grout layer.
Tools to Future-Proof Your Flooring Investment
Getting the right tools now means fewer headaches years down the line. For instance, adopting a moisture meter like the Tramex the Mollimeter helps me monitor subfloor conditions accurately, preventing adhesion failures and warping caused by trapped moisture. As moisture control techniques evolve, integrating tech-savvy tools will become standard practice and help extend the lifespan of your installations.
Looking ahead, I predict that automation and smart technology will become integral to flooring projects. Imagine cordless tools equipped with IoT sensors that provide real-time data on material consistency and environmental conditions—saving time and ensuring precision. Staying ahead of these trends will make professional-grade results accessible to DIY enthusiasts and pros alike.
How do I maintain my tools to keep them working perfectly over time?
Proper maintenance starts with cleaning after every use—removing dust, grout, and adhesive residues prevents rust and preserves accuracy. Lubricate moving parts as recommended by manufacturers, especially on power tools, to avoid wear and tear. Regular calibration of laser levels and moisture meters guarantees they function correctly when needed. Additionally, storing tools in a dry, organized space minimizes accidental damage and preserves their calibration. Consider setting up a dedicated workshop area where you can keep all your equipment ready for the next project, reducing downtime and increasing efficiency. Incorporating these maintenance habits ensures your tools remain reliable and accurate, which translates into consistently high-quality results in your flooring endeavors.
For tips on level preparation and mastering proper substrate assessment, check out this comprehensive guide. Don’t forget, investing in the right tools and maintaining them meticulously pays dividends in the longevity and beauty of your final flooring project. Try using a laser level for your next big job—it could make the difference between an average finish and a truly flawless floor.
What I Wish I Knew Before My First Tile Job
One of the most valuable lessons I learned is that patience and attention to detail trump rushing through the process. Early mistakes taught me that thorough substrate prep and controlled moisture levels are the silent heroes behind a durable, professional-looking finish. I’ve discovered that taking the time to master simple techniques, like the Damp Sponge Hack, can prevent months of frustration and costly rework.
Understanding that many errors stem from overlooked nuances—like proper curing times or incorrect tool maintenance—has transformed my approach. Sharing this insight can save fellow tilers from common pitfalls and elevate the entire craft.
Tools and Resources That Elevated My Skills
Investing in quality tools made a tangible difference. My laser level, the Bosch GLL3-330C, offers unmatched precision and saves countless hours aligning tiles and leveling floors. Coupling that with a high-grade concrete grinder and diamond cup wheels has empowered me to prepare substrates reliably, especially over challenging surfaces.
Moreover, reliable references like the comprehensive guide on floor leveling and trusted industry blogs have been invaluable. These resources deepen my understanding and keep me updated on best practices, ensuring that every project stands the test of time.
Your Next Step Toward Flooring Excellence
The journey to mastering tile installation and floor leveling is ongoing, but every project you complete adds valuable experience. Embrace the small tricks, select the right tools, and continually seek knowledge—the rewards are worth it. Remember, every perfect grout line and seamless finish starts with a commitment to precision and care.
Are you ready to apply these insights to your next flooring project? Share your experiences or questions below—let’s learn from each other and elevate our craft together!