
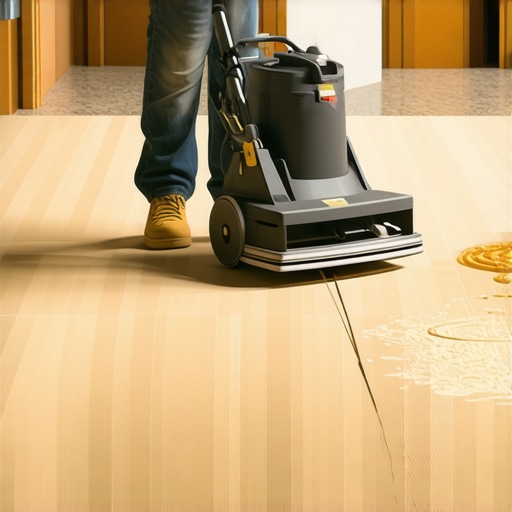
I’ll never forget the day I decided to sand my hardwood floors myself. What started as a simple upgrade turned into a dust-fueled nightmare that took hours to clean and left me questioning my DIY skills. That lightbulb moment hit hard—there had to be a better way.
Dust Storms During Floor Sanding? Not on My Watch!
After many frustrating attempts, I’ve discovered that achieving a smooth, professionally finished floor doesn’t have to mean living in a cloud of dust. Today, I want to share with you the secrets I’ve learned on how to sand a floor without creating a dust storm—and trust me, it’s a game-changer for your patience, your health, and your home’s cleanliness.
Is Dust-Free Sanding Really Possible?
Early on, I made the mistake of underestimating how much dust a little sander could produce. I’d rush, using standard equipment, and end up with a living room that looked like a snowstorm had come through. The truth is, dust particles are tiny and pervasive—they hang in the air, settle into every nook and cranny, and can be stubborn to clean. Achieving truly dustless sanding is not just a pipe dream; it’s an achievable goal with the right techniques and tools. Studies show that airborne dust can contain particles that are harmful when inhaled, especially over prolonged exposure, which makes controlling dust during sanding even more crucial (source: CDC NIOSH warning).
If you’ve faced this problem—wearing a mask for hours, cleaning endlessly, and still finding dust everywhere—you’re not alone. I’ve been there, and I’ll tell you, there’s an escape route.
Let’s look into how you can turn this dusty ordeal into a clean, efficient process, starting with the tools and techniques that actually work. Whether you’re a seasoned DIYer or just trying to polish up one room, mastering dust-free sanding will make your project easier and more enjoyable. Ready to dive in? Keep reading for practical, proven strategies that truly make a difference.
Choose the Right Equipment
Start with a HEPA-filter dust extraction system. I learned this lesson firsthand during my last project when I switched from a standard sander to a dustless orbital sander equipped with a quality vacuum port. The difference in dust control was staggering, leaving my space remarkably cleaner and breathing easier. Look for tools that connect directly to a wet/dry vacuum to trap dust at the source.
Prepare Your Workspace for Dust Containment
Seal off doorways with plastic sheeting, and cover vents with filtration material. When I sanded my living room, taping heavy-duty plastic around the entrance minimized dust escape. Using painter’s tape to secure the plastic ensured a tighter seal, drastically reducing airborne particles spreading to adjacent rooms.
Use Micro-Tools Designed for Dust Control
Utilize a pointed edge sander for detailed areas, paired with low-profile attachments that fit snugly. I found that switching attachments frequently and keeping blades sharp prevented extra dust from being generated due to inefficient cutting or grinding. Combining these tools with your main sander maximizes dust capture efficiency.
Implement Wet-Sanding Techniques When Appropriate
Some surfaces tolerate light dampening. I used a damp sponge on stubborn spots after dry sanding, which helped suppress dust. Be cautious: avoid excessive moisture that could damage the wood or substrate. This technique is especially useful for delicate finishes or intricate inlays.
Schedule Dust Control Units Strategically
Operate vacuum systems continuously during sanding. I recommend turning on the dust extractor before starting and keeping it running until after finishing the session. This constant airflow prevents dust from settling, making cleanup easier and safer.
Clean As You Go for Ongoing Dust Management
Regularly empty vacuum bags or canisters midway through the job. When I paused to change filters, I noticed a substantial decrease in airborne dust afterward. This habit prevents overfilling and maintains optimal suction power, ensuring continued dust containment.
Post-Sanding Cleanup That Keeps Dust Off Your Spaces
Finish with a HEPA-filter vacuum and microfiber cloths. After sanding, I used a vacuum with a HEPA filter to remove residual dust from surfaces, followed by a damp microfiber cloth to catch any remaining particles. This two-step cleaning is crucial to keep your environment dust-free and ready for the next steps.
Many homeowners and even seasoned DIYers fall prey to misconceptions when it comes to floor leveling and hardwood installation. A prevalent myth is that pouring self-leveling compound guarantees a perfectly flat surface without proper preparation. In reality, neglecting to assess subfloor conditions can lead to cracks, unevenness, and future damage, making thorough assessment essential before applying any leveling material. For example, moisture levels and subfloor integrity play critical roles—skipping moisture testing can cause bubbling or warping over time, despite initial appearances. To truly master floor preparation, consult detailed guides like the one on floor leveler techniques and avoid these costly mistakes.
Another misconception involves hardwood floors, where many believe that over-sanding isn’t risky. Conversely, excessive sanding thin the wear layer and jeopardize the wood’s durability. Unlike drywall, hardwood’s thin topcoat demands precise, expert-level sanding—overdoing it exposes raw wood, increases susceptibility to dents, and shortens the lifespan. Knowing your specific wood species and finish type is vital; for instance, engineered wood reacts differently to sanding than solid hardwood. Advanced installation also hinges on understanding the nuances of acclimation and expansion gaps, topics well-covered in comprehensive resources like hardwood flooring styles. Misjudging these details can result in buckling or gaps down the line.
When it comes to tile, many believe that the primary challenge is just getting the correct adhesive mix. But the real trap is ignoring substrate preparation—dust, oil, or uneven surfaces directly compromise adhesion. Proper cleaning and leveling are prerequisites, as outlined in tile leveling challenges. Without meticulous preparation, tiles can crack, loosen, or pop over time, especially in areas with temperature fluctuations or heavy foot traffic. Advanced installers also consider the importance of uncoupling membranes or crack isolation mats to prevent substrate movement from affecting tile integrity.
### Why Are Subtle Details So Critical?
It’s tempting to focus on big-picture steps, but missing the small, often overlooked nuances can sabotage an entire flooring project. For example, controlling moisture isn’t just about testing; it’s about ongoing management, especially in basements or areas prone to dampness. Similarly, understanding the specific properties of your chosen material—be it engineered hardwood, porcelain tile, or luxury vinyl—can prevent costly mistakes. For instance, some flooring types require special underlayments or expansion treatments, which are often skipped due to lack of awareness.
Mastering these hidden nuances ensures durable, professional results. As I’ve learned through experience, a keen eye for detail and thorough preparation make the difference between a temporary fix and a lasting investment. To deepen your knowledge, I recommend reviewing critical guides such as flooring installation success steps. Remember, cutting corners now can lead to significant setbacks later.
Have you ever fallen into this trap? Let me know in the comments! Ensuring your project’s success relies on understanding and mastering these nuanced aspects—don’t overlook them.
Once you’ve achieved that flawless floor, the journey doesn’t end—keeping it looking pristine requires the right tools and consistent maintenance. Over the years, I’ve fine-tuned my toolkit to include equipment that not only preserves my work but also makes ongoing care more efficient and effective.
Invest in a Quality Vacuum with HEPA Filtration
I can’t stress enough how crucial a high-quality HEPA-filter vacuum is for post-maintenance cleaning. I personally use a model that features adjustable suction and a sealed dust chamber, which ensures that even microscopic dust particles don’t recirculate into the air. This is vital for preventing dirt buildup and maintaining the health of your indoor environment, especially in homes with allergy sufferers. Regularly using such a vacuum helps to prolong the life of your flooring by preventing abrasive particles from settling into the surface.
Use a Fine-Industry-Grade Floor Buffer
For hardwood floors, a professional-grade buffer equipped with a terrycloth or microfiber pad helps to restore shine and remove minor scuffs without damaging the surface. I swear by a model that offers variable speed control, allowing me to match the buffer’s intensity to the specific finish—whether it’s a matte or high-gloss seal. When used periodically, this tool keeps the finish looking new and helps distribute maintenance products evenly. This practice prevents the need for costly refinishing prematurely.
Apply the Latest Floor Protectants and Sealants
Over time, preventive maintenance involves applying thin, yet effective, sealants that protect against spills and scratches. I opt for a high-tech polymer-based sealant, which I apply with a microfiber cloth or a spray system, depending on the area. Modern sealants are designed to be more durable and flexible, accommodating the natural expansion and contraction of wood or tile. Regular reapplication, usually every couple of years, extends the beauty and integrity of your flooring significantly.
What about Software and Monitoring Techniques?
While manual tools are essential, emerging software can help track maintenance schedules and notify you when it’s time for a refresher. For large commercial spaces, integrating floor monitoring systems can alert you to early wear or damage—saving money and preserving aesthetics in the long run. Although this might seem more advanced, even homeowners can benefit from simple digital reminders or apps that log your maintenance routines.
Looking ahead, I predict that technological integrations—like IoT sensors—will become standard, offering real-time data on floor health and environmental factors that influence longevity. Staying ahead of these trends means investing in adaptable tools now, ensuring your floors remain stunning for years to come.
How do I maintain my flooring tools over time?
Proper maintenance of your tools is key. After each use, thoroughly clean buffers and vacuums according to manufacturer instructions, paying close attention to filters and brushes. Regularly replacing worn pads on buffers and inspecting seals on vacuums prevents loss of suction and dirt escape, maintaining cleaning efficiency. For software or digital systems, keep firmware updated and back up logs periodically. Well-maintained tools are not only safer but also more effective, saving you time and effort during each upkeep session.
If you’re ready to elevate your maintenance game, try upgrading your vacuum with a true HEPA filter and see the difference it makes in air quality and cleanliness. Visit our contact page if you’re interested in expert recommendations or want to explore advanced tools tailored for premium flooring care. Remember, the key to lasting beauty lies in consistent, precise maintenance—equip yourself accordingly and enjoy the long-term rewards of your craftsmanship.
Lessons the Hard Way in Flooring Mastery
- Early on, I underestimated how crucial substrate assessment was. I thought all concrete slabs were alike, but I learned the importance of moisture testing through painful trial and error. Now, I always use a moisture meter before pouring leveler—saving time and preventing future issues.
- Over-sanding hardwood floors seemed like a quick fix until I realized each species has a limit. Knowing the specific wear layer and finishing technique has saved me from exposing raw wood and shortening my floors’ lifespan. Deepening my knowledge here was a game-changer.
- When installing tiles, my biggest mistake was neglecting proper substrate preparation. I now understand that even minor dust or unevenness can crack or loosen tiles over time. Careful cleaning and leveling beforehand have transformed my results.
- The myth that self-leveling compounds are foolproof almost made me skip proper inspection—until I faced cracks and bubbles. Learning the nuances of mixing and application techniques has helped me achieve flawlessly flat surfaces every time.
Tools and Resources That Made the Difference
- High-quality Moisture Meter: Essential for pre-leveling assessments. I trust the Tramex Moisture Encounter because it’s reliable and easy to use.
- Professional Floor Leveler: A top-tier self-leveling compound from Ardex has consistently delivered smooth, crack-free results, saving me frustration and rework.
- Educational Guides: The comprehensive floor leveling techniques resource helped me understand the subtle science behind perfect finishes, preventing costly mistakes.
- Specialized Tools: My orbit sander with HEPA extraction changed my hardwood refinishing. It keeps dust down and improves the quality of my work, making the process more enjoyable.
Embrace the Journey and Keep Moving Forward
Remember, flooring projects are as much about patience and learning as they are about skills. Every misstep is a step toward mastery. If you approach each project with curiosity and an eagerness to learn from experience, your results will reflect that growth. Keep honing your techniques, utilizing the right tools, and exploring new ideas from trusted resources like pro installation strategies. Your future floors will thank you for it.
What has been your biggest lesson in flooring installation or leveling? Share your story below and join a community committed to craftsmanship!