
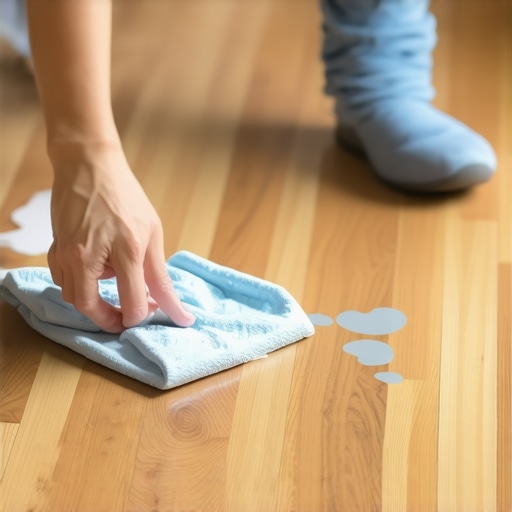
I remember the exact moment I realized my hardwood floor had become a canvas for unintended paint splatters. It was during a weekend DIY project, excitement fueling my every move. Suddenly, I noticed a stubborn blue stain spreading across the planks—tiny droplets that seemed impossible to remove. My initial instinct was to grab a chemical cleaner, but a nagging thought stopped me. Could there be a safer, more natural way?
After some trial and error, I discovered that removing paint splatters from hardwood doesn’t have to mean exposing yourself and your floors to harsh chemicals. In fact, with a few simple techniques, you can restore your beautiful wooden surface using everyday household items. Today, I want to share my journey from frustration to confidence—so you won’t have to struggle with stubborn paint spots anymore.
Why It’s Worth Tackling Paint Splatters Without Chemicals
Paint splatters are more than just an eyesore—they can also damage your hardwood if left untreated. Traditional methods often involve chemical solvents that may harm your wood’s finish or pose health risks to your family. Plus, many commercial removers contain harsh fumes, making the cleanup process unpleasant. By choosing natural solutions, you protect your floors’ longevity and create a safer environment.
From my experience, neglecting paint splatters can lead to discoloration or peeling over time. I learned this the hard way early on—trust me, I made the mistake of using aggressive paint removers that dulled the finish. That’s why I emphasize patience and gentle techniques, which preserve your floor’s natural beauty. If you’re like me, you’re probably wondering if there’s an effective way to tackle this problem without risking damage.
Here’s the good news: you can often remove paint splatters with items already in your home. For instance, a bit of warm water and mild soap might do the trick for water-based paints. For oil-based paints, plan B involves alcohol or natural oils like coconut oil, which can dissolve the paint gently. The key is to act quickly, because fresh spills are much easier to clean than dried stains.
In upcoming sections, I’ll walk you through proven methods to safely remove paint splatters from hardwood, ensuring your floors stay pristine without the hassle of chemical cleaners. Ready to regain your floor’s natural charm? Let’s dive into the step-by-step solutions that turned my DIY mishap into a simple, rewarding fix.
Act Quickly with Water-Based Paints
When I accidentally spilled water-based paint on my hardwood, I grabbed a damp cloth and started dabbing immediately. The key is to blot, not wipe, to prevent spreading. Use warm water with a few drops of mild dish soap and gently rub the stain, much like rubbing a stain out of fabric. This approach is effective because water-soluble paints soften quickly, making them easier to remove without chemicals.
Tackle Oil-Based Paint with Natural Oils
For stubborn oil-based splatters, I found that coconut oil works wonders. I applied a small amount onto a soft cloth and gently massaged the paint spot, letting the oil break down the paint’s bond with the wood surface. After a few minutes, I wiped the area with a clean cloth dampened with warm water. Think of it as dissolving stubborn adhesive with a gentle solvent—safe for your floors and effective.
Use Rubbing Alcohol for Dried Paint
Once the paint dries, it becomes rigid and resistant. I applied a small amount of isopropyl rubbing alcohol on a cotton ball, pressing it onto the dried splatter. After five minutes, I gently scraped the softened paint with a plastic scraper, avoiding metal tools that could scratch the surface. This method is like using a solvent that melts the paint’s structure, making removal manageable without harming your finish.
Test First and Proceed with Caution
Before applying any solution, I always tested a small, inconspicuous area of my floor. This prevents unexpected discoloration or damage, especially since hardwoods vary like a fingerprint. For example, some oil-based stains reacted differently, so I adjusted my approach accordingly. Remember, patience and gentle pressure are your best allies in avoiding damage.
Final Cleanse to Restore Shine
After successfully removing the splatters, I cleaned the area with a hardwood floor cleaner and buffed with a soft cloth. This step helps restore the natural sheen and ensures no residue is left behind. Regular maintenance and prompt attention keep your hardwood looking pristine long-term. For more tips on maintaining your floors, check out our guide on hardwood floor care secrets.
Many homeowners and even some professionals tend to accept simplified beliefs about hardwood floors, floor leveling, and tile installation, but these myths can lead to costly mistakes. For example, a prevalent misconception is that leveling subfloors is a straightforward, one-step process; in reality, achieving a perfectly flat surface requires understanding complex subfloor dynamics and potential issues like moisture seeping through or uneven subsurface patterns. This subtlety is often overlooked, resulting in tiles that crack or floors that squeak over time. Additionally, a common error involves believing that all hardwood floors are equally durable or that refinishing can hide underlying flaws. In truth, the quality of the wood, installation method, and finishing play roles that are often misunderstood—skipping proper acclimation, for instance, can cause significant warping later. When it comes to tile installation, many assume that choosing cheap adhesive or ignoring proper surface prep won’t impact longevity, but expert advice emphasizes that subpar materials and surface missteps often lead to tile cracks or lifting. For a detailed understanding of these issues, consulting sources like floor leveling challenges can illuminate common pitfalls. Interestingly, one underappreciated nuance involves the interaction between subfloor materials and adhesives—certain combinations can cause delamination or moisture damage, which isn’t obvious during installation but manifests later. This underscores why relying solely on surface appearance is a mistake. Think about tile and hardwood integrative design: many assume that mixing these materials is simple, but proper transition strips and matching finishes are crucial for aesthetic cohesion and structural integrity. For example, exploring modern tile trends can offer insights into harmonious blends. The key takeaway is that understanding these hidden nuances can save you significant rework and expenses—it’s about being thorough, not just expedient. Have you ever fallen into this trap? Let me know in the comments. For more advanced tips, check out our expert flooring installation strategies.
Keeping It Working: Essential Tools for Durability
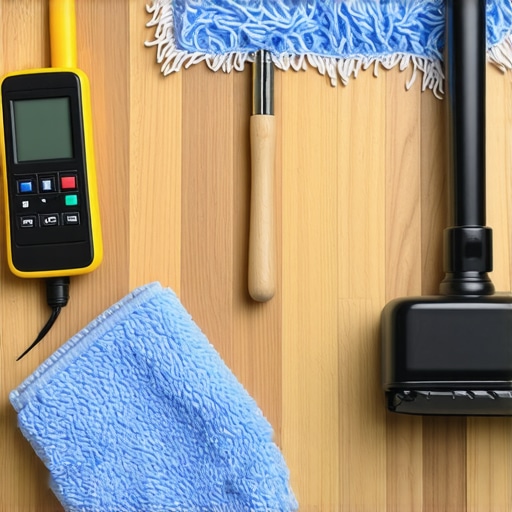
Ensuring your hardwood floors, tile, and flooring installations stand the test of time requires not just quality materials but the right tools for maintenance and upkeep. I personally rely on a high-quality rubber squeegee for routine cleaning, which effectively removes debris without scratching the surface. For deeper cleaning, a microfiber mop paired with pH-neutral hardwood floor cleaner, like those recommended in our care secrets, maintains shine and prevents buildup. Additionally, I keep a calibrated moisture meter handy to monitor humidity levels, essential for preventing warping or gaps over time.
For more intensive tasks, such as addressing uneven grout or stone maintenance, I use a vibratory polisher equipped with soft pads—to gently refresh surfaces without damaging the finish. When it comes to tile installation or repairs, a high-grade rubber mallet ensures adjustments without cracking tiles, a tip I picked up from seasoned professionals documented in pro installation strategies. Keeping sharp utility knives and proper grout removers on hand helps me tackle minor repairs efficiently.
Embrace Technology for Long-Term Results
Looking ahead, I predict smart tools will complement traditional maintenance practices. Smartphone-connected moisture sensors and automated vacuums with HEPA filters are gaining popularity, offering continuous monitoring and cleaning—saving time and reducing errors. Investing in these devices now offers peace of mind, especially in humid environments or homes with pets and children.
How Do I Maintain Flooring Over Time
Regular maintenance with the right tools is vital. I schedule quarterly deep cleans with professional-grade equipment, and annually reassess humidity and surface condition. Sealing grout lines and applying protective finishes periodically extend the life of tiles and hardwood alike. Furthermore, targeted repairs when small issues are detected prevent costly replacements later. For specific guidance tailored to your flooring type, consulting expert resources like mastering refinishing techniques can be invaluable.
In my experience, maintaining a proactive approach—regular inspections, prompt repairs, and using the appropriate tools—saves both time and money. Try integrating a high-quality moisture meter into your routine; early detection of humidity fluctuations can prevent significant damage. Keeping your floors pristine and functional isn’t a one-time effort but an ongoing process that rewards patience and diligence.
Dodging Common Pitfalls: Insights from My Journey
One of the biggest lessons I learned was that rushing through floor leveling or tile installation often leads to costly mistakes down the line. I once underestimated the importance of proper moisture testing, which resulted in uneven tiles and cracking. Patience and meticulous preparation are key—don’t skip the foundational steps, even if you’re eager to finish.
Another revelation was the significance of choosing the right materials for your specific environment. Trusting the advice of professionals and doing thorough research saved me from installing overly soft hardwood in high-traffic areas, which would have worn out prematurely. Remember, the right tools and materials make all the difference in creating a lasting, beautiful finish.
Finally, I realized that small details—like maintaining consistent thinset coverage or ensuring proper expansion gaps—can make or break the final look. Paying attention to these nuances prevents gaps, uneven surfaces, and future maintenance headaches, turning your project from a quick fix into a long-term investment.
Tools and Resources That Changed the Game
For anyone serious about achieving professional-quality results, I recommend investing in a high-quality moisture meter. It’s an unsung hero for preventing future floor failures by catching humidity issues early. Pair this with a reliable laser level to ensure your subfloor and tiles align perfectly—precision saves time and frustration.
Reading expert books like Mastering Hardwood Floor Refinishing provided me with foundational knowledge and advanced techniques. And when in doubt, consulting detailed guides such as Step-by-Step Flooring Installation gave me confidence that I was on the right track.
Don’t underestimate the value of online forums and videos—learning from others’ experiences can help you avoid errors I’ve made, like improper substrate preparation or ignoring expansion gaps. The cumulative knowledge accessible today empowers DIYers and professionals alike to elevate their craftsmanship.
Your Next Move Toward Perfect Floors
Embarking on your flooring or tiling project is exciting, and with the right mindset and tools, you can achieve stunning results. Remember, patience, preparation, and attention to detail are your best allies. Whether upgrading hardwood or adding elegant tiles, every step you take today builds the foundation for beauty and durability tomorrow.
So, are you ready to turn your vision into reality? The journey to flawless floors begins with informed choices and confident action. Let your project be a source of pride, not frustration—every perfect seam and level surface is worth the effort.
Have you ever struggled with a specific step in flooring installation or tile laying? Share your stories below—your experience might inspire someone else to succeed!