

It happened to me during a renovation that I had carefully planned for weeks. I was leveling a hardwood floor, confident that my measurements and tools would suffice. But as I laid down the final planks, I noticed uneven gaps and a slight wobble underfoot. Frustration set in — how could I have so thoroughly misjudged the process? That lightbulb moment came when I discovered the power of a simple yet overlooked trick: the foam strip secret for leveler expansion gaps.
Why Small Gaps Can Make or Break Your Flooring Success
When installing hardwood or tile, one critical element often trips up DIY enthusiasts and even seasoned pros: the expansion gap. These tiny spaces are essential for accommodating natural wood movement and temperature fluctuations. Yet, many overlook how to properly manage them, leading to uneven surfaces, cracked tiles, or warped floors. The foam strip method proved to be a game-changer in my experience. It elegantly ensures that these gaps are filled just right, preventing pesky issues down the line.
Is The Foam Strip Technique Overhyped? My Bold Take
Before I tried this trick, I was skeptical. I thought, “Why bother with a foam strip? Won’t regular caulk or filler do?” I made the mistake early on of assuming all gap-filling methods were the same — only to realize that many aren’t designed to handle the dynamic movement of wooden floors. The foam strip acts as a flexible buffer, absorbing expansion and contraction without cracking or shifting. If you’re questioning whether this method is worth your time, consider this: many seasoned floor installers swear by it. To understand more about achieving a flawless finish, check out our comprehensive guide to floor leveling.
Now that I’ve blown your mind with the potential of foam strips, let’s dive into how this technique can level up your installation game—and save you headaches in the future.
Preparing Your Subfloor Like a Pro
Start by removing any debris, dust, or loose material from the area. Use a broom or vacuum to ensure a clean surface, which is crucial for adhesion and a smooth finish. Inspect the subfloor for any soft spots or significant unevenness that could compromise the leveling process. If you discover high or low spots, mark them clearly to address during the leveling phase.
Applying Self-Leveling Compound Effectively
Mix the self-leveler following the manufacturer’s instructions, aiming for a pourable, lump-free consistency. To prevent bubbles that can create weak spots, stir slowly and avoid over-agitating the mixture. Pour the mixture in small sections, starting from the lowest point and working outward. Use a gauge rake or notched trowel to spread the compound evenly, especially over larger areas, ensuring it flows smoothly into low spots without trapping air.
Master the Pour to Avoid Pinhole Bubbles
While pouring, keep the vessel close to the surface to minimize air entrapment. If you notice bubbles forming, lightly tap the surface with a trowel handle or use a roller to coax out trapped air—this is akin to removing bubbles from a shaken soda bottle before opening. This step is vital; tiny pinholes can compromise surface integrity, leading to future cracks or dips. For best results, consult our precise floor leveling techniques.
Leveling with a Straightedge and Hand Tools
For minor adjustments or localized low spots, place a long, straightedge (like a carpenter’s level or a straightboard) across the surface. Gently rock it back and forth, observing where the edges lift or where gaps remain. Use a trowel to add more compound to low areas or a sanding block for high spots after curing. Think of it as fine-tuning a musical instrument—every small tweak counts toward harmony.
Addressing Warm Edges and Surface Tainting
Temperature differences during curing can cause the surface to dry unevenly, leading to unattractive streaks or discoloration. To mitigate this, keep the area at a consistent temperature—ideally between 65°F and 75°F—and avoid direct sunlight. If streaks appear, lightly sand the surface or apply a compatible smoothing agent. Keep in mind that proper curing time depends on the product but generally takes 24-48 hours before proceeding with further installation. Learn more about avoiding common leveling mistakes in our floor leveling pitfalls and solutions.
Ensuring a Flat, Adhesive-Ready Surface
After curing, test the surface with a long straightedge or a spirit level to ensure uniformity. Any dips over 1/8 inch may require additional filling or sanding. The goal is a perfectly flat foundation for your tiles or hardwood floors, preventing uneven wear and cracking down the line.
Applying these steps carefully transforms a rough subfloor into a pristine foundation. Remember, patience and attention to detail during the leveling process pay off by saving time and avoiding headaches later in your project. For more strategies on seamless flooring installation, explore our fundamentals of flooring leveling.
Many homeowners and even some professionals believe that achieving a perfectly level floor is simply about pouring a self-leveling compound and calling it a day. However, this common misconception overlooks crucial nuances that can make or break your flooring project. One widespread myth is that self-leveling compounds alone can compensate for major subfloor issues. In reality, without proper subfloor prep—like removing debris, inspecting for soft spots, and addressing high or low spots—you risk future cracks, uneven tiles, or squeaky hardwoods. For expert-level results, it’s essential to understand that surface preparation and gradual correction are key, as detailed in our comprehensive guide to flooring leveling and installation.
A common trap many fall into involves relying solely on the self-leveler to fix substantial imperfections. This approach might seem expedient, but it often leads to what I call the “illusion of perfection,” where the surface appears flat initially but deteriorates over time due to hidden flaws. Instead, I recommend a layered approach: first, identify and address major irregularities with patching compounds or sanding, then apply self-leveling products for minor adjustments. This meticulous process guarantees a durable, flat surface that will support your flooring for years.
Now let’s tackle a question that challenges even seasoned DIYers—what’s the secret to mastering floor leveling for complex spaces?
How Can I Achieve a Flawless Floor Over an Unusually Irregular Subfloor?
The answer lies in a combination of advanced techniques, such as scribing and progressive correction. For particularly uneven or aged subfloors, using a laser level helps identify high and low spots with precision. Then, strategic use of slurries and multiple layers of patching compounds—applied gradually—can level out large discrepancies. This process prevents the typical pitfalls of over-reliance on single-layer self-levelers, which often mask underlying issues. Experts emphasize that it’s better to spend extra time correcting major irregularities than to risk costly rework down the line; for a step-by-step walkthrough, see our pro tips for flawless leveling.
An overlooked but critical point is the importance of proper curing and avoiding surface taints, such as streaks or pinholes, which can compromise your final finish. Temperature and humidity management during curing are vital, as even small fluctuations can cause warping or weak bonding. Remember, patience during this phase is an investment in longevity, not a luxury.
Finally, don’t forget: even the slightest undetected imperfection can become glaring after tiling or hardwood installation. Use a long straightedge or a laser to verify flatness before proceeding. It might seem tedious, but it’s the step that guarantees seamless results and prevents headaches later.
Want to dive deeper? Explore our detailed guide on identifying and correcting subfloor issues to ensure your foundation is truly solid. Remember, mastering these nuances is what separates a professional finish from a quick fix. Have you ever fallen into this trap? Let me know in the comments.
Keeping Your Floors in Top Shape Over Time
Maintaining a flawless floor isn’t a one-time task; it requires using the right tools and adopting smart practices. I rely on precision measuring tools like laser levels to monitor shifts in your subfloor. These lasers, such as the Bosch GCL100-Offset, provide accurate readings over large areas, making ongoing assessments quick and reliable, especially when checking for slight deviations caused by moisture or temperature changes. Our comprehensive guide emphasizes the importance of consistent monitoring to avert costly repairs down the line.
For routine cleaning, a microfiber mop paired with a pH-neutral cleaner preserves your hardwood or tile finishes without deterioration. Avoid harsh chemicals that can break down sealants and cause discoloration over time. Additionally, installing uncoupling membranes beneath your tiles or hardwoods protects against substrate movement, vital for long-term durability in areas prone to shifting or moisture intrusion.
How do I maintain my flooring equipment over the years?
Regularly calibrate your tools, like laser levels and moisture meters, following manufacturer instructions. Keep measuring instruments clean and store them in protective cases to prevent damage. For hand tools such as trowels and detail brushes, periodic cleaning with warm water and a soft cloth prevents debris buildup, ensuring precision for future projects. Upgrading your tools periodically, especially as technology advances, can save time and improve results, aligning with innovations in adhesive formulations and leveling compounds that are becoming more sophisticated, as explored in our expert tips for installation mastery.
Looking ahead, the trend is shifting toward smart, sensor-equipped tools capable of detecting subfloor moisture and movement dynamically. Investing in these innovations now can streamline future inspections, reduce errors, and extend your floors’ lifespan. By maintaining your tools diligently, you’ll ensure precision and longevity in your flooring projects, making every effort count.
Ready to elevate your maintenance game? Try regularly using a high-quality laser level to monitor your subfloor’s stability post-installation. Small but consistent checks can reveal shifts early, saving you from major repairs later. For a deep dive into advanced techniques, consult our article on innovative tile and flooring designs.
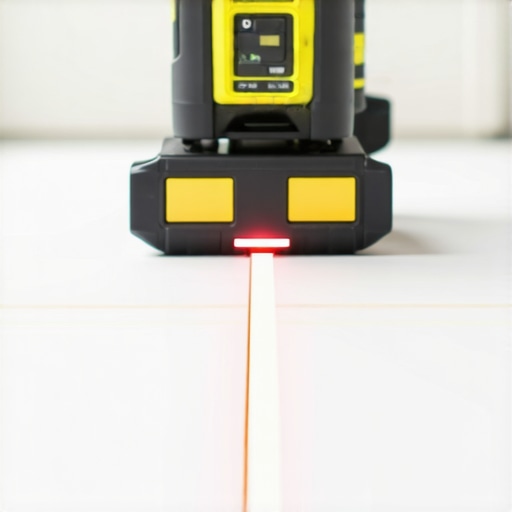
The Hardest Lesson I Learned About Floor Leveling, Tile, Flooring Installation, Hardwood Floors
Early in my DIY journey, I believed that pouring a self-leveling compound was all it took to achieve perfection. The truth is, even a high-quality product can’t compensate for poor prep or rushed work. I found that meticulous surface prep, like removing debris and addressing major unevenness first, drastically improved my results and saved time in the long run.
3 Myths About Floor Leveling, Tile, Flooring Installation, Hardwood Floors That Held Me Back
- Myth 1: Self-leveling compounds can fix all imperfections. Reality: They work best when the subfloor is prepared properly. Major issues need addressing before applying.
- Myth 2: Uneven subfloors aren’t noticeable after installation. Reality: Hidden dips can cause tiles to crack or hardwood to squeak over time.
- Myth 3: Rapid curing is always better. Reality: Slower, controlled curing prevents surface tainting and ensures durability.
What Experts Won’t Tell You About Floor Leveling, Tile, Flooring Installation, Hardwood Floors
In my experience, the secret lies in patience and layered correction. Using laser levels to identify deep irregularities and applying patching compounds gradually leads to a rock-solid foundation. Overlooking surface curing times or rushing can undermine your entire project, no matter how skilled you are. For in-depth techniques, check out our pro tips.
Curated Resources for a Flawless Finish
- Laser Levels: I trust the Bosch GCL100-Offset for accuracy. It makes identifying uneven spots straightforward and saves countless hours of guesswork.
- Self-Leveling Compounds: The Mapeguard products have proven reliable and easy to work with, helping me achieve smooth surfaces even over challenging substrates.
- Instructional Guides: Our comprehensive floor leveling guide has become my go-to resource for step-by-step strategies that ensure consistent results.
- Moisture Meters: A reliable tool like the Wagner MMC220 helps prevent moisture-related problems that can compromise the entire floor.
Your Turn to Elevate Your Flooring Skills
Taking your flooring installation from good to great requires attention to detail and a willingness to learn from mistakes. Every challenge offers an opportunity to refine your technique and build confidence. Remember, a well-leveled floor is the foundation for stunning, long-lasting results. Are you ready to tackle your next project with new insights? Share your experiences and questions below—and let’s grow together in mastering the art of floor leveling and installation.