
One morning, I stepped into my living room and was hit with a warped, wavy surface beneath my feet. That smooth, beautiful hardwood floor I poured my heart into was now unmistakably cupped, even though I had gone to great lengths to maintain a low-humidity environment. It was a lightbulb moment for me—why on earth was my floor buckling when the humidity levels seemed spot-on? I knew I wasn’t alone in this frustrating experience.
Breaking Down the Cupping Conundrum
If you’ve ever experienced that unsettling lift at the edges or a hollow sound when walking across your hardwood, you’re probably wondering why your floor is cupping despite keeping the room dry. The truth is, the causes can be sneaky and multifaceted, often beyond just humidity levels. And trust me, early-on mistakes—like neglecting subfloor integrity or improper installation—can make matters worse. I learned this the hard way and want to save you some headaches.
Could It Be Something You’ve Overlooked?
Absolutely. For instance, even if the room’s humidity reads low, the subfloor underneath might be holding moisture, creating a hidden problem. I once ignored the importance of proper subfloor preparation, which led to my floors reacting badly to environmental changes. It’s a reminder that moisture can come from beneath, not just from the air around us. Curious about how to ensure your subfloor is ready for a flawless install? Check out these expert leveling tips.
So, what exactly causes wood to cup? Often, it’s the uneven moisture levels between the top and bottom of the board. When the bottom absorbs moisture or the top dries out too much, the wood contracts or expands unevenly, resulting in cupping. This can happen even in low-humidity environments if your flooring isn’t installed correctly or if moisture is trapped during the process. Often, it’s a combination of installation errors and environmental factors—like fluctuations in moisture—that lead to this unsightly problem.
Are you worried that your cupping issue might be permanent? You’re not alone. But here’s the good news: with an understanding of the root causes and proper intervention, you can often reverse or prevent further damage. As professionals emphasize, diagnosing the problem early can save you time and money in the long run. For more insights on professional techniques, I recommend reading these sealing and leveling strategies.
Now that we’ve identified some core issues, let’s delve into how to diagnose and correct your cupped floor properly. Ready to get your hardwood looking as good as new? Let’s go!
Assess and Prepare Your Subfloor
Start by inspecting your subfloor for moisture and flatness. Use a moisture meter to check for dampness beneath the surface—if readings are high, address this first to prevent future issues. Next, examine the subfloor’s surface; it should be sturdy, free of debris, and level within 3/16 inch over 10 feet. I once encountered a wavy subfloor caused by uneven plywood sheets, which created major cupping in my hardwoods. To fix this, I used a self-leveling compound from this guide, smoothing out the surface before installation. Proper subfloor prep is like laying a foundation for a house—your floors’ durability depends on it.
Control Environmental Conditions
Maintain a steady humidity level between 35-55% and temperature around 60-75°F. Sudden climate fluctuations are notorious for causing wood to cup or gap. During my renovation, I started using a dehumidifier and portable heater to stabilize the room, which significantly reduced wood movement. If moisture from the environment is a concern, consider installing a vapor barrier or better yet, incorporate a moisture barrier layer like polyethylene sheeting beneath your subfloor.
Choose the Right Installation Method
Opt for a floating, glue-down, or nail-down installation based on your subfloor and environment. For instance, I preferred a floating method with an uncoupling membrane to allow for expansion and contraction—click-lock engineered flooring works well here. Use a high-quality adhesive like this professional-grade glue if your subfloor demands it. Remember, improper installation—such as gluing the planks directly to a moist or uneven subfloor—can induce cupping. Think of installing hardwood like assembling a puzzle; every piece must fit perfectly without forced pressure.
Implement Proper Moisture Barriers
Applying a moisture barrier during installation can prevent trapped moisture from seeping into your wood. I’ve used a peel-and-stick vapor barrier that adheres neatly and forms a tight seal. If you missed this step initially, you might need to remove and re-install the affected planks after addressing moisture issues. Guidance from this comprehensive guide offers in-depth tips on moisture management to protect your hardwood.
Monitor and Maintain Post-Installation Conditions
After installation, uphold consistent humidity by using humidifiers or dehumidifiers. Regularly inspect for signs of moisture intrusion or uneven gaps. I schedule seasonal checks to catch problems early and use dehumidifiers during humid months. This proactive approach preserves your floors and prevents cupping from reoccurring. For ongoing maintenance, visit these hardwood care tips to keep your investment lasting through the years.
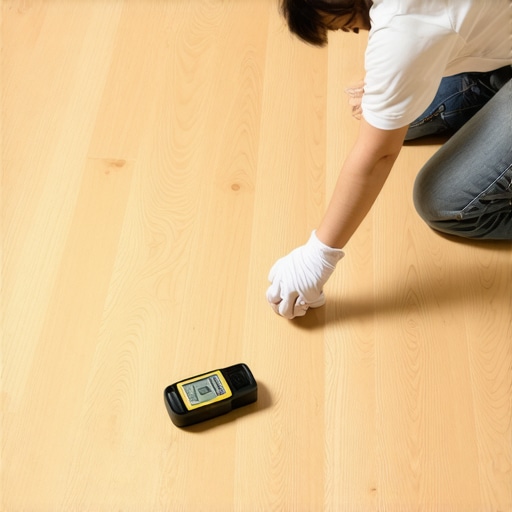
Many homeowners and even seasoned professionals believe that following standard procedures guarantees a flawless floor, but the reality is far more nuanced. One common myth is that simply applying a layer of thinset or laying tiles in linear patterns ensures perfection. In my experience, subtle factors like substrate prep quality, moisture gradients, and even the sequence of adhesive mixing can dramatically impact the outcome. For example, I once encountered a tile installation where the large-format tiles cracked within months; a deeper analysis revealed that uneven subfloor moisture caused the adhesive to bond inconsistently, leading to stress points—something overlooked by many.
Now, here’s a critical point often ignored: the importance of moisture management during all phases of installation. Many assume that once the surface looks dry, it’s safe to proceed—yet, moisture can lurk beneath, silently causing issues like cupping or delamination down the line. An advanced mistake I’ve seen is not performing a residual moisture test on concrete slabs, which experts like this veteran industry resource emphasizes as essential for longevity. Skipping this step is akin to building on quicksand, and it can lead to costly rework later.
Can Your Floor Handle the Wear and Tear Once Installed?
Many underestimate the impacts of environmental changes post-installation. For example, climate control strategies are often simplified to maintaining a humidifier, but without considering seasonal fluctuations or the specific properties of your chosen flooring, you’re risking future problems. Engineered hardwoods, for instance, have specific moisture expansion ratings, and exceeding these can cause gapping or buckling. I advise staying informed with expert guidelines like those in this comprehensive guide. It’s not just about the initial install, but ongoing management that preserves floor integrity over years.
Another common error is choosing improper underlayments or neglecting to include proper expansion joints, which can trap moisture or restrict natural movement. Overlooking these details might seem minor but can contribute significantly to problems akin to what I experienced with cupping after just a few seasons.
Furthermore, understanding the limitations of adhesives and leveling compounds is critical. For example, using a fast-set leveling compound without considering ambient temperature can cause premature hardening, trapping air bubbles or creating uneven surfaces—issues carefully documented in this detailed tutorial. These advanced pitfalls highlight why mastery in flooring isn’t just about the tools or materials but about comprehending and applying the subtler principles.
So, before going into your next project, consider these nuanced aspects, and ask yourself: Are you prepared to handle the complexities that can make or break your installation? For tailored guidance, visit our contact page. And remember, the devil is often in the details—don’t let overlooked nuances trip you up. Have you ever fallen into this trap? Let me know in the comments.
Keeping It Working: Essential Tools and Maintenance Practices
Maintaining your flooring system’s integrity over time requires not just quality materials but also the right tools and a consistent upkeep routine. Investing in specialized equipment can significantly extend the lifespan of your hardwood or tile floors, saving you money and effort in the long run. One of my go-to devices is a high-precision moisture meter from this trusted resource, which helps me monitor subfloor conditions before and after installation to prevent future issues like cupping or buckling.
Another indispensable tool is an adjustable floor sander with variable grit pads. I prefer models that allow for precise control over abrasive levels, ensuring I can maintain the smooth finish of hardwood floors during refinishing, without risking uneven wear or damage. For delicate cleaning, a microfiber mop paired with a pH-neutral hardwood floor cleaner ensures I preserve the finish and prevent scratches.
When it comes to long-term maintenance, regular inspections using a laser level can detect subtle shifts or unevenness in your flooring that might indicate underlying moisture problems or subfloor movement. Incorporating a vacuum test, as detailed in this guide, helps verify subfloor readiness and adhesion quality before applying new coatings or tiles.
Predicting where flooring trends are heading, I believe smart, IoT-enabled sensors could soon play a pivotal role in real-time humidity and stress monitoring, providing homeowners with proactive alerts to prevent costly repairs. Staying ahead of installation and maintenance techniques is essential—so I highly recommend trying out a digital moisture sensor if you haven’t already. These tools allow for more precise control, ultimately leading to flawless finishes that stand the test of time.
How do I maintain flooring over time?
Consistency is key. Regularly cleaning with appropriate products, controlling environmental factors—such as humidity and temperature—and scheduling professional inspections can vastly improve your floor’s durability. Additionally, applying protective coatings like polyurethane sealers periodically helps maintain a glossy finish and shields against wear and tear. Investing in tools like a high-quality buffer and a detailed moisture meter ensures you catch issues early, minimizing repairs and extending the floor’s lifespan.
Looking to streamline your maintenance routine? Consider automating humidity control with smart thermostats and dehumidifiers linked to weather data. This integration not only protects your floors but also enhances overall home comfort. For detailed guidance on installing such systems, explore these professional tips.
And remember, adopting an informed approach with proper tools makes all the difference. Try implementing a scheduled check using a digital moisture meter on your next maintenance day. It’s a proactive step toward ensuring your flooring remains beautiful and functional for years to come.
What I Wish I Knew Before Starting My Flooring Journey
- Frequency Matters More Than I Thought: Regularly checking subfloor moisture levels saved me from unexpected cupping. Early detection is your secret weapon.
- Subfloor Prep Can Make or Break Your Project: A level, dry base prevents future headaches. Skipping this step almost cost me a complete redo.
- Environmental Stability Is Crucial: Steady humidity and temperature aren’t just suggestions—they’re essentials for lasting flooring.
- Quality Tools Save Money in the Long Run: Investing in a good moisture meter and proper leveling compounds paid off by reducing rework and prolonging floor life.
- Every Detail Counts: From proper underlayment to expansion gaps, the small choices significantly impact the final look and durability.
Tools and Resources That Elevated My Work
- Accurate Floor Leveling Techniques: A must-have for achieving a perfectly flat surface that resists cupping.
- The Ultimate Guide to Floor Leveling: Provides comprehensive insights into moisture barriers and substrate considerations.
- Innovative Tile Designs: Inspires aesthetic choices that complement hardwood floors beautifully.
- Hardwood Floor Care Secrets: Tips to maintain your floors’ beauty for decades.
Take Charge and Make Your Floors Shine
Embarking on a flooring project is more than just following instructions—it’s about embracing the nuances that lead to perfection. With the right knowledge, tools, and mindset, you can transform your space into a true masterpiece. Remember, every step—from moisture management to environmental control—is an investment in your home’s future beauty and stability. Don’t be afraid to experiment, learn from setbacks, and celebrate your successes along the way. Your dream floor is within reach—start today and enjoy the satisfaction of a job well done.
Have you ever encountered a hidden moisture problem that caught you off guard? Share your story below—I’d love to hear your experiences and tips!