
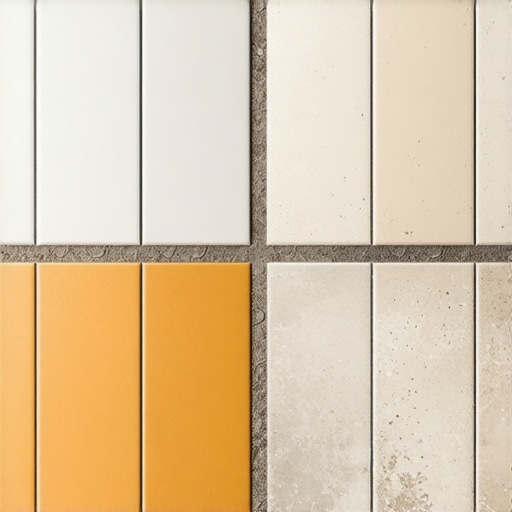
I’ll never forget the moment I watched my carefully laid tiles crack and shift just months after installation. That frustrating realization hit me hard—something as simple as choosing the wrong type of thinset might have been the culprit. If you’re diving into a flooring project and feeling overwhelmed by all the technical details, you’re not alone. The debate between modified and unmodified thinset is a common sticking point, often misunderstood, yet crucial for ensuring your floors stand the test of time.
The Hidden Impact of Your Thinset Choice
Choosing the right thinset isn’t just a minor detail; it can make or break your entire flooring experience. When I first started, I assumed all thinset was pretty much the same. Boy, was I wrong. I learned that different formulations serve different purposes, affecting everything from adhesion to drying times. Making an uninformed choice can result in floor lippage, cracks, or even complete failure. That’s why I want to demystify this topic and help you make an informed decision—saving you headaches down the line.
The Skeptic’s Dilemma: Is the Modified Thinset Really Any Better?
Let’s address the elephant in the room: Many skeptics wonder if modified thinset’s hype is justified. Is it really worth the extra cost and effort? Early in my career, I made the mistake of assuming that more is better—so I defaulted to modified thinset for everything, thinking it was the superior choice. Turns out, that wasn’t always the case, especially for certain applications. According to experts, while modified thinset offers excellent adhesion for large format tiles, it can sometimes be problematic over certain substrates or in moist environments. So, it’s essential to identify your specific project needs before making a choice.
Understanding the nuances between modified and unmodified thinset can seem daunting. But don’t worry—I’ve got your back. In the sections ahead, we’ll explore the benefits, drawbacks, and ideal scenarios for each type, helping you pick the perfect match and avoid costly mistakes. Want to ensure your tile job lasts for decades? Let’s dive into what sets these two options apart and how to choose wisely.
If you’ve faced issues with floor leveling or tile installation, you’ll find these insights especially valuable. For comprehensive techniques, check out this guide on flawless surface leveling.
Prepare Your Surface Thoroughly
Start with a clean, dry, and dust-free subfloor. Use a shop vacuum to remove loose debris, then wipe the surface with a damp cloth to pick up fine dust. A contaminated surface can cause thinset or leveling compounds to bond poorly, leading to uneven floors. Remember, a spotless base is the foundation of success.
Identify and Address High or Low Spots
Use a long straightedge or a laser level to scan the entire floor. Mark any ridges or depressions with a pencil. For high spots, sand or grind down the uneven area with a concrete grinder or hand-held sander. Low spots or dips can be filled with a self-leveling compound. During my first attempt, I vividly recall measuring a 1/4-inch depression in a bathroom, which I filled with leveling compound. The result was a seamless surface that prevented tiles from cracking later.
Mixing and Applying Floor Leveler Properly
Always follow the manufacturer’s instructions for mixing ratios, and use a clean bucket. For large areas, use a paddle mixer attached to a drill to ensure a smooth, bubble-free mixture. Pour the self-leveling compound slowly into the low spots, starting at the lowest point, allowing the material to flow and fill cracks and voids. Use a notched trowel or gauge rake to spread it evenly across the surface. During my project, I learned to limit the amount of product mixed at a time—the old 5-gallon bucket rule helps avoid setting before application.
Working Quickly but Carefully
Self-leveling compounds begin to set rapidly—within 10 to 15 minutes—so plan your workflow accordingly. Work in sections, pouring and spreading to maintain a wet edge. Use a large gauge rake to feather the edges of each poured section, preventing seams or ridges. I once underestimated this timing and had to redo a section due to premature setting; now I prepare all tools beforehand to execute swiftly.
Smoothing and Finishing Techniques
After pouring, use aávibrating paddle or the backside of a trowel to smooth the surface and eliminate air bubbles. This step is crucial for a flat, stable base. For intricate areas near walls or fixtures, a margin trowel offers precision. Observe the compound’s behavior; if it starts to set, work rapidly. Once cured, lightly sand any high spots or ridges for a perfectly level surface.
Verify Levelness before Proceeding
Allow the compound to cure fully—usually 24 hours—before installing tiles or hardwood. Test for flatness again with a long straightedge or a level. For critical flooring projects, I always run multiple checks at different angles to confirm uniformity. If uneven spots remain, consider additional topping or consult professional guides like this comprehensive leveling guide.
Linking to Expert Techniques
Mastering these core steps not only streamlines your workflow but also reduces costly mistakes. For detailed methods and common pitfalls, explore this article on leveling challenges. Confidence and precision in each phase make the difference between a mediocre floor and a stunning, durable surface that lasts decades.
Many DIY enthusiasts fall into the trap of believing that simply pouring self-leveling compound guarantees a perfectly flat surface, but the real secret lies in meticulous surface preparation and understanding the nuances of substrate variability. This mistake often results in uneven floors or cracks down the line, despite following all standard procedures. In my experience, neglecting substrate conditions—like residual moisture or incompatible prior coatings—can severely compromise leveling results, a fact supported by flooring experts such as those referenced in this comprehensive guide. Additionally, many assume that high-end materials or advanced techniques alone can compensate for a poor foundation, but the truth is, mastering fundamental surface prep is what makes or breaks the final outcome. Advanced projects demand a keen eye for substrate imperfections, moisture management, and proper substrate bonding, which is often overlooked. Furthermore, common myths persist—such as the belief that thicker layers of leveling compound are better—yet applying excessive material can trap air bubbles and lead to future cracks, as detailed in this article on pitfalls. Mastering these hidden nuances ensures a durable, flawless finish that endures the test of time. To elevate your skills further, consider exploring professional secrets for perfect leveling. Remember, the foundation you build on is everything—skimping on prep today may cost you dearly in repairs tomorrow. Have you ever fallen into this trap? Let me know in the comments.
Keep Your Flooring System Running Smoothly
Maintaining your flooring, whether it’s tile, hardwood, or other materials, is essential for preserving its aesthetic appeal and structural integrity over time. My first recommendation is to invest in quality tools that can handle routine upkeep and minor repairs. For example, a high-power precision sander, like the Dynabrade 5200 Electric Sander, ensures smooth refinishing of hardwood floors without gouging or uneven abrasions. It’s lightweight and ergonomic, making long sessions less tiring. For tile maintenance, a good grout cleaning machine, such as the Vimory Tile Grout Cleaner, helps eliminate stubborn stains without damaging the surface, which can extend the life of your tiles and prevent costly replacements.
Understanding your tools’ capabilities allows you to perform preventative maintenance effectively. Regularly inspecting seals and finishes, especially on hardwood floors, can prevent moisture infiltration that causes warping or cupping. Applying a protective polyurethane layer every few years with a quality sprayer, like the Wagner Control Spray Max, ensures a uniform coat with minimal wastage. I personally prefer this sprayer because it provides consistent pressure and a fine mist, avoiding buildup or uneven layers that could compromise your finish.
How do I maintain hardwood floors over time?
Preventative care involves simple yet effective routines. Daily sweeping with a soft broom or microfiber dust mop prevents dirt and grit from scratching the surface. For periodic deep cleaning, I recommend using a pH-neutral wood floor cleaner, such as the Hardwood Floor Care Secrets. Avoid excessive water or steam mops, which can penetrate seams and cause swelling. Additionally, I advise installing felt pads on furniture to prevent scratches and moving heavy items carefully. Recognizing that wear and tear are inevitable, I plan to refinish hardwood floors every 7-10 years; embracing this schedule keeps the floors looking impeccable and prevents irreversible damage.
The trend points toward smart maintenance systems integrating moisture sensors and floor monitoring apps. These innovations help detect early signs of damage or moisture intrusion, making upkeep proactive rather than reactive. As I look to the future, I believe automation and sensor technology will make floor maintenance nearly effortless, allowing homeowners and professionals alike to prolong the lifespan effortlessly.
Utilize Smart Storage and Handling for Your Tools
Proper storage extends the life of your maintenance equipment. Dust-free, climate-controlled storage units prevent rust and degradation for power tools and handheld devices. I keep my tools in labeled bins with silica gel packs to absorb excess moisture. Regularly inspecting and calibrating your tools ensures consistent results — for example, a misaligned sander can create uneven refinishing, which diminishes the floor’s appearance over time. Remember to clean tools after each use, especially when working with adhesives or finishes, to prevent buildup that can clog machinery or cause malfunction.
So, take a moment to review your current maintenance setup and invest in a few essential tools if you haven’t already. Replacing a worn-out sander or upgrading your cleaning equipment now will save you much time and money in the long run. For comprehensive insights on correct flooring care, check out this resource on hardwood floor longevity. Don’t hesitate to try our recommended electric sander to see the difference in your refinishing projects — a small upgrade today can mean decades of durable, beautiful floors tomorrow.
What I Wish I Knew Before Starting
One of the most profound lessons I learned is that meticulous surface prep can never be underestimated. Skipping the detailed cleaning step or rushing through leveling can lead to issues that surface months later. Investing time in understanding substrate conditions and ensuring a clean, dry base has saved me countless headaches and costly repairs.
Why Overconfidence in Tools Can Backfire
I once believed that the latest high-end tools would compensate for poor technique. Experience taught me that mastering foundational skills—like proper mixing ratios and application techniques—outweighs fancy equipment. Tools augment your work, but skill makes the real difference, especially when troubleshooting unexpected curing or adhesion problems.
The Power of Small Details
Applying a simple bubble-free mixing method or double-checking the leveling course might seem minor, but these small actions build up to flawless results. Over time, I realized that paying close attention to these nuances elevates my craftsmanship and ensures durability, making my projects stand out.
My Trusted Resources for Long-Term Success
- “Precise Floor Leveling Techniques” — the ultimate guide that keeps my leveling sharp and consistent.
- “Mastering Hardwood Refinishing Tips” — essential for ongoing maintenance and refinishing projects.
- Trusted brands like Dynabrade and Wagner for tools that deliver on durability and performance, making daily tasks more efficient and precise.
Seize the Moment and Elevate Your Craft
While the journey to perfect flooring can be challenging, every step taken with care and attention amplifies your skills and pride in your work. Remember, mastery is built through consistent learning and practice. Don’t be afraid to take on that complex leveling or tile installation project—each experience deepens your expertise and brings your space closer to perfection.
What has been your biggest breakthrough or lesson learned in flooring installation? Share your stories below—I’d love to hear them!
,