
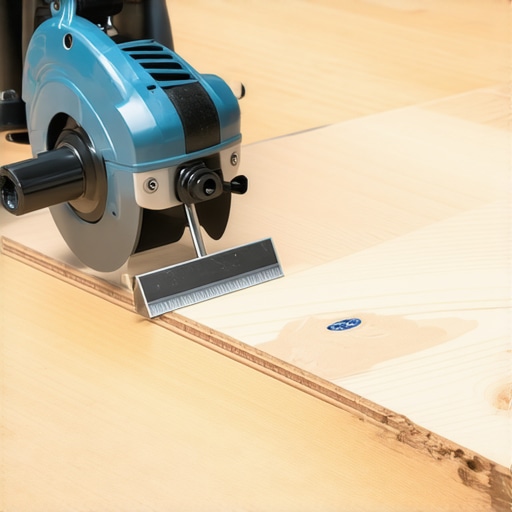
Ever stubbornly wrestled with a piece of LVP, only to realize halfway through that your blade isn’t suited for the task? I remember the frustration of watching a perfectly good floor become marred by a careless cut, all because I used the wrong tool. That lightbulb moment taught me a simple truth: not all blades are created equal—and for luxury vinyl plank (LVP), the right blade can make or break your installation.
Finding the Cutting Edge: The Importance of the Right Blade
During my early projects, I thought any sharp blade would do. I was eager to get the job done quickly, but I quickly learned that the wrong blade leads to jagged edges, uneven cuts, and even damage to the planks. The outcome? Increased waste, extra work, and a less professional finish. It was a costly lesson that pushed me to research what makes a blade suitable for LVP.
Turns out, the key is in the blade’s design—specifically, its material and tooth pattern. A blade with a fine, toothed edge designed for vinyl or laminate ensures cleaner cuts without chipping or melting the material. Using an inappropriate blade not only complicates the process but can also compromise the integrity of your flooring, leading to repair or replacement down the line.
If you’re tackling a flooring project soon, understanding the significance of this simple tool choice can save you time and money. And if you’re wondering whether switching blades is worth the effort, I can tell you—it’s absolutely transformative.
Can a Different Blade Really Make That Big of a Difference?
Absolutely. I made the mistake of sticking with a standard wood-cutting blade for my first vinyl plank install. The result was a series of rough cuts and chipped edges, forcing me to redo sections—and waste a lot of material. Since then, I’ve learned that investing in a blade specifically designed for LVP can elevate the quality of your work significantly. For more insight on avoiding common flooring mistakes, you might find this guide helpful: Flooring Installation Mistakes to Avoid.
So, before you start cutting, ask yourself: have I got the right blade? If not, it might be the single most impactful upgrade to your project. Ready to learn how to choose the best blade for your LVP? Let’s dive into the specifics that will keep your cuts clean and your floors flawless.
Prepare Your Workspace and Gather Necessary Tools
Start by clearing the area entirely to avoid tripping hazards and accidental damage. Assemble a sharp, fine-tooth blade specifically designed for vinyl or laminate, which will ensure clean cuts and reduce chipping. Use a trusted miter saw or a utility knife depending on the cut type. I recall my first attempt, trying to cut a plank with a dull blade, which resulted in rough edges and wasted material. That experience underscored the importance of the right tools before proceeding.
Measure and Mark the Plank Accurately
Use a tape measure and a pencil or chalk to mark the cut line precisely. Double-check measurements, especially near doorways or uneven walls, to prevent misalignments. I once measured twice but marked once, leading to a miscut that required re-cutting and extra work. Always mark in well-lit conditions and verify measurements to save time and material.
Secure and Support the Plank
Place the plank on a stable work surface or use clamps to secure it. Supporting both sides of the cut minimizes vibrations and ensures a straight, accurate cut. During my installation, I used scrap wood blocks under the plank to prevent splintering, which made the cut cleaner. Proper support is crucial, especially with wide or thick planks, to avoid uneven edges.
Make the Cut with the Right Technique
Using a Miter Saw
Align the mark with the blade, ensure the saw is at the correct angle, and gently feed the plank through without forcing it. Turn on the saw and let the blade reach full speed before cutting. Use a slow, steady motion—rushing causes ragged edges. I remember carefully making my first cut, which resulted in a flawless edge, boosting my confidence for the next sections.
Using a Utility Knife
For straight cuts, score along the marked line with a sharp utility knife multiple times, then snap the plank over a clean edge or support. Apply consistent pressure; don’t rush. This method is akin to scoring and breaking a ceramic tile. During a project, I scored several planks, snapping them cleanly, which prevented the need for sanding or filing.
Sand and Finish Edges When Needed
If cuts appear rough or slightly chipped, lightly sand with a fine-grit sandpaper to smooth the edges. Hold the sandpaper at a 45-degree angle and feather the edge for a seamless look. During my latest installation, a few cut edges needed smoothing, and this simple step preserved the appearance and integrity of the plank.
Test Fit Before Final Placement
Place the cut plank in its intended spot to check for proper fit and alignment. Adjust if necessary by trimming small amounts. This avoids surprises during later phases. I learned early on that confirming fit before adhesive application prevents costly re-cuts.
Mastering these cutting methods transforms a messy job into a smooth, controlled process. The right tools combined with precision and patience produce professional results, saving time and materials. For comprehensive tips on laying a flawless floor, check out this detailed guide.
Many homeowners and even some professionals believe that floor leveling, hardwood, and tile installation are straightforward tasks, but the reality is more nuanced. A prevalent myth is that the subfloor’s imperfections can be ignored or simply smoothed over with adhesive or thinset. In truth, overlooking subtle inconsistencies can lead to long-term problems like uneven floors, cracked tiles, or squeaking hardwoods. Advanced installers know that addressing these small deviations early, through meticulous preparation and proper leveling techniques, ensures durability and a flawless finish. For instance, using a high-quality floor leveler can compensate for minor dips, but only if applied correctly—getting this right involves understanding the substrate’s properties and the right mix consistency, as discussed in this detailed guide.
Beware the trap of over-confidence in basic tools like self-levelers or standard thinsets—these often can’t handle complex subfloor issues without customization or additional prep steps. For example, large-format tiles are prone to cracking if the substrate isn’t perfectly flat, especially at the edges or corners. Many assume that a quick pour of leveling compound will fix all problems, but this can cause issues if the compound sets too quickly or doesn’t adhere well to dusty or uneven surfaces. Correct application requires understanding the moisture content of the slab, the viscosity of the leveling mix, and proper priming techniques. For common pitfalls and how to avoid them, this resource offers valuable insights.
Can Inexperienced Installers Really Achieve Perfect Floors?
While experience greatly improves craftsmanship, even novices can attain professional results by understanding and respecting the complexity behind seemingly simple steps. As an expert once said, “The devil is in the details,” and that is especially true with flooring. Small factors like the timing of primer drying, temperature control during admixture mixing, and precise measurements of leveling materials can make or break the project. It’s vital to avoid shortcuts that seem tempting—like rushing the curing process or skipping surface preparation—as these often lead tosolete issues down the line. For more technical tips, check out this article. Remember, mastering these nuanced techniques can dramatically reduce costly mistakes, saving you time and money.
Furthermore, understanding the properties of different flooring materials enhances decision-making. For hardwood, knowing how moisture fluctuations can cause gapping or cupping encourages proactive measures—like climate control and proper acclimation before installation. When it comes to tile, selecting the appropriate adhesive and grout is crucial, especially in variable environments. A comprehensive approach combining proper tools, techniques, and material knowledge is what differentiates a top-tier installation from a common amateur effort. For guidance on choosing the right materials, this resource can help you make informed decisions.
In summary, the key to avoiding costly errors lies in understanding that surface imperfections, material properties, and precise application are all interconnected. Rushing or neglecting these details always risks future headaches. So, before starting your project, pause and assess every step carefully—investing time upfront pays dividends in the longevity and beauty of your floors. Have you ever fallen into this trap? Let me know in the comments.
Keep It Running: Essential Tools for Longevity
Achieving a flawless floor isn’t a one-time effort; it requires the right tools not just for installation but for ongoing maintenance. One of my top recommendations is investing in a high-quality floor buffer, specifically a rotary machine with soft pads. This tool allows you to remove surface scratches and restore shine without harsh chemicals, extending the lifespan of hardwood and tile surfaces alike. Pair it with microfiber pads designed for flooring to prevent damage while cleaning. For grout lines, a steam cleaner can be invaluable, helping to eradicate deep-seated dirt that can cause discoloration over time. I personally use the Shark S5003D, which offers adjustable steam settings and produces efficient, chemical-free cleaning—saving both my floors and the environment.
Another must-have is a hygrometer coupled with a digital moisture meter. Maintaining optimal humidity levels—generally between 35-55%—is crucial for preventing wood expansion, contraction, and cracking. Regularly checking these levels allows you to react proactively when conditions fluctuate, especially in varying seasons. This preventative approach aligns with the science-backed advice found in this detailed guide.
Stay Ahead with Smart Maintenance
In the future, I see a trend toward incorporating smart sensors into flooring systems, enabling real-time monitoring of moisture, temperature, and even structural shifts. This technology could revolutionize how we maintain our floors, alerting homeowners to issues before they escalate. For now, developing a routine of regular inspections—using the moisture meter and visual checks—can help catch problems early. For example, promptly addressing small water leaks or spills prevents significant damage, saving you money and stress down the line. To enhance your routine, consider setting monthly calendar reminders aligned with seasonal changes, especially in climates with high humidity swings.
How do I keep my floors looking pristine over time?
One tactic that’s proven effective is applying a protective topcoat for hardwood floors, such as a polyurethane finish with added UV protection. This layer acts as a shield against daily wear, scratches, and UV fading. Additionally, using felt pads on furniture feet and area rugs with non-slip backing can significantly reduce surface scratches. Remember, the key is consistency—regular cleaning coupled with preventative measures extends your floors’ lifespan dramatically. For detailed techniques, check out this resource. And don’t forget: testing new cleaning products on a small, inconspicuous area ensures they won’t harm your finish.
Lastly, consider scheduling annual professional inspections and recoatings—these maintenance steps keep your floors looking fresh and prevent minor issues from becoming costly repairs. With the right tools, routine upkeep, and a proactive mindset, you’ll ensure your floors remain stunning for years to come. Ready to implement one of these advanced maintenance tactics? Try incorporating a moisture meter check as part of your quarterly routine—it’s a game-changer for hardwood longevity.
Bright Spots and Blunders: Lessons Only Insiders Know
- I once believed that a quick pour of self-leveling compound could fix all uneven spots, but I learned the hard way that meticulous surface prep and understanding the product’s properties are essential for a flawless finish.
- Investing in the right blade for vinyl plank cuts transformed my projects—cleaner edges, less waste, and a professional look, proving that tool choice truly makes all the difference.
- Skipping the measurement double-check or rushing the cutting process often led to misalignments and wasted materials. Patience and precision are your best allies in flooring work.
- Addressing subfloor irregularities early—using proper leveling techniques—saved me from headaches down the line, especially when installing large-format tiles.
- Realizing that ongoing maintenance tools like moisture meters and proper cleaning equipment extend the life of hardwood and tile floors has changed how I care for my spaces.
Tools and Resources That Elevate Your Craft
- Tile & Level: A high-quality laser level with a wide beam makes marking and ensuring perfect alignment much easier, saving time and frustration.
- Adhesive Expertise: My go-to guide on hardwood and tile combinations helped me understand how to pair materials for both style and durability.
- Moisture Monitoring: A dependable digital moisture meter has been invaluable for avoiding future issues, especially in basements or areas prone to humidity fluctuations.
- Maintenance Know-How: Cleaning and care resources teach me how to keep my floors looking pristine and protected for decades.
Your Next Move: Make It Count
Taking the leap into quality flooring installation requires more than just tools—it calls for confidence in your approach and willingness to learn from experience. Remember, mastering the art of floor leveling and installation isn’t just about aesthetics; it’s about creating a foundation that lasts. Trust in your preparations, choose the right tools, and stay proactive with maintenance. With these principles, your flooring projects will not only look great but stand the test of time. Are you ready to elevate your flooring skills and transform your space today? Share your thoughts or questions below—I’m here to guide you every step of the way.