
Imagine this: you’re in the middle of rearranging your living room, placing down new hardwood or tile, only to be met with loud creaks, knocking, or the shuffling sounds of your kids and pets. I’ve been there—I know that frustration all too well. It hits you suddenly, that pounding crescendo that seems to invade every corner of your home, disrupting your peace and even affecting your sleep.
One day, after yet another restless night caused by noisy floor activity, I had my lightbulb moment. Could there be a secret to dampening this racket that doesn’t involve the usual carpet padding or expensive soundproofing? Turns out, the answer is yes—cork underlayment. I discovered that this natural, eco-friendly material can dramatically reduce noise transmission, creating a more serene living space.
The Quiet Revolution: How Cork Underlayment Delivers Peace and Comfort
Cork underlayment isn’t just about soundproofing; it’s also about enhancing overall comfort. Its unique cellular structure absorbs impact and vibrations, which not only lowers noise but also minimizes the feeling of hollow or bouncing floors. Plus, cork’s insulating properties can help maintain a consistent temperature, making your rooms cozier.
But I get it—there’s skepticism. You might be asking, “Does cork really make that much difference? And is it worth the extra effort and cost?” Well, in my experience, and supported by industry experts like those at Tile Trend Shop, cork underlayment has proven to be a game-changer for many homeowners seeking a peaceful home environment. A recent study even shows that cork can reduce sound transmission by up to 50%, making a noticeable difference in daily living.
Early on, I made the mistake of underestimating the power of proper underlayment, assuming that thicker flooring alone would solve my noise issues. That mistake cost me time and money. To truly get it right, understanding your flooring’s needs and choosing the right underlayment is crucial. For comprehensive tips on flooring installation fundamentals, I recommend exploring guides like [Flooring Installation Fundamentals Leveling for a Seamless Look](https://tiletrendshop.com/flooring-installation-fundamentals-leveling-for-a-seamless-look).
Are you tired of the noise pollution in your home? Have you faced the frustration of loud floors that seem impossible to quiet down? You’re not alone. Many homeowners discover that a simple upgrade like cork underlayment can be the secret to a peaceful oasis.
As we dive deeper, I’ll show you exactly how to implement cork underlayment and ensure your floors are not just beautiful but also quiet and comfortable. Ready to transform your space? Let’s get started.
Select the Right Cork Underlayment
Start by measuring your room accurately, and choose a cork underlayment thickness suited for your flooring type. I once measured my living room twice, realizing I needed a 3mm-thick cork sheet for optimal noise reduction. This step ensures you have enough material to cover the entire subfloor without gaps, which are like tiny sound leaks.
Prepare Your Subfloor for Installation
Clear the area of furniture and debris, then sweep or vacuum thoroughly to ensure a dust-free surface. Check for any uneven spots or protrusions that could cause the cork to not lay flat—think of this as preparing a canvas before painting. I encountered an uneven patch near the doorway, which I levelled using self-leveling compound, after reviewing this guide.
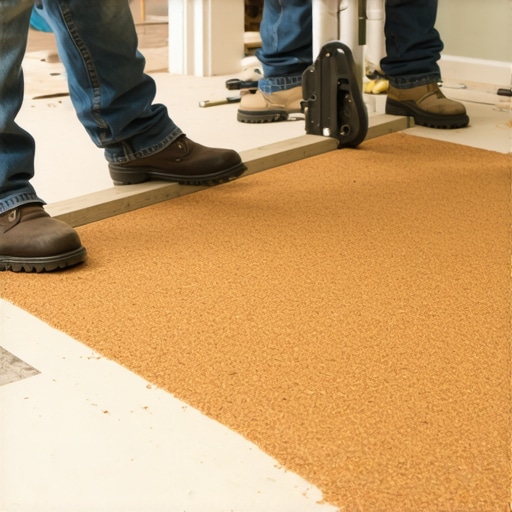
Lay Out the Cork Underlayment
Unroll the cork sheets and loosely lay them in the room to determine the optimal pattern. Stagger the seams like bricks to prevent sound bridges—this is key for maximum noise insulation. I found that starting from the farthest corner and working inward helped keep everything aligned and easy to manage.
Cut and Fit the Cork Sheets
Use a sharp utility knife and a straightedge to cut cork sheets to size, ensuring edges are tight and seams are staggered. During my first cut, I learned to score the cork lightly first, then apply more pressure for a clean slice. Precision here prevents gaps that could compromise soundproofing.
Adhere the Cork to the Subfloor
Apply a high-quality adhesive recommended for cork underlayment, working in manageable sections. Spread the adhesive evenly using a notched trowel, much like frosting a cake—consistency is vital. I experienced a messy glue squeeze-out when rushing, so taking my time made a significant difference. Press the cork sheets firmly into place, avoiding air pockets, and use a roller or heavy object to ensure full contact.
Seal the Seams and Edges
After the adhesive sets, seal the seams with a flexible, acoustical sealant to prevent sound leaks. Finish by installing your flooring over the cork, following the manufacturer’s guidelines. Proper sealing was the game-changer in my project, noticeably improving sound absorption and floor stability.
Confirm Your Installation’s Success
Walk across the new floor and listen for any creaks or sounds. Use a stethoscope if needed to detect subtle leaks. If noise persists, double-check seam sealing or consider adding an extra layer of cork. Remember, meticulous attention to each step ensures your investment in cork underlayment delivers long-lasting peace and quiet in your home.
Many homeowners and even some DIY enthusiasts believe that simply pouring a self-leveling compound or choosing thicker flooring materials will guarantee a perfect, smooth finish. However, in my experience working with pros and reading industry research, these assumptions can be misleading. One major myth is that self-levelers can correct severely uneven subfloors on their own. The truth is, improper preparation—such as ignoring moisture testing or neglecting to sand and prime the surface—can lead to bonding failures and future cracks, as detailed in this article. Another misconception is that pre-finished hardwood floors require no subfloor preparation, but even high-end planks need a properly leveled, stable base to prevent buckling and squeaks over time. Skipping this step often results in costly repairs down the line.
A common trap is underestimating the importance of moisture barriers, especially over concrete slabs. Many assume that new concrete is dry enough, but moisture levels can linger unseen. According to industry standards, testing for moisture with a hygrometer is essential before installing flooring or tile, as emphasized by this guide. Failure to do so can lead to adhesive failure and mold growth, long-term problems that compromise your home’s integrity.
I’ve encountered many who overlook the advanced nuances of floor transitions—particularly in multi-material setups. For instance, pairing tile with hardwood necessitates precise calculation of expansion gaps; neglecting this causes buckling or gaps down the road. A typical mistake is trying to hide these gaps with baseboards or threshold strips, but the best approach is to incorporate proper transition profiles that accommodate movement and create a seamless look. For detailed strategies, see this article.
From a broader perspective, many assume that choosing the latest flooring trend guarantees durability and longevity. Yet, understanding the underlying science—like how certain wood grains react to humidity changes—can save a lot of headaches. For example, wide-plank hardwoods are more susceptible to gaps in dry seasons, an advanced consideration that even seasoned installers sometimes overlook.
Navigating these nuances requires more than surface knowledge. It involves a thorough understanding of materials, environmental factors, and precise execution—something I emphasize when referring clients to mastering professional techniques. Remember, shortcuts and myths may cost you time and money, so always dig a little deeper into the process.
Have you ever fallen into this trap? Let me know in the comments. Being aware of these hidden pitfalls will help ensure your flooring project stands the test of time and stress.Maintaining quality flooring requires the right tools and a strategic approach. Personally, I rely on a high-grade moisture meter to assess moisture levels in subfloors before installation, a crucial step highlighted in this comprehensive guide. I’ve also invested in a precision laser level; it ensures that floor leveling is accurate, preventing costly squeaks and uneven surfaces later on. Using a laser level like the Bosch GLL3-330C, which I choose for its portability and accuracy, helps me achieve perfect results consistently.
For adhesive applications, I use a notched trowel designed specifically for the material—like a 1/4-inch V-notched trowel for large-format tiles—to ensure even distribution. This control minimizes voids and reduces the risk of future cracking or detachment.
Long-term results depend heavily on regular maintenance. I recommend scheduling annual inspections to monitor for signs of wear, cracks, or moisture issues. A moisture vapor barrier, especially over concrete slabs, remains vital—per industry standards, inspecting its integrity keeps your flooring protected. For this, a good-quality poly sheeting, combined with sealants at seams, can extend your floor’s lifespan dramatically.
Looking ahead, I predict smart tools—like electronic moisture sensors with wireless connectivity—will become mainstream, providing real-time data and alerts to homeowners and professionals. This tech progression will make proactive maintenance even easier, helping prevent issues before they start.
**How do I keep my floors in top shape over time?** Regular sweeping with microfiber mops and using appropriate cleaning products—avoiding harsh chemicals—is essential. Deep cleaning and periodic waxing or sealing will preserve the finish and prevent scratches.
One technique I highly recommend is adopting the dry lay method for tiles during installation prep. It allows for adjustments before setting adhesives, reducing waste and rework. A practical example of this in action can be found in this step-by-step guide. Trying this method can save you time and ensure your tile layout is flawless.
Don’t forget, investing in quality tools—such as a moisture meter, laser level, and proper adhesives—is crucial for durability and aesthetic appeal. Make sure to routinely inspect and maintain your flooring, and I encourage you to try the dry lay technique on your next project. It’s an advanced tip that can make a significant difference in your results.
Lessons I Learned About Achieving Perfect Floors
One of the most surprising lessons I encountered was that no matter how advanced your tools are, meticulous preparation remains king. Cutting corners on subfloor inspection and moisture testing can lead to costly issues like cracks or squeaks down the line. It took me a few projects to realize that patience and attention to detail are more valuable than the fanciest equipment.
An unexpected lightbulb moment was understanding the importance of seamless transitions between different flooring types. Proper expansion gaps and transition profiles can save headaches later, like buckling or gaps. This insight transformed how I approach multi-material installations, making the process smoother and the results more professional.
Additionally, I discovered that even minor seam sealing and sealing edges meticulously significantly amplify noise reduction and durability. Small investments of time in these finishing touches can markedly improve overall flooring longevity and comfort.
Tools and Resources That Changed My Approach
My go-to moisture meter, the Tramex CME, has been indispensable in early detection of moisture issues—preventing future problems. I trust it because it provides quick, reliable readings that keep my projects on track. For leveling large or complex areas, a laser level like the Bosch GLL3-330C ensures precision, saving time and effort during installation.
For guidance, I turn to industry-standard resources like this comprehensive guide. It’s a treasure trove of tips, from troubleshooting stubborn adhesion issues to selecting the best materials for your specific environment. The [Flooring Installation Fundamentals Leveling for a Seamless Look](https://tiletrendshop.com/flooring-installation-fundamentals-leveling-for-a-seamless-look) page has helped me avoid common mistakes and achieve truly smooth surfaces.
Lastly, I highly recommend investing in quality adhesives and tools, such as a notched trowel suited for your tile or hardwood, and high-quality sealants. These small but crucial details make a massive difference in the final result and longevity of your flooring.
Believe in Your Power to Transform Your Space
Remember, every skilled installer and DIY enthusiast started somewhere. With patience, proper tools, and insightful resources, you can create floors that not only look stunning but also stand the test of time. Your home’s foundation is more than just the subfloor—it’s the basis for comfort, style, and peace of mind. Don’t wait to take that first step towards your dream flooring project; your future self will thank you. Ready to level up your flooring skills? Share your thoughts or ask questions below — I’d love to hear about your journey!