
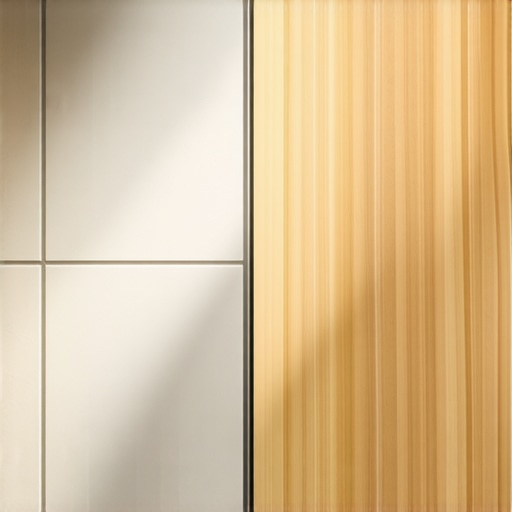
Ever had that heart-stopping moment where you step from your tile floor onto the hardwood and catch a toe on a tiny, seemingly harmless edge? I remember the first time it happened in my home—my stomach dropped, and I knew I wasn’t alone. That sudden jolt of pain wasn’t just physical; it was a wake-up call. Transitioning from tile to hardwood isn’t as simple as laying the next piece of flooring; it’s about ensuring safety without sacrificing style. And trust me, a trip hazard lurking at your doorway can turn into a bigger headache than you bargained for.
Why The Transition Matters More Than You Think
When upgrading your floors, the last thing you want is a coverage gap that’s as dangerous as it is unsightly. A mismatched height or uneven surface not only risks trips and falls but also diminishes the beauty of your space. According to industry experts, more than 20% of household trips are caused by uneven flooring transitions—which is both startling and preventable. If you’ve ever felt uneasy walking across a transition strip or noticed your toes catching on a misaligned edge, you’re already aware of how critical this issue is. Early in my project, I made the mistake of thinking that a quick shim or a simple threshold would suffice. Spoiler: it didn’t. That mistake cost me time, money, and an uneasy feeling every time I stepped through that doorway.
Is a Level Transition Really Worth the Extra Effort?
Many homeowners dismiss the importance of meticulous floor leveling, thinking it’s a tedious or overly technical task. But from personal experience—and after doing a bit of research—I learned that skipping proper leveling can lead to squeaky, uneven floors down the line, plus those dangerous trip hazards I mentioned. For a reliable method that ensures safety and smoothness, I recommend consulting detailed guides on floor leveling techniques. This approach not only saves you from future headaches but also adds value to your home’s aesthetic and function.
If you’re tired of awkward transitions that threaten your safety and ruin your décor plan, you’re in the right place. Next, I’ll walk you through the essentials of creating a seamless, level transition from tile to hardwood—so you can walk confidently in your own home, every single day.
Achieve a Flat Base Before Installing
Start by preparing your subfloor—think of it as laying a sturdy foundation for a building. Use a self-leveling compound to fill in low spots and smooth out uneven surfaces, ensuring your flooring will sit exactly where it should. I once neglected this step, resulting in a terrazzo-like unevenness that caused squeaks and trip hazards. To avoid this, I followed the detailed techniques from this comprehensive guide, which provided clear instructions and proper mixing ratios.
Adjust Height for a Perfect Match
Measure and Plan the Transition
Accurately measuring the height difference between your tile and hardwood is crucial. Use a tape measure and a straightedge to determine the existing gap, then plan for the thickness of your threshold or transition strip accordingly. During my first attempt, I misjudged these measurements, ending up with a gap that was either too tall or too low—annoying and unsafe. I recommend sketching your measurements and double-checking before proceeding.
Use Shims or Ramp Materials
If your measurements reveal a significant height difference, create a ramp using shims or a sloped transition strip. Hot-melt glue or construction adhesive can secure shims in place temporarily. For a more professional finish, I employed a pre-made threshold with adjustable height to fine-tune the transition. This approach guarantees a smooth, level surface that minimizes tripping risks and preserves the aesthetic flow. For detailed instructions, see this step-by-step tutorial.
Secure the Transition with Precision
Once you’ve established the correct height and slope, permanently fix the transition strip. Drill pilot holes into the subfloor, then screw or nail the strip into place. Ensure the fasteners sit flush to avoid creating a new trip hazard. During my project, I used a pneumatic nailer for quick and even fastening, which resulted in a tight, flush fit. A common mistake is over-tightening, which can warp the strip or damage the flooring. Take your time, and check alignments frequently. For tips on securing various types of thresholds, visit this installation guide.
Seal and Finish for Longevity
After installation, seal the transition to protect against water and debris ingress. Use a high-quality, floor-compatible sealant along the edges, especially if it will be in a humid or high-traffic area. During my experience, I applied a clear silicone sealant, which maintained flexibility and prevented cracking as the floor settled. Proper sealing prolongs the life of your transition and enhances safety by preventing moisture buildup that could cause slipping or warping. Learn more about maintenance and care at this resource.
Many homeowners assume that laying hardwood floors is as simple as matching planks and nailing them down. However, beneath the surface lies a complex world of nuances that, if misunderstood, can derail an entire project. One common myth is that hardwood flooring is forgiving when it comes to subfloor imperfections. In reality, even minor unevenness can cause squeaks, gaps, and uneven wear over time. Experts emphasize the importance of thoroughly assessing and preparing the subfloor before installation—something many overlook. For advanced tips, visit this guide on precise floor leveling.
A trap that often catches even experienced installers is neglecting proper acclimation of the wood. Wood expands and contracts with moisture changes, and installing it too soon after delivery can lead to cupping or gaps. While this seems obvious, many skip the necessary acclimation process, resulting in costly fixes later. Remember, patience here saves time and money.
Let’s address a common misconception about tile and hardwood transitions. Many believe that a simple threshold suffices. But the reality is that mismatched heights or inconsistent adhesion at these points can create tripping hazards and aesthetic inconsistencies. Achieving a seamless, safe transition requires meticulous attention to floor leveling and a nuanced understanding of material compatibility. For detailed strategies, see advanced leveling methods.
What many don’t realize is the significance of expansion gaps. Installing floors without adequate space around the perimeter can cause buckling during seasonal moisture fluctuations. This is a nuance frequently misunderstood; gaps aren’t ugly—they’re essential for longevity. Experts recommend a minimum of ¼ inch around the perimeter, but in some climates, more space is necessary. Overlooking this can result in future post-installation headaches.
In terms of tile integration with hardwood, the misjudgment of subfloor compatibility is a silent danger. Using incompatible underlayments or ignoring moisture barriers can compromise both flooring types, leading to cracks or mold. It’s vital to select materials that complement both surfaces and withstand environmental conditions. For savvy advice on tile selection, visit this comprehensive guide.
Focusing too heavily on speed over quality might tempt homeowners into rushing the prep stages. However, this shortcut often results in uneven floors, squeaks, or early wear—problems that are often attributed to poor initial work. Remember, the devil is in the details. Investing extra effort upfront, especially in subfloor assessment and material acclimation, pays off in the long run.
Have you ever fallen into this trap? Let me know in the comments. For more expert insights and tailored advice, don’t hesitate to reach out through our contact page. Mastering these nuances ensures your flooring not only looks stunning but stands the test of time.
Keep Your Floors Looking New for Years to Come
Maintaining beautiful hardwood, tile, and leveled flooring requires more than just regular cleaning; it involves the right tools and proven methods to ensure longevity and flawless appearance. From proper cleaning equipment to specialized repair kits, using the correct gear can make all the difference in preserving your investment over time.
Investing in Quality Maintenance Tools
One of my go-to tools is a high-quality microfiber mop combined with a pH-neutral cleaner. Unlike traditional mops that can trap dirt and debris, microfiber is gentle yet effective at lifting dust without scratching surfaces. I personally use a spray mop with replaceable pads for quick daily touch-ups, which keeps my floors pristine without hassle. For tile maintenance, I recommend a soft-bristled brush and a grout cleaning tool that fits between tiles to prevent dirt buildup in grout lines, preserving the clean, professional look. Regularly inspecting your subfloor with a moisture meter, especially before applying any coatings or during seasonal changes, can prevent costly damagehttps://tiletrendshop.com/how-to-spot-water-damage-before-the-wood-buckles.
Tools That Simplify Floor Repairs and Rejuvenation
Over time, even well-maintained floors develop scratches or minor dents. For fixing dark scratches in maple or oak, I rely on a wood stain applicator kit, paired with mineral spirits to blend repairs seamlessly. Additionally, a calibrated sander for spot sanding can refresh worn sections without affecting the entire floor, saving time and effort. When it comes to tile, a grout haze remover and a specialized scraper help restore a pristine finish after sealing or grouting, which is essential for a professional look. Remember, using the right tools like an electric grout float or a precision caulking gun ensures smooth application of sealants and fillers, extending the life of your flooring edgeshttps://tiletrendshop.com/why-your-grout-haze-mistake-that-ruins-new-backsplashes.
Embracing Technology for Long-Term Results
Technological advancements are transforming flooring maintenance. Digital moisture meters with Bluetooth connectivity allow for real-time monitoring, which is invaluable during seasonal shifts or after installation. I predict that in the near future, smart floors integrated with sensors will alert homeowners about moisture or structural issues the instant they occur, potentially preventing extensive repairs. Using apps to track maintenance schedules and reminders ensures you don’t overlook critical tasks like re-sealing or acclimating new wood planks, which are crucial for preserving your floors’ integrity.
How do I maintain flooring over time?
Consistently inspecting your floors with the right tools, applying gentle cleaning methods, and promptly addressing repairs are key to long-term success. For instance, regularly cleaning grout lines with specialized solutions prevents dirt accumulation that causes discoloration, as detailed in this guide. I also recommend trying advanced techniques like spot refinishing damaged areas with a DIY kit combined with detailed tutorials on floor refinishing to maintain that like-new look. Adopting these practices now ensures your floors remain both beautiful and functional for decades to come.
The Hidden Lessons Learned at Doorways
One of the most overlooked aspects of flooring upgrades is realizing that every transition, especially from tile to hardwood, holds a lesson. I once believed that a quick fix with a thin shim would suffice—only to discover it caused squeaks and safety concerns later. The key insight? Patience and meticulous measurement are indispensable. Waiting for the right materials and taking the time to level surfaces correctly can save you from future headaches.
Another revelation was that even a small misjudgment in height difference could turn a sleek hallway into a trap. Shooting for that perfect, level transition isn’t just about aesthetics; it’s about safety. I learned that creating a gentle slope with proper shims and selecting the right transition strip ensures smooth, secure walking without the risk of catching toes or causing falls.
Tools and Resources That Transformed My Approach
Over the years, I’ve come to trust and rely on specific tools and guidance to perfect my flooring projects. My go-to resource is the comprehensive floor leveling guide—it offers step-by-step techniques that elevate the quality of any installation. For measuring height differences, a reliable digital caliper and moisture meter are essentials, ensuring precise adjustments to prevent future buckling or gaps.
I also recommend investing in high-quality transition strips with adjustable heights, which have made achieving that seamless look easier. Combining these tools with expert tutorials on precise leveling techniques has transformed my approach from guesswork to craftsmanship.
Challenging Misconceptions That Held Me Back
One misconception I had early on was believing that perfect flooring transitions happen naturally with good materials alone. The truth is, even the finest materials require proper preparation—especially surface leveling and correct measurement—to achieve lasting results. I learned that skipping these steps often results in squeaks, gaps, and unsafe surfaces, which can diminish your home’s value and safety.
Another hurdle was underestimating the importance of acclimating hardwood before installation. Wood reacts to moisture, and failing to allow it to fully expand or contract can cause warping and gaps. Since adopting a patient approach and following expert advice, I’ve seen how this small step makes a tremendous difference in the outcome.
Step Beyond Basic—Why Detailing Matters
Many homeowners settle for standard thresholds, but I found that customizing transition solutions—like creating ramps with shims or selecting slopes that match your specific height difference—makes a world of difference. This attention to detail enhances safety and elevates aesthetics. For guidance, I consult the advanced leveling methods, which provide insights into handling complex transitions.
Furthermore, understanding the significance of expansion gaps and moisture barriers isn’t just technical jargon; it’s critical to prevent future buckling or moisture damage. An investment in proper planning upfront guarantees durability and beauty over the years.
Keep Improving: An Invitation to Discover Your Potential
Every flooring project offers an opportunity to learn, to improve, and to craft a space that reflects both function and style. The key is to embrace patience, leverage trusted tools, and pay attention to the details that matter most. The more you understand about floor leveling and transition perfection, the more confident you’ll become in creating a flawless home environment.
If you’ve ever faced challenges with leveling or transitions, I’d love to hear your stories. Sharing tips and experiences helps us all grow—so don’t hesitate to reach out and join the conversation. Remember, your dedication to excellence today will pave the way for stunning, safe floors for years to come.